In this article, we will look at backing up Nutanix AHV virtual machines using VBR 12.1 and Nutanix AHV Plug-In v5.
The main difference between the v4 plugin and v5 is the possibility of creating backup jobs related to Nutanix AHV VMs right in the VBR console. You don’t need to connect to the backup appliance deployed in a Nutanix cluster to create a backup job.
Also, please make sure, that you’re using version 5.1 of the plugin or higher because of the critical bug found in v5.0.
Let’s get started.
First, we need to configure a Nutanix Cluster.
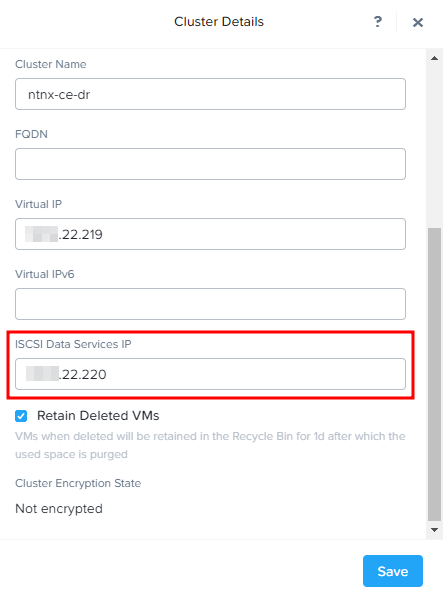
The mandatory is to define ISCSI Data Services IP address. You can set up this address by clicking on Cluster Name in the Prism Element interface:
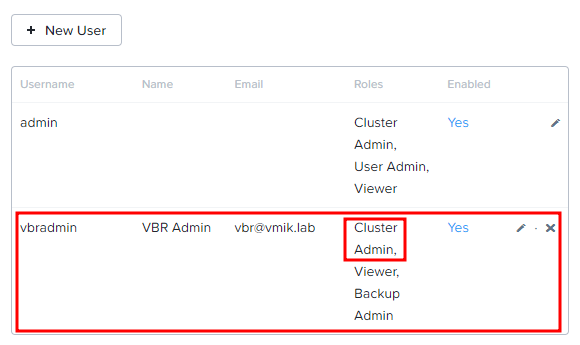
Next, I prefer to create a dedicated user, which will be used by Veeam. The minimum required role for a user is “Cluster Admin”. A new user can be added in the Local User Management of Settings menu:
The last step is to create a dedicated network for the Veeam backup appliance:

The procedure of preparing the Nutanix cluster is complete. Let’s move to the VBR server.
First, we need to download the Veeam Backup for Nutanix AHV Plug-In from the Veeam Website.
After downloading, copy that file to the VBR server and install it. The installation procedure is simple, click next a few times.
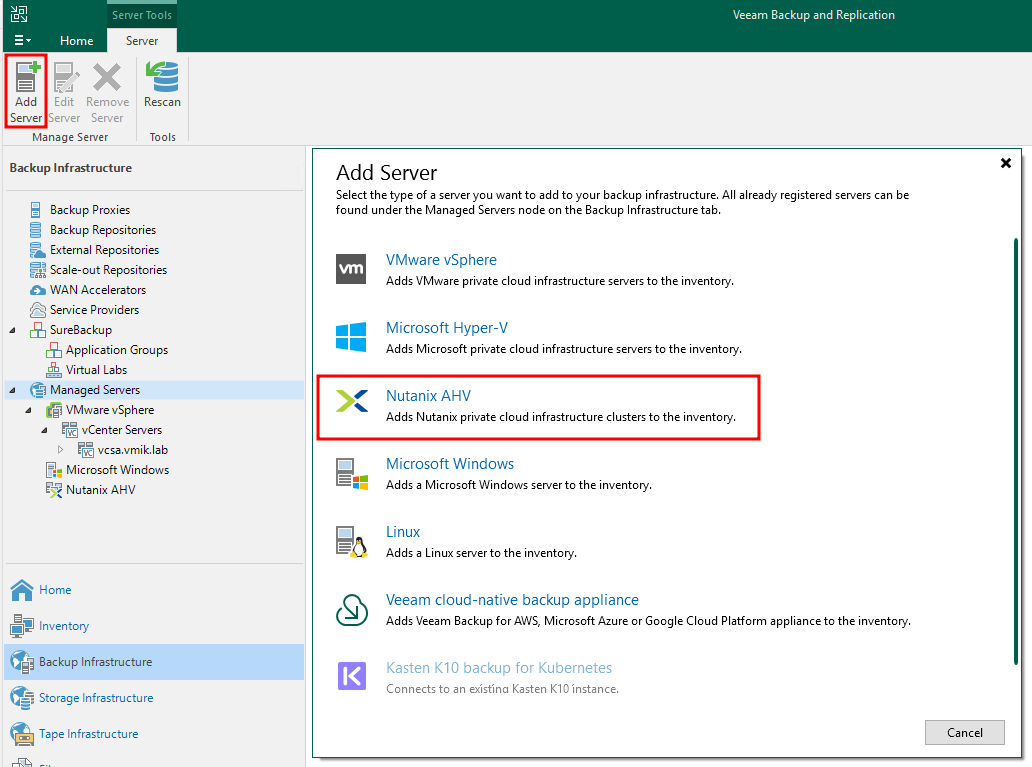
When the plugin is installed, we can add a new type of Server into the backup infrastructure – Nutanix AHV.
Let’s follow the new server wizard.
Choose Nutanix AHV as a new server:
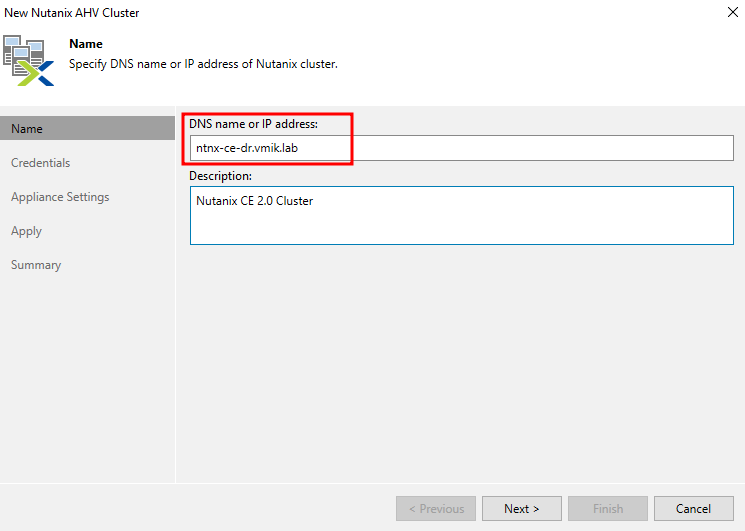
Next, we need to provide the DNS or IP address of Nutanix Cluster (Cluster IP):
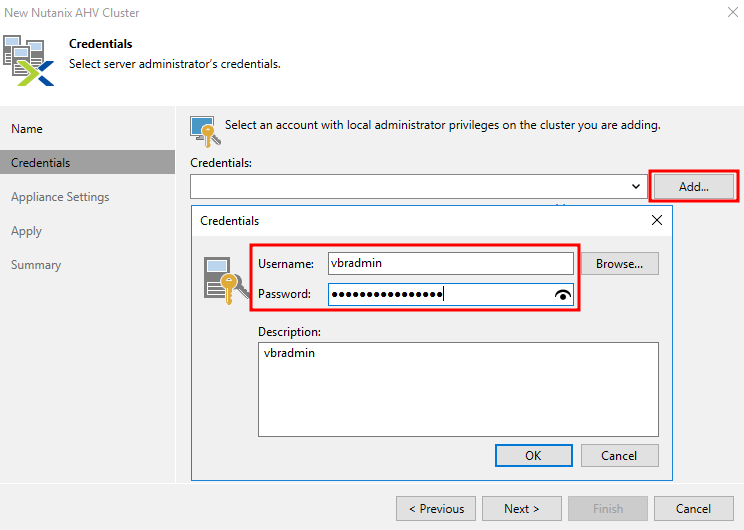
In the Credentials section, we need to provide an account created before during the Nutanix cluster configuration:
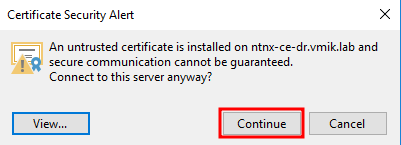
Check certificate:
Under the Appliance settings section, we need to provide information for the FLR helper. IP address, network to connect, and Storage container to deploy:
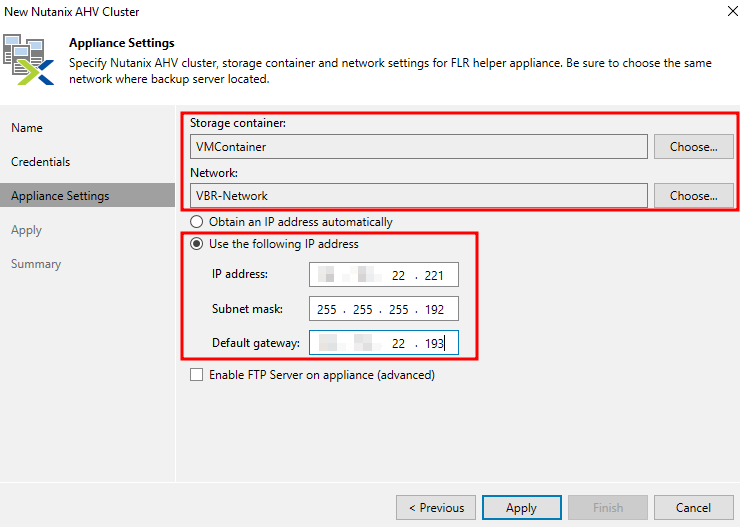
Click Apply, to begin a procedure of adding a new server.
After Nutanix Cluster was added to VBR infrastructure. The next step is adding a Nutanix backup proxy. This menu will automatically show:

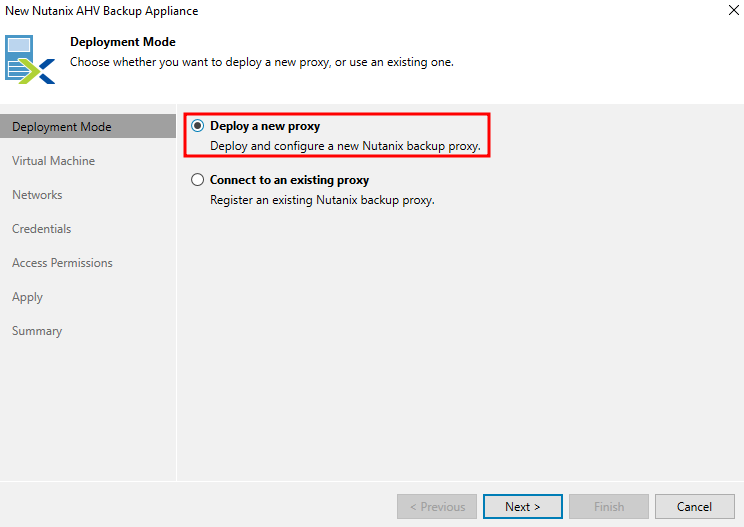
We can connect to an existing proxy or create a new one. Please note that there is a limitation – one proxy per Nutanix cluster. Let’s deploy a new proxy:
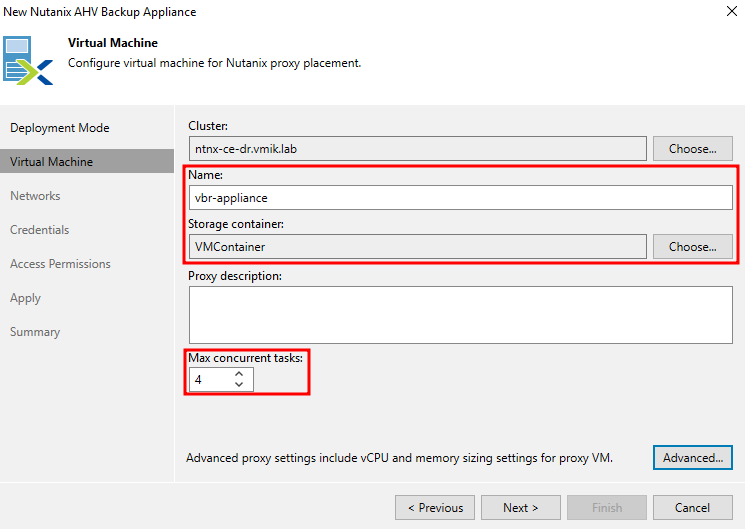
Next, we need to specify the VM name, storage container, and required resources (CPU and memory). One concurrent task consuming 1vCPU and 1GB of RAM. So, 4 concurrent tasks will result in a VM with 4vCPU and 4GB of RAM:
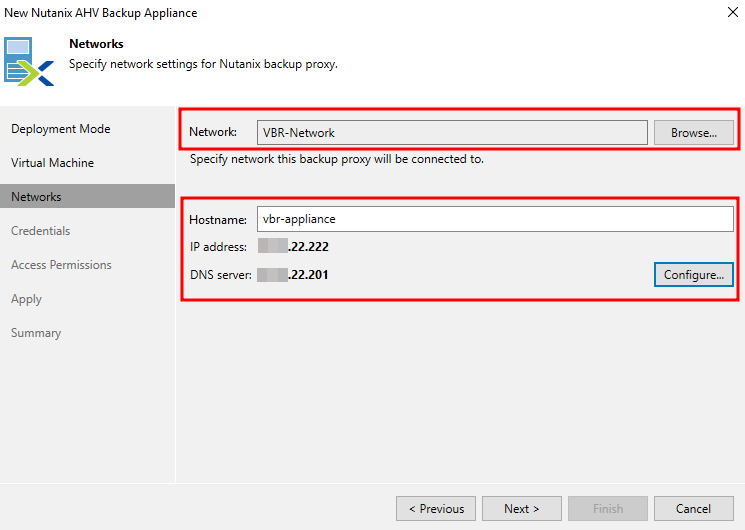
Select network, provide IP address and hostname:
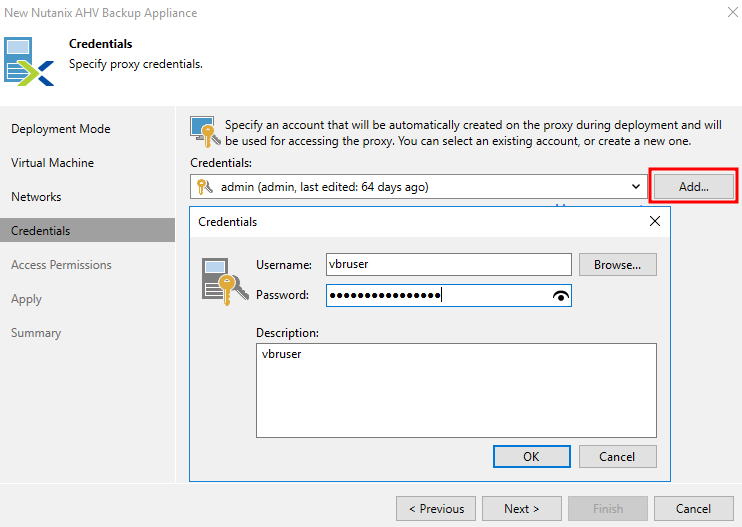
Provide credentials. Provided credentials we will use to login to the appliance web interface or the VM console for troubleshooting:
We can limit accessible repositories:
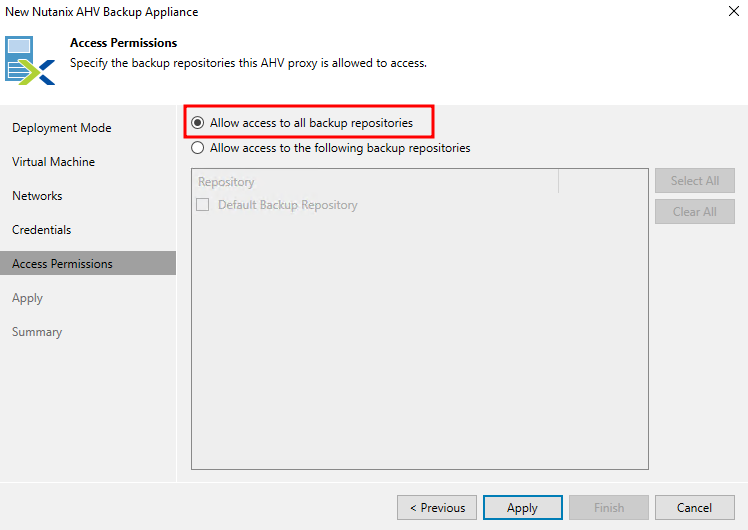
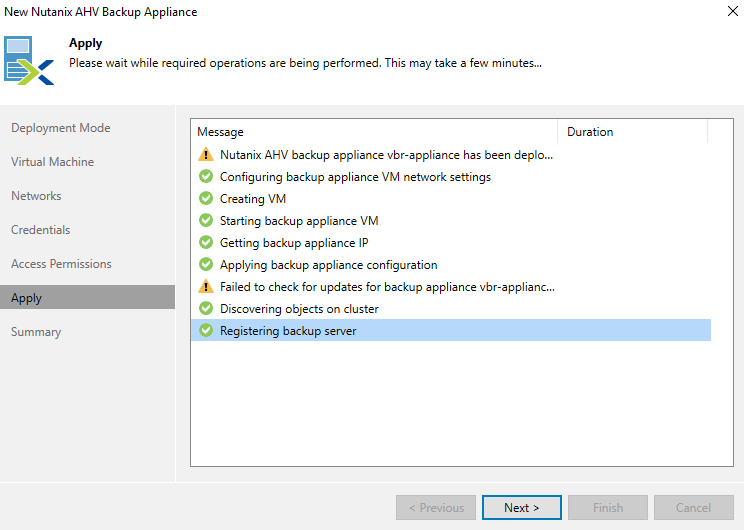
Clicking to Apply will begin the procedure of deploying a new appliance to the Nutanix Cluster:
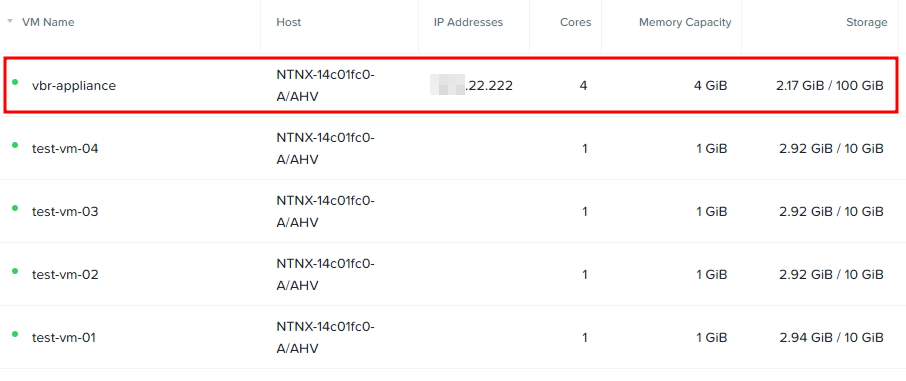
When the procedure is finished. We can observe a newly deployed VM in the Nutanix cluster:
That’s it. We are ready to create some new backups.
In the next steps, I’ll demonstrate how to create a backup job and restore procedures from the VBR console, but keep in mind, that those procedures can be done using an appliance web interface.
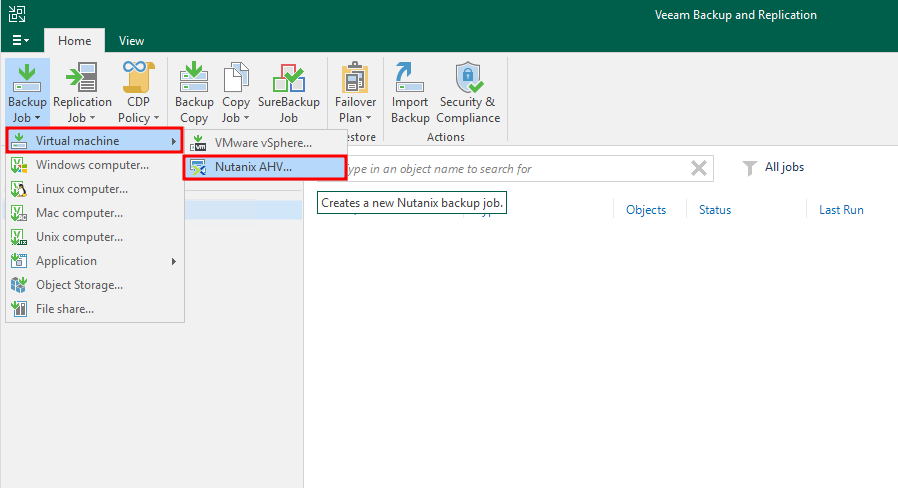
We can create a backup job the same way, as for VMware vSphere. Just select Nutanix AHV during backup job creation:
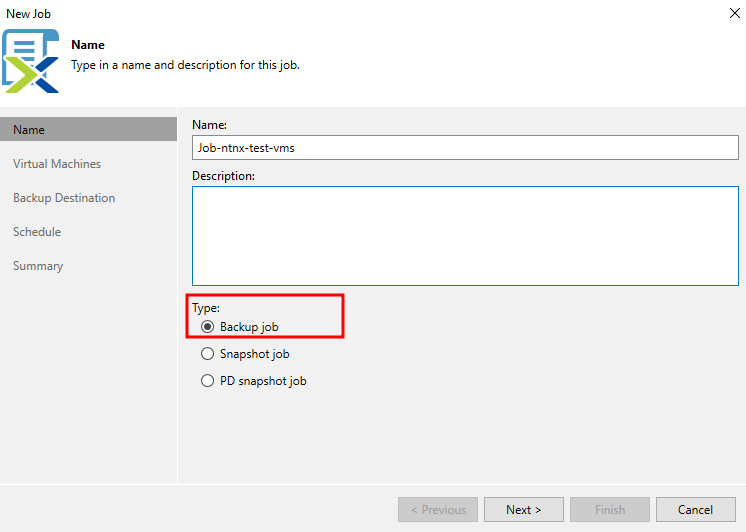
We can create backup, snapshot, or Protection Domain snapshot jobs. Let’s go with backup:
Add VMs to the job by clicking add:
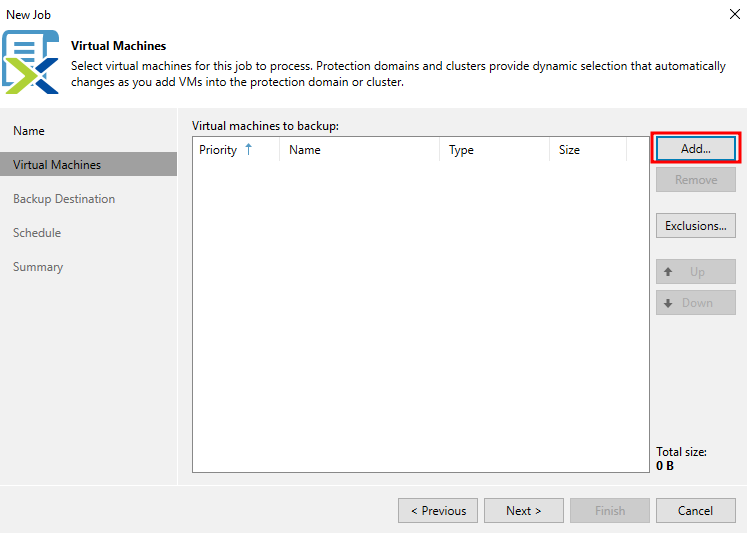
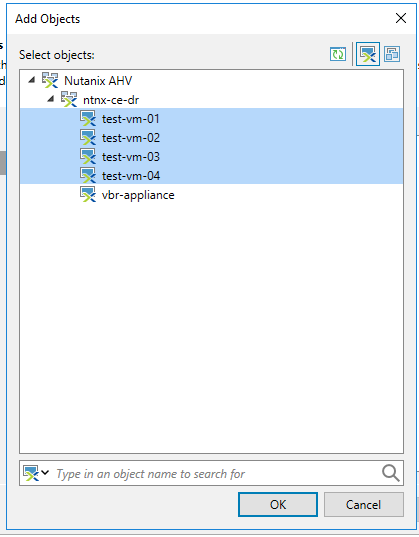
Select VMs:
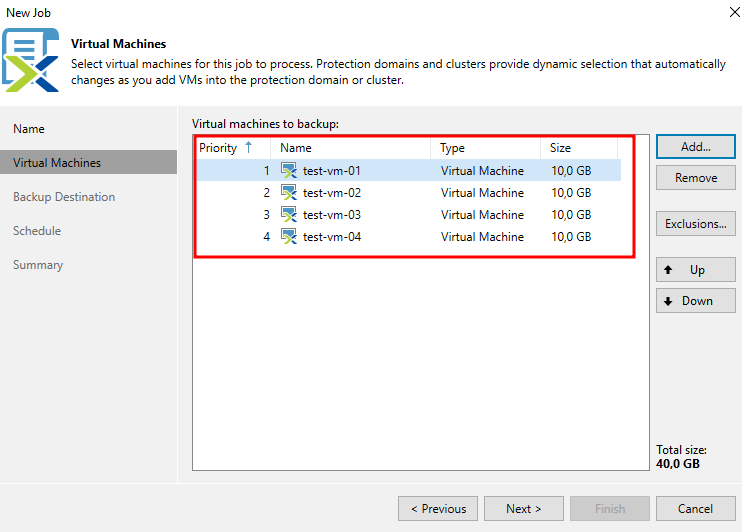
Selected VMs will added to the job:
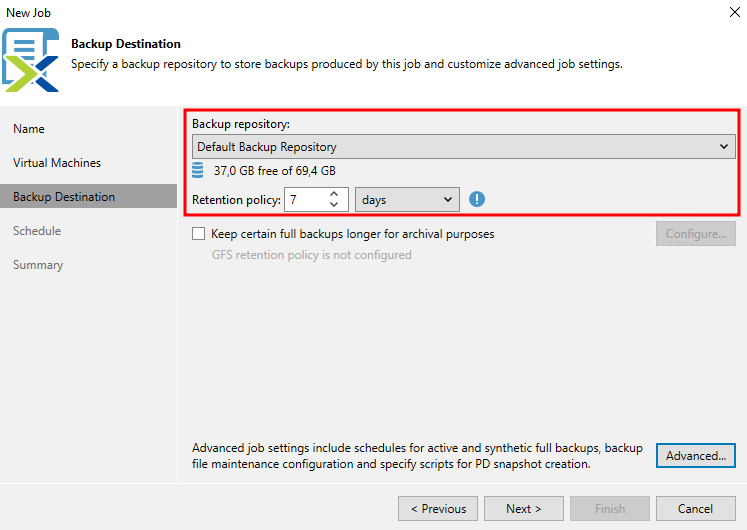
Next, specify the Backup Destination by selecting one of the available repositories and the retention policy:
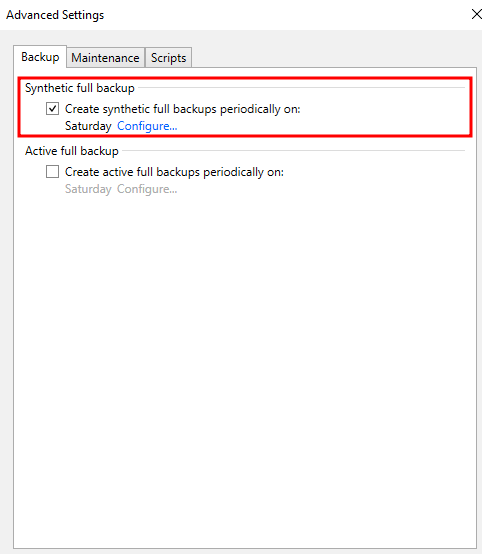
If we click Advanced settings, we may notice, that Synthetic Full backup is a default setting:
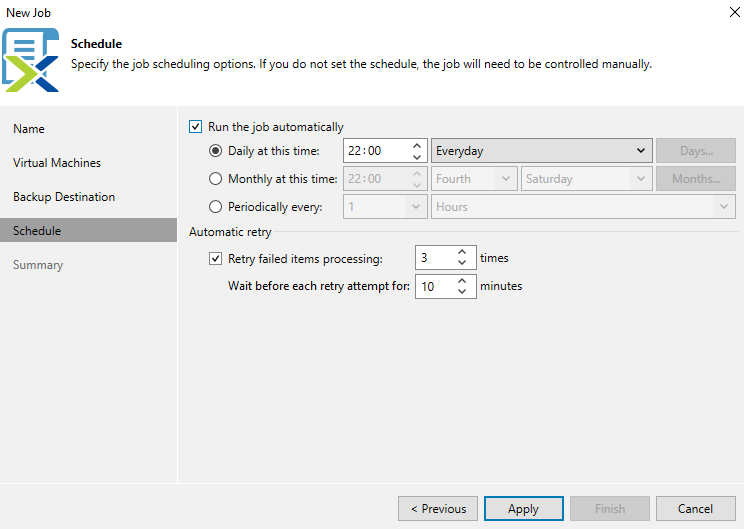
The last step is configuring the backup schedule:
After clicking apply and finish, as result a backup job will created:

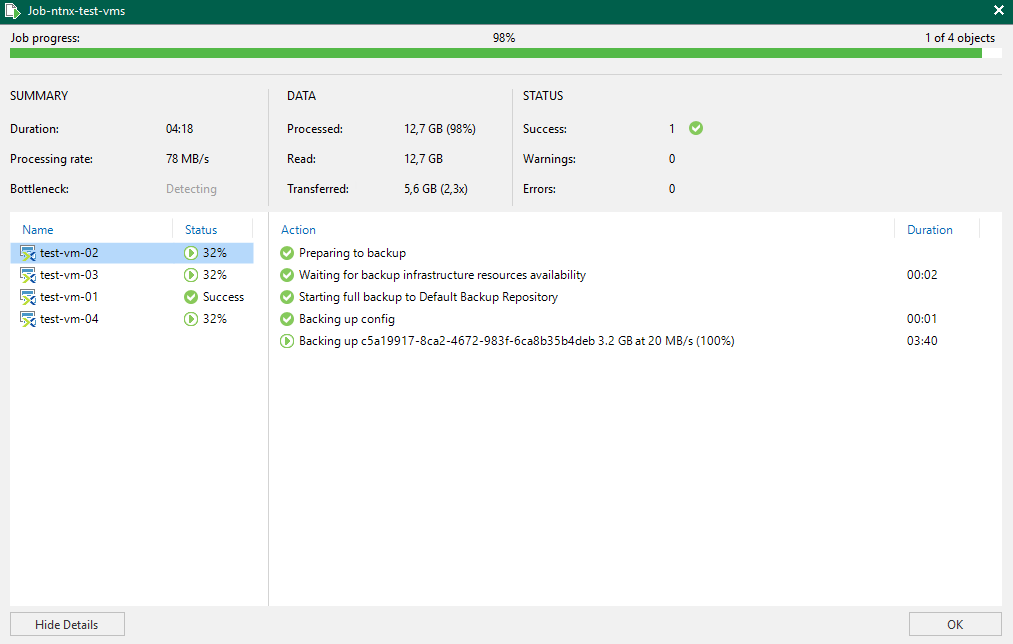
Now we can run the job and observe the process:
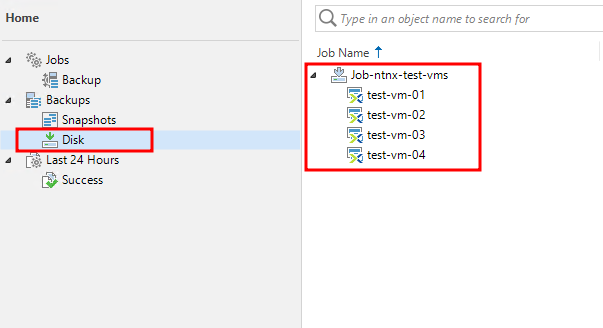
When the job is finished, new backup files will display:
That’s what the backup procedure looks like. Let’s try to restore something.
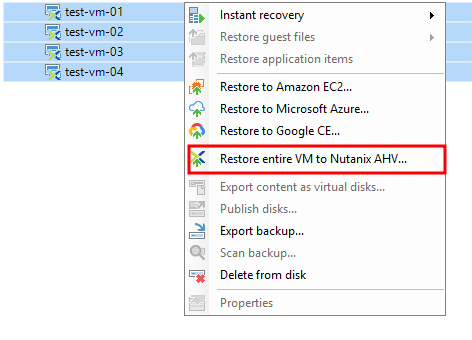
Select required VMs, right-click on them, and choose “Restore entire VM to Nutanix AHV…”:
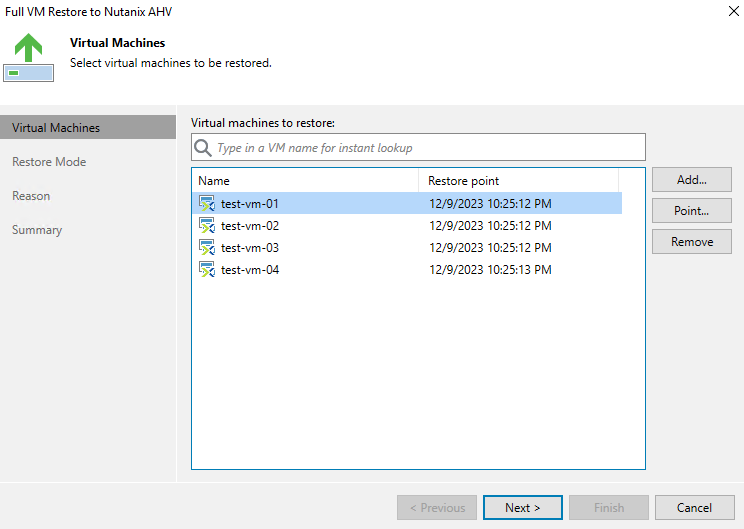
As usual, specify a restore point if you have more than one backup:
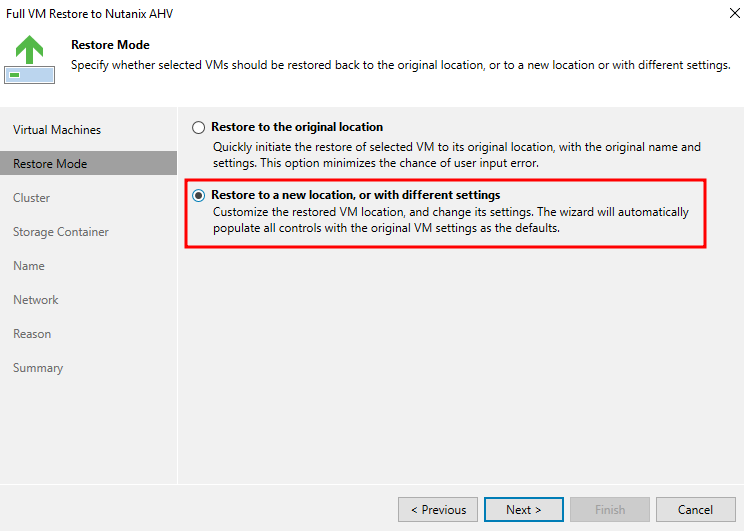
We can overwrite existing VMs or restore them to the new location or with different settings. I will go with an option 2:
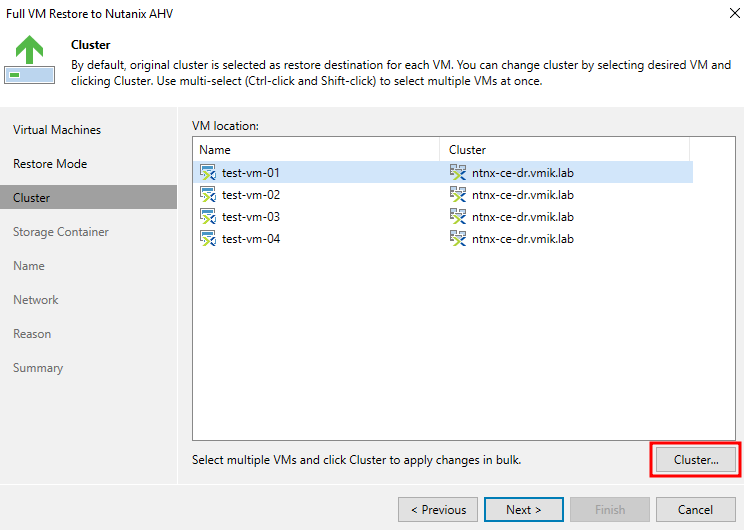
For each VM, we can specify a Nutanix Cluster if we have more than one in infrastructure:
Next, we can specify a Storage Container:
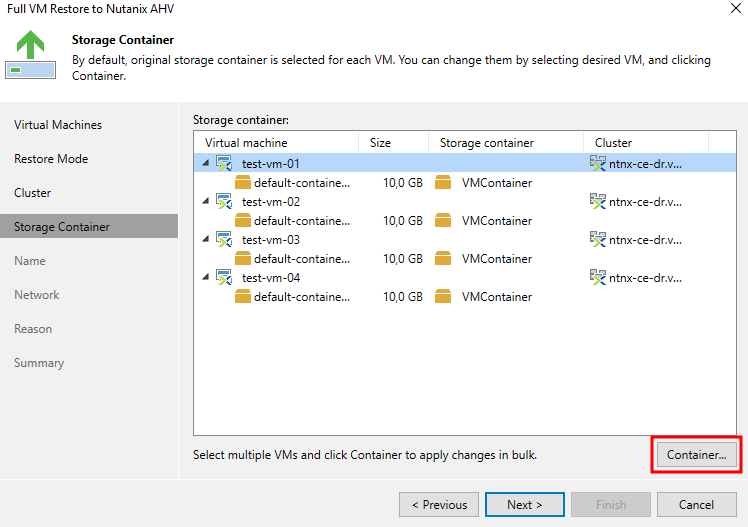
In this example, VMs were located in the default-container, but I will restore them to the container named VMcontainer.
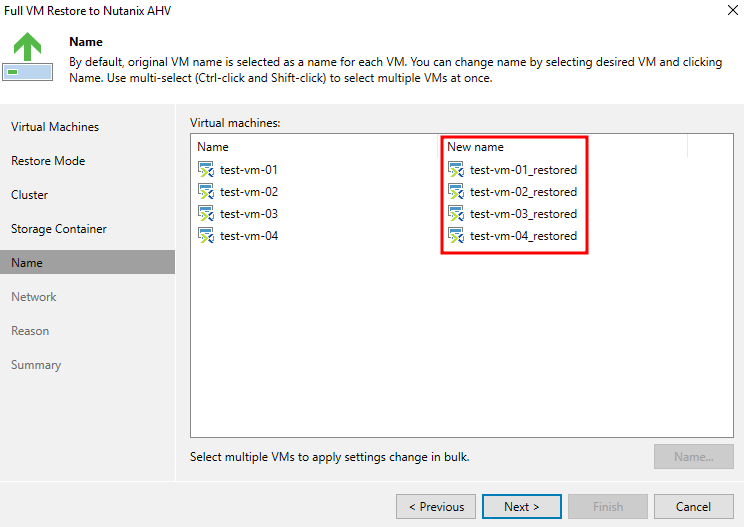
Also, we can change VM’s name and add suffixes or prefixes:
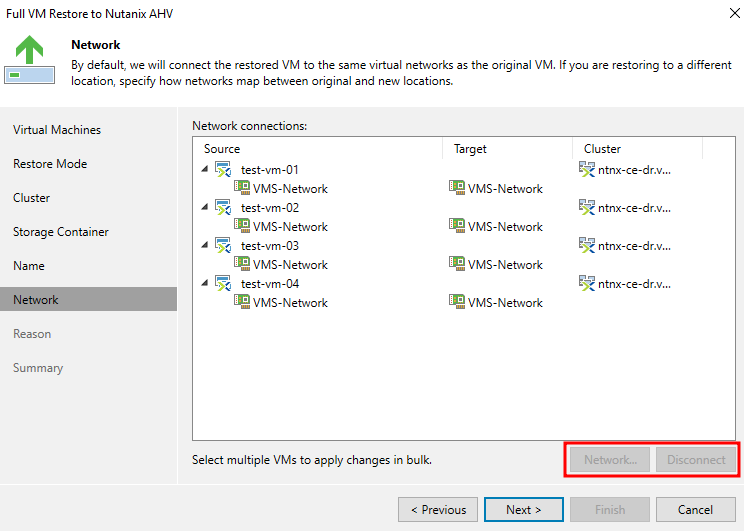
Next, it’s required to select the network, using existing, or even disconnect the network interface:
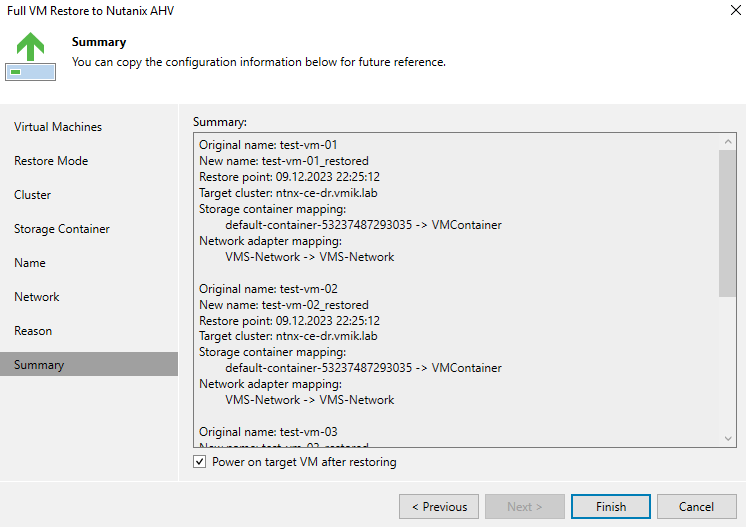
Check the Summary and click finish to begin the restore process:
For each VM a restore task will create:

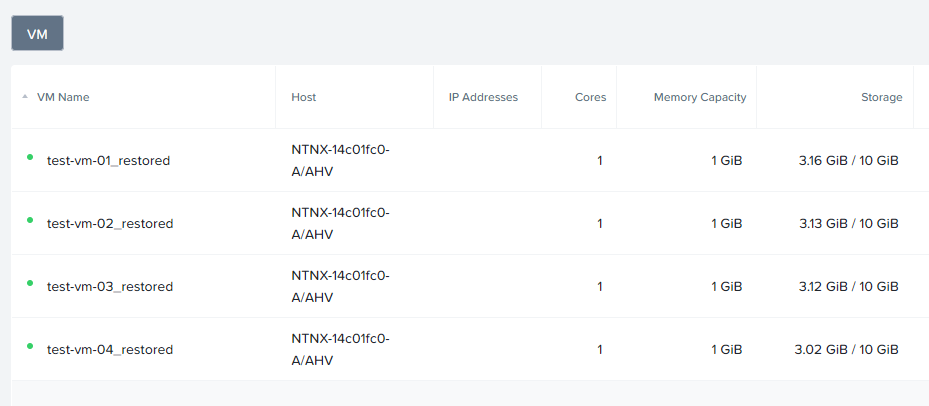
After the tasks are finished, new VMs will be up and running in the Nutanix Cluster:
In conclusion:
This is how Veeam works with backups of Nutanix AHV and how you can configure backup jobs from the VBR console. Please don’t forget, that a lot of features you can see in the Appliance Web Interface. Check this out.
Also, I didn’t show a cool feature – Instant Recovery. It was a long-awaited feature for Nutanix and it has worked since AHV plugin v4 and AOS 6.0 and later. Maybe I will cover It in another article.
![]()