Last year, a new check added to the NCC module may require your attention:
“Password-based remote login is enabled on the cluster. It is recommended to use key-based SSH access instead of password-based SSH access for better security.”
Although this check has a severity level of “Info”, if you dig a little bit deeper, you can find, that password-based authentication will be a deprecated authentication method since 2024. And we can only guess when key-based authentication will be not a recommendation, but a requirement.
In this article, we will look at Cluster Lockdown Mode and how to enable key-based access to the cluster.
Although it’s recommended to perform all operation tasks using Prism Element or Prism Central and not connect to the CVMs or AHV hosts, sometimes it may not be an option.
A few easy examples: some configuration tasks, are not allowed in the Prism interface or troubleshooting.
At the same time, high-security standards may require you to restrict SSH access on all clusters, and here Lockdown mode may help.
Lockdown mode will disable the possibility of logging in to CVMs or Hypervisors using SSH and increase your security.
Let’s enable Lockdown mode and check how it works.
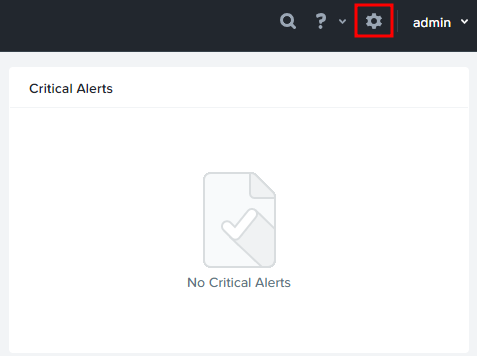
Go to the configuration menu of Prism Element:
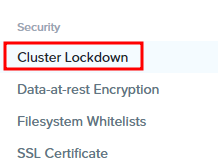
Find the security section on the left and select Cluster Lockdown:
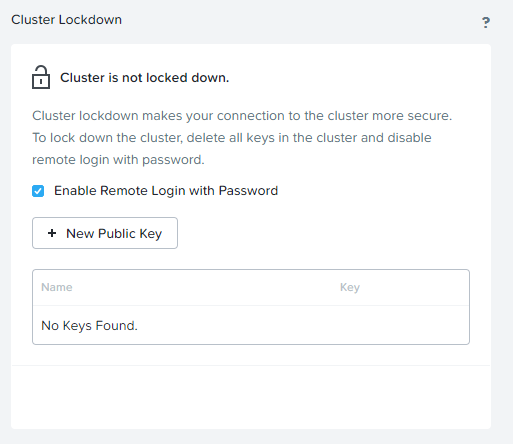
By default, the cluster is not locked down and you can use SSH to connect to the CVMs or Hosts using login and password:
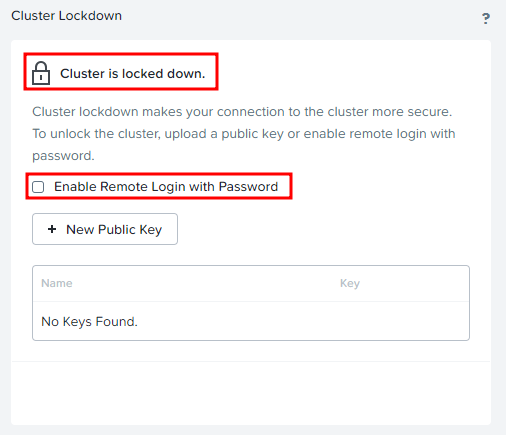
To enable cluster lockdown, unmark the “Enable Remote Login with Password” checkbox. Answer OK in the following question.
You will see that the cluster is now locked down:
When you try to connect to the CVM or Host, you will receive the message:
No supported authentication methods available (server sent: publickey)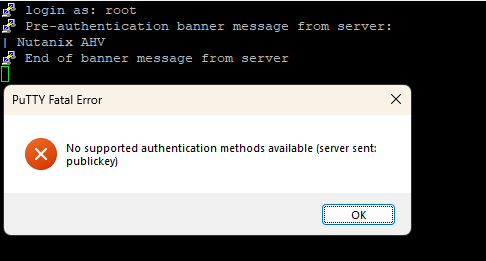
Although SSH still works, you can’t connect to the server because the server requires a key and not a login/password combination.
You may notice on the screenshot above, that there is an option to upload a public key. And this is how we will connect to the cluster, instead of using login/password.
Now let’s enable key-based authentication.
First, we need to generate a key pair (public and private keys). In this example, I will generate a key pair using ssh-keygen tool available in most Linux distributives.
Run ssh-keygen and specify the key-pair name by using the –f parameter. Consider specifying a passphrase. Otherwise, anyone who gets your private key can use it without any restrictions.
Using this example, we will generate a key pair and store it in the home/.ssh directory:
$ ssh-keygen -f ~/.ssh/ntnx-ce
Generating public/private rsa key pair.
Enter passphrase (empty for no passphrase):
Enter same passphrase again:
Your identification has been saved in /home/vmik/.ssh/ntnx-ce
Your public key has been saved in /home/vmik/.ssh/ntnx-ce.pub
Now we have a public and a private key:
$ ls ~/.ssh/
known_hosts  ntnx-ce  ntnx-ce.pub
ntnx-ce – private key
ntnx-ce.pub – public key
Next, we need to add a public key to the Nutanix infrastructure. Return to the Cluster Lockdown section. You will see a button “+ New Public Key”:
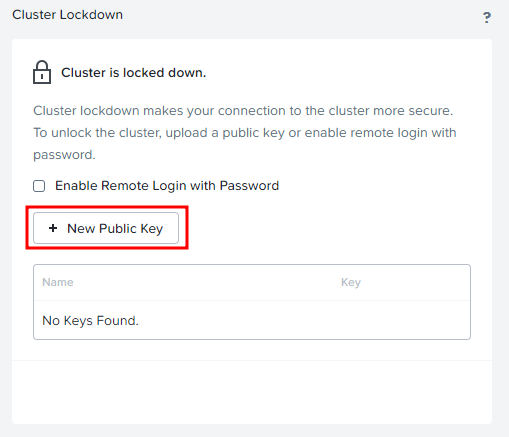
There you need to provide a previously generated public key. Read the public key:
$ cat ~/.ssh/ntnx-ce.pubCopy everything begins from ssh-rsa (including) to the end and paste it to the Key section, also specify a key name:
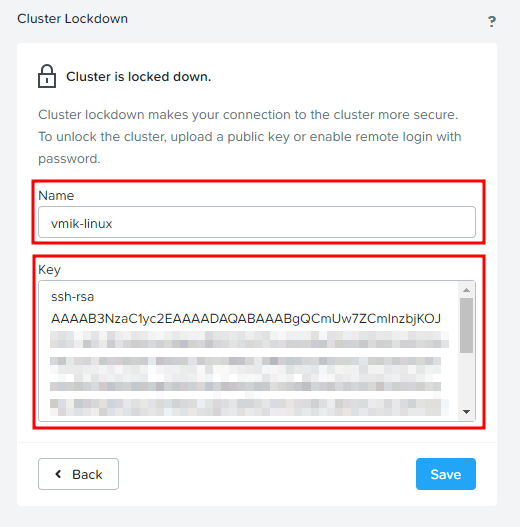
Then click save. If you get an error “Exception while verifying public key”, check the correctness of the copy.
The key is added:
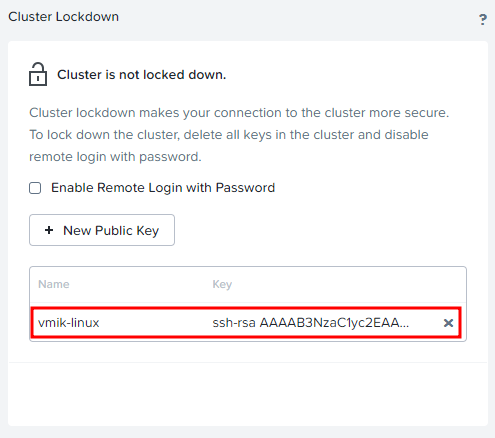
Now, we can connect to the Nutanix CVMs or AHV hosts using nutanix or admin users with private key.
Please notice, that after adding a public key, the cluster is not locked down anymore.
Let’s connect to the cluster using the standard ssh tool. Using parameter –i, we specify the private key location:
$ ssh nutanix@192.168.22.215 -i /home/vmik/.ssh/ntnx-ce
Nutanix Controller VM
Enter passphrase for key '/home/vmik/.ssh/ntnx-ce':
Nutanix Controller VM (CVM) is a virtual storage appliance.
Alteration of the CVM (unless advised by Nutanix Technical Support or
Support Portal Documentation) is unsupported and may result in loss
of User VMs or other data residing on the cluster.
Unsupported alterations may include (but are not limited to):
- Configuration changes / removal of files.
- Installation of third-party software/scripts not approved by Nutanix.
- Installation or upgrade of software packages from non-Nutanix
  sources (using yum, rpm, or similar).
** SSH to CVM via 'nutanix' user will be restricted in coming releases.  **
** Please consider using the 'admin' user for basic workflows.           **
If we run the NCC check again, we will see, that it passes:
/health_checks/system_checks/check_cvm_ssh_security [ PASS ]This is how to enable Lockdown mode and how to use key-based authentication in the Nutanix environment.
One thing that also needs to be covered is PuTTY – the popular Windows client.
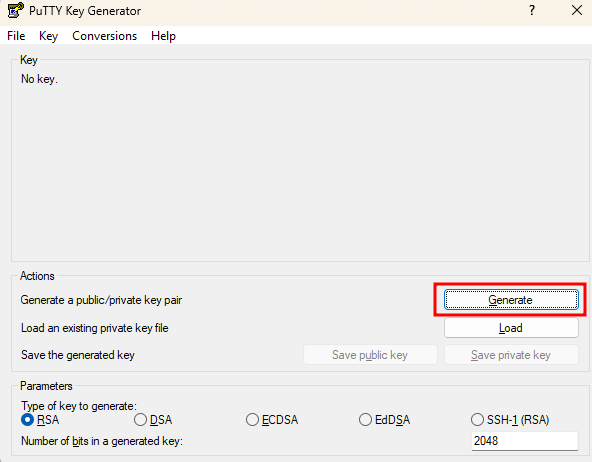
To generate a new key pair, we need to run the PuTTYGen utility and click “Generate”:
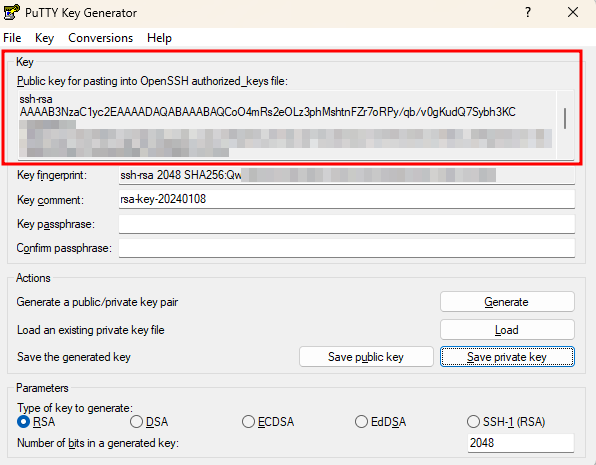
You will see, that a new public key is generated:
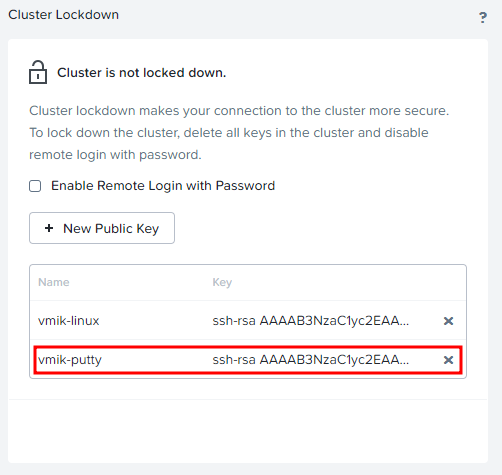
Copy it, and add it to the Nutanix environment:
In PuTTYgen, save the private key by clicking on the corresponding button:

If you didn’t specify a key passphrase, you will get a warning message recommending to do that.
So, specify the key passhrase:

And save the key. You may save the public key as well.
You may notice that the private key has ppk extension which means PuTTY Private Key.
When we have a public key added to the Nutanix and a saved private key, let’s open PuTTY.
Move to the Connection – SSH – Auth section, and provide the private key, clicking “Browse”:
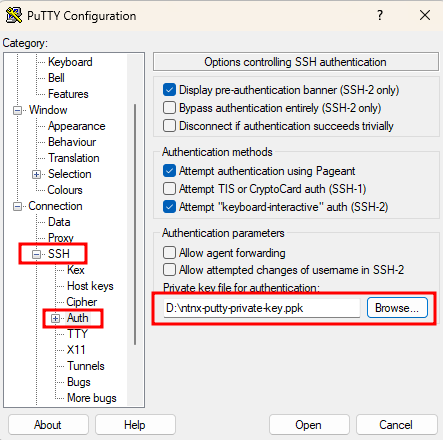
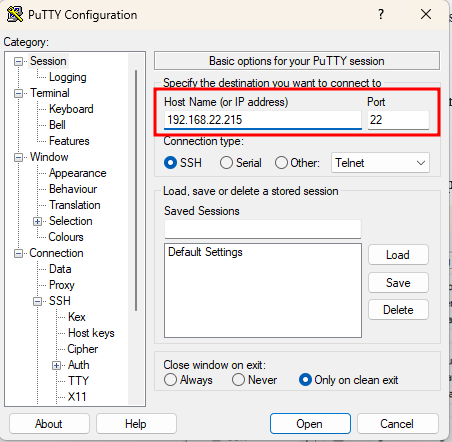
Return to the Sessions and specify the host or CVM IP address. Click Open to connect:
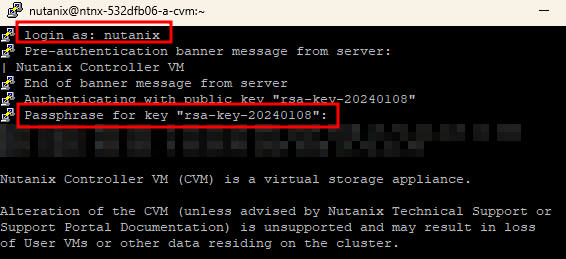
Specify a Nutanix user and key passphrase, and we’re in:
Notice, that although PuTTY requires ppk files for storing private keys, you may generate a ppk file based on your existing private key in PuTTYgen. Just choose: “Load an existing private key file”:
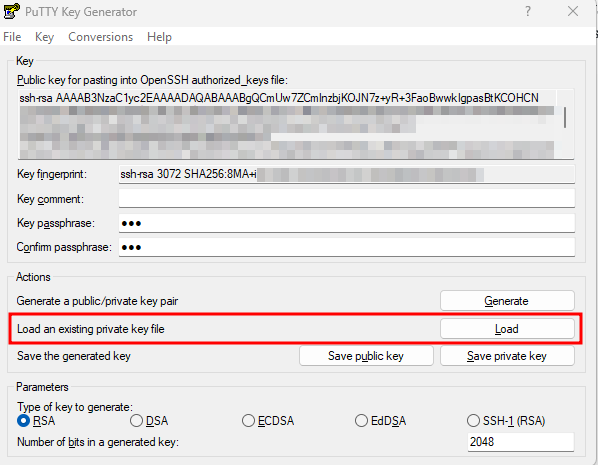
If the private key was protected with a passphrase, you will be required to provide it. Now save the private key and you will get a ppk one.
![]()