
When I look at the virtualization platform, I look not only at the functionality but also at the ecosystem, including backups. When Veeam released version 12.2, where Proxmox support was added, I decided that it was time to learn this platform for a bit.
Previously I didn’t have experience with PVE, and this post is my journey on deploying this virtualization platform for lab purposes.
I considered writing a series of posts but later decided to put all the content into one large post.
In this post, I will cover how to deploy PVE nodes, create a 3-node cluster, connect shared storage, create a VM, and enable high availability.
Disclaimer: I am a beginner in Proxmox and this post may contain not full information or some concepts may be wrongly explained. Sorry for that!
The purpose of the post is to demonstrate the basics without deep technical details.
Before we begin, we need to decide on requirements.
For a production environment:
We need a CPU-supported virtualization (not a big problem nowadays);
Minimum 2 GB RAM for OS and Proxmox VE services, all remaining RAM will be used by guest VMs;
Fast and redundant storage;
2 NICs, minimum 1Gbe, but 10Gbe and higher also supported and recommended.
When we decide on basic requirements, let’s create VMware VMs.
I created three VMs:
pve-node01
pve-node02
pve-node03
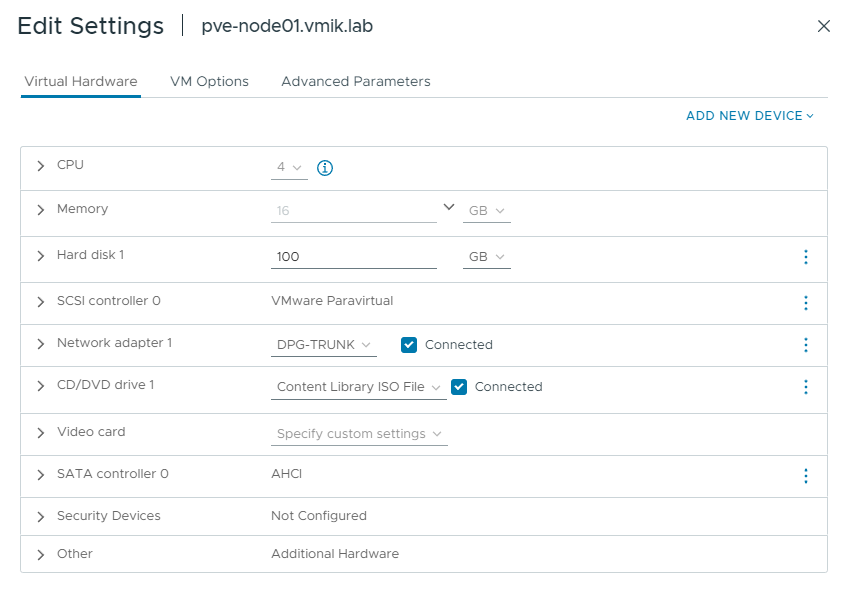
With 4vCPUs, 8 GB RAM, 100GB HDD, and one NIC. There is nothing special during VM creation, but a few things.
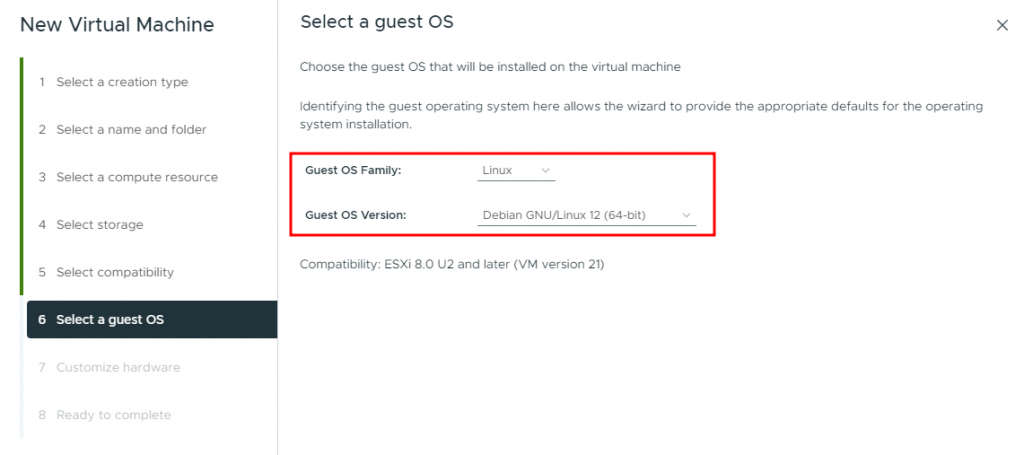
Because PVE 8 is based on Debian 12, I will select this as a Guest OS Version:
Don’t forget to enable the «Hardware Virtualization» checkbox under the CPU settings:

The overall VM’s configuration looks like this:
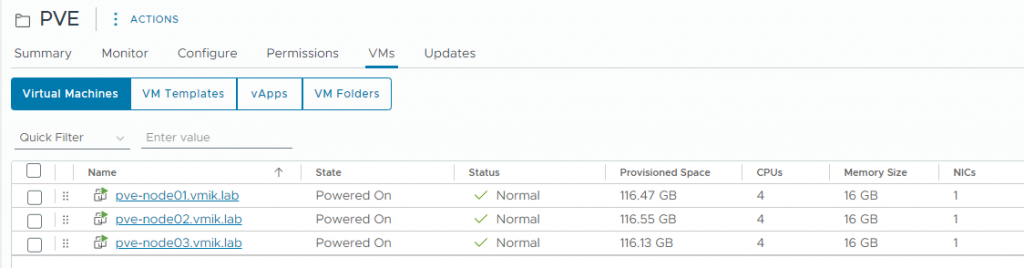
As a result, I have three prepared VMs:
Now connect PVE ISO to the VMs, power on them, and begin the installation:
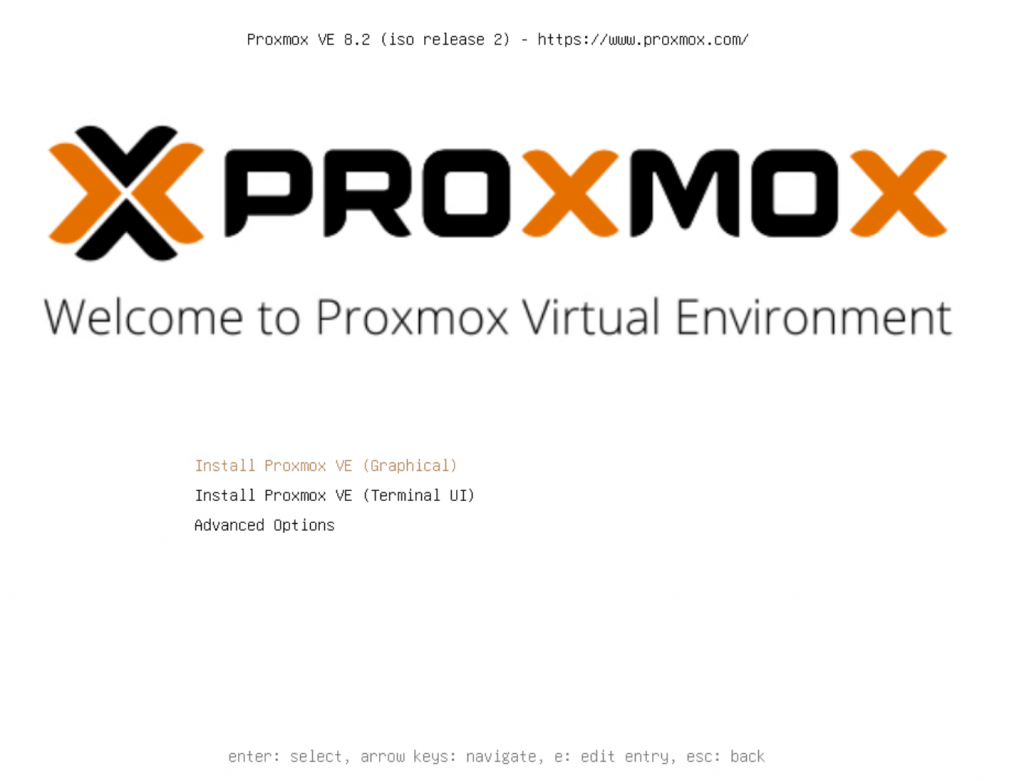
The basic graphical installation is pretty simple. Accept EULA:

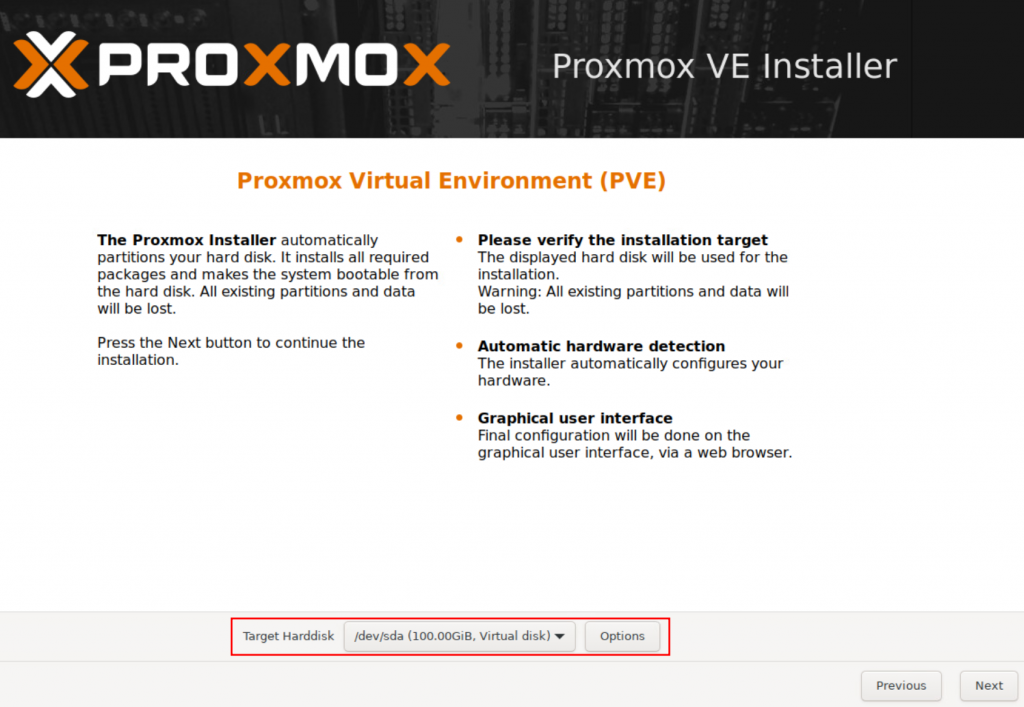
Select a hard disk to install PVE:
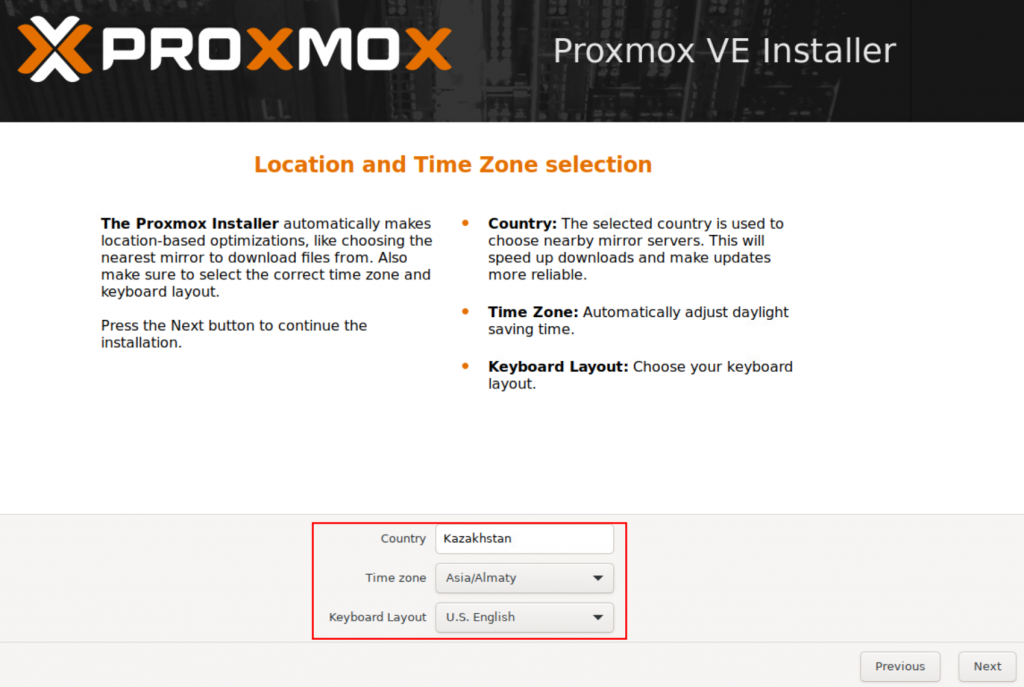
Provide time zone information:
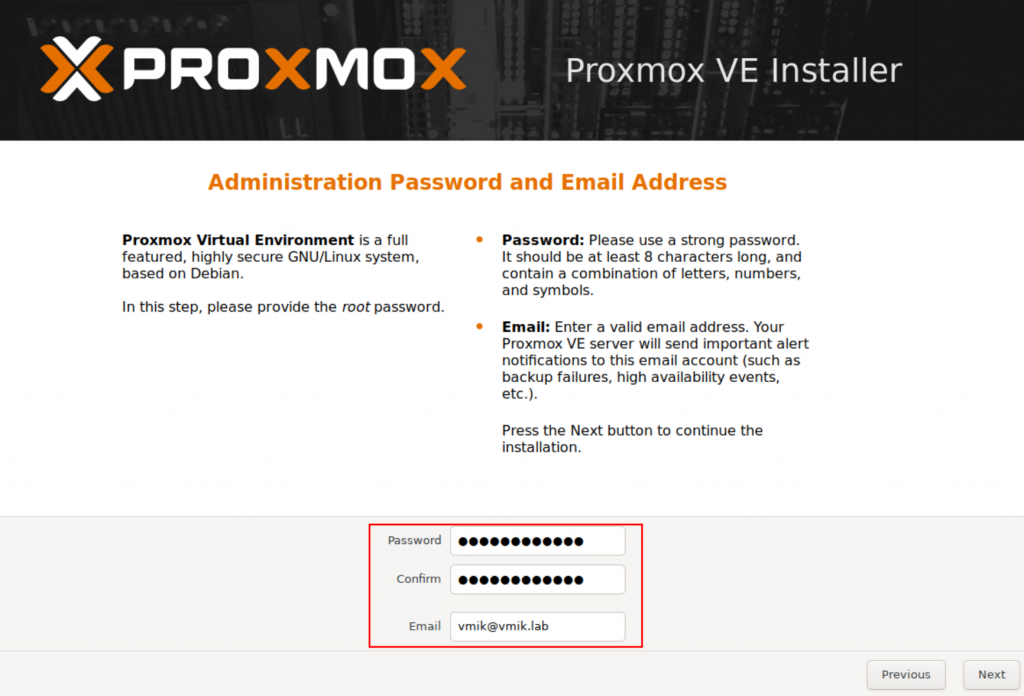
Set a root password and email:
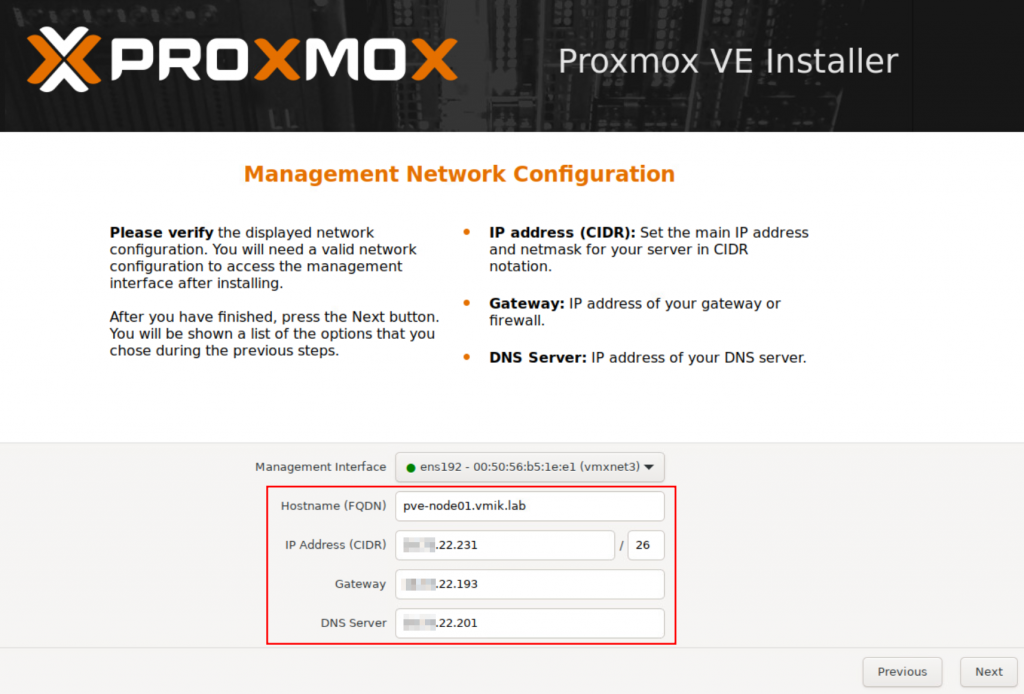
Configure the management network:
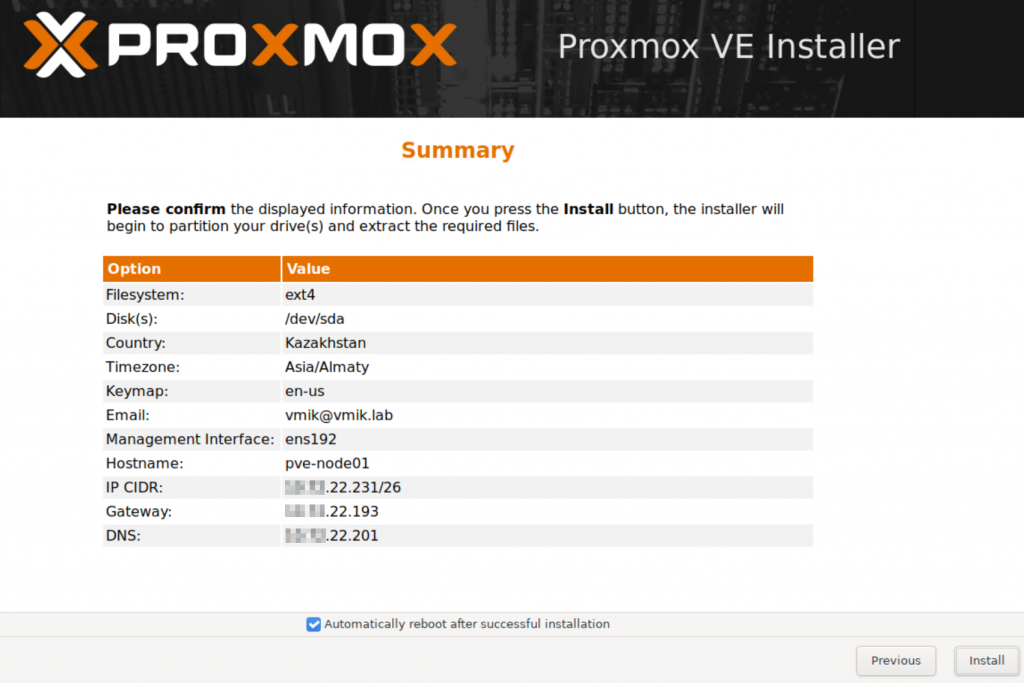
Review the settings and install the PVE node:
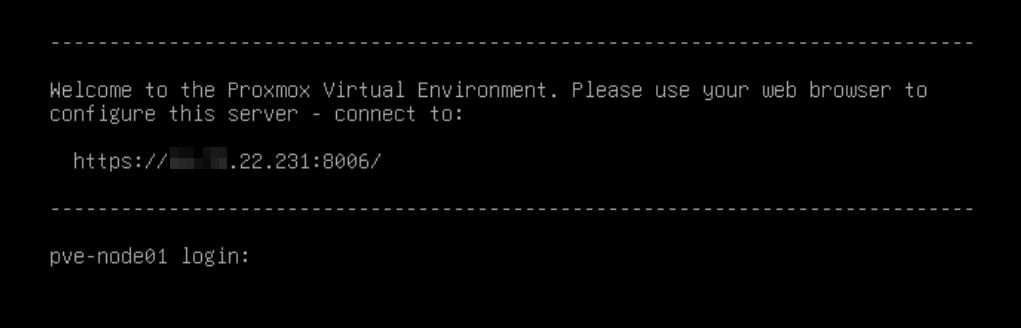
After installation completes, we will see an HTTPS address to manage the node:
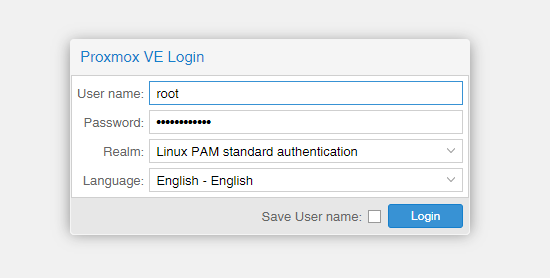
Connect to the address using a web browser. At this moment we don’t have any other accounts instead of root. Authenticate:
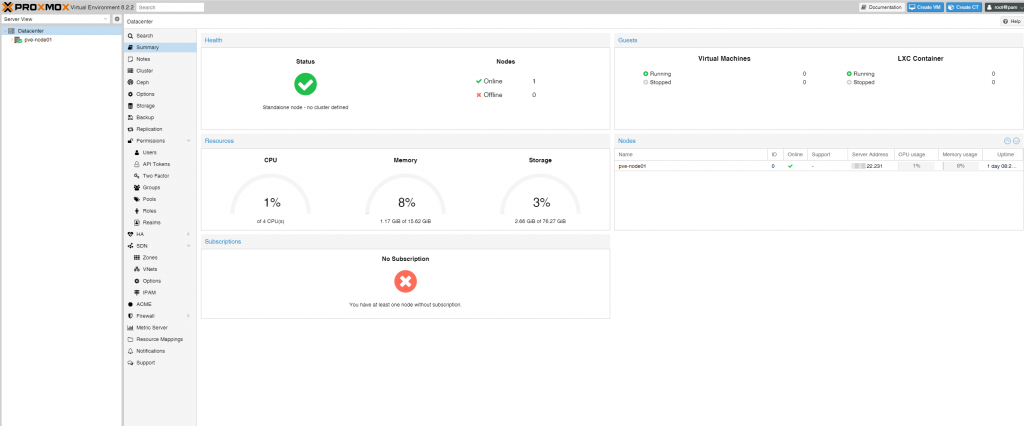
And here it is. A one-node datacenter:
In the same way, install two other nodes. We will see the similar picture, connecting each node.
Now, let’s create a simple cluster.
Main requirements to create a cluster:
- Opened UDP ports 5405-5412 for corosync;
- SSH connection (tcp/22) between cluster nodes;
- Date and time synchronization;
- Three nodes to form a Quorum for High Availability cluster.
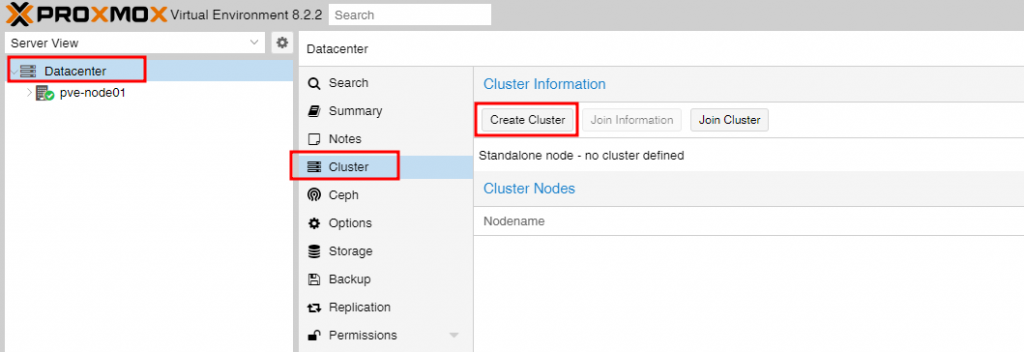
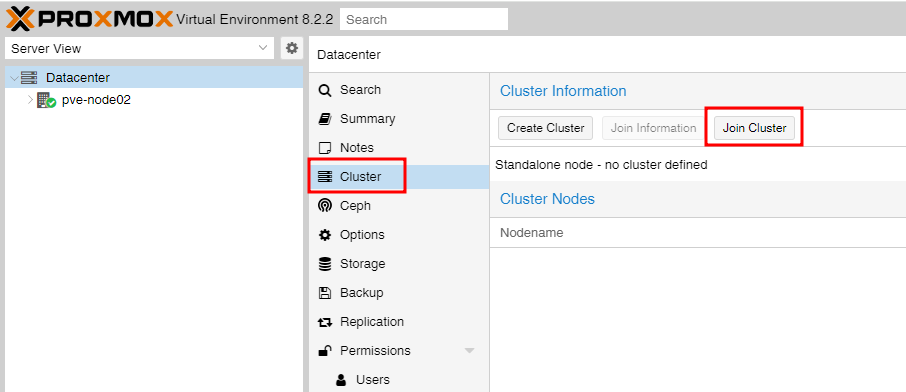
Click on Datacenter, then Cluster, and the “Create Cluster” button:
Set cluster name. We will not adjust the cluster network for this time but keep in mind that for the production environment, a dedicated cluster network is recommended.
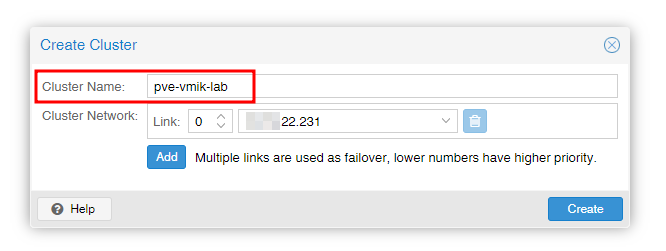
Click Create:
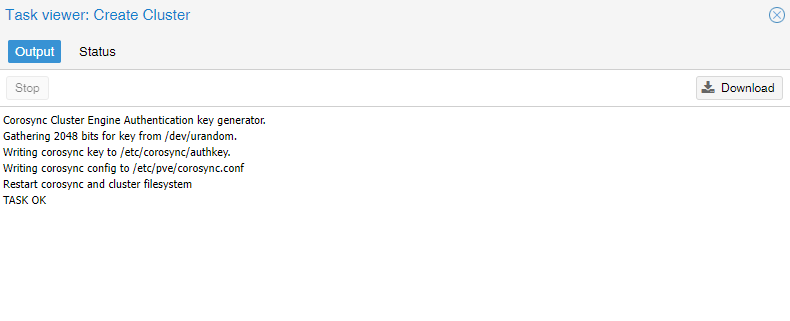
A one-node cluster is created:

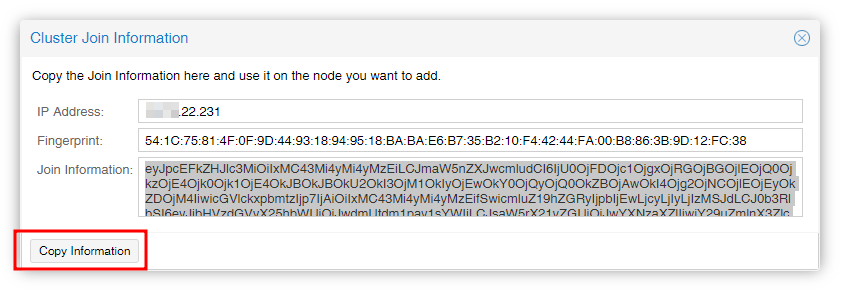
It’s time to connect two additional nodes to the cluster. To connect another node, we need a join information.
Click on the «Join Information» button and copy the join information:
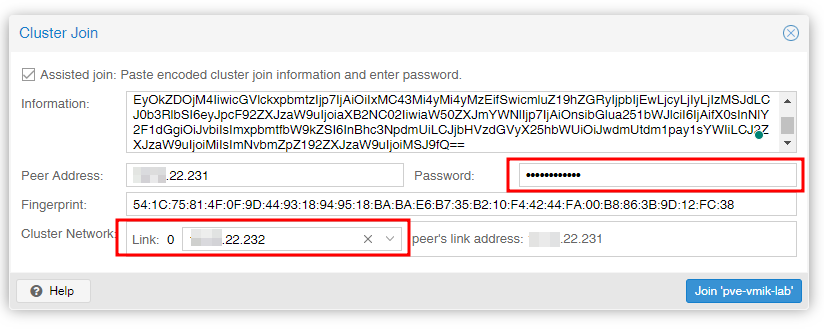
Connect to the second node, and move to the cluster menu. Instead of creating a cluster, click «Join Cluster»:
Paste join information, provide the root password for the peer address (node1), and select the link for the cluster network:
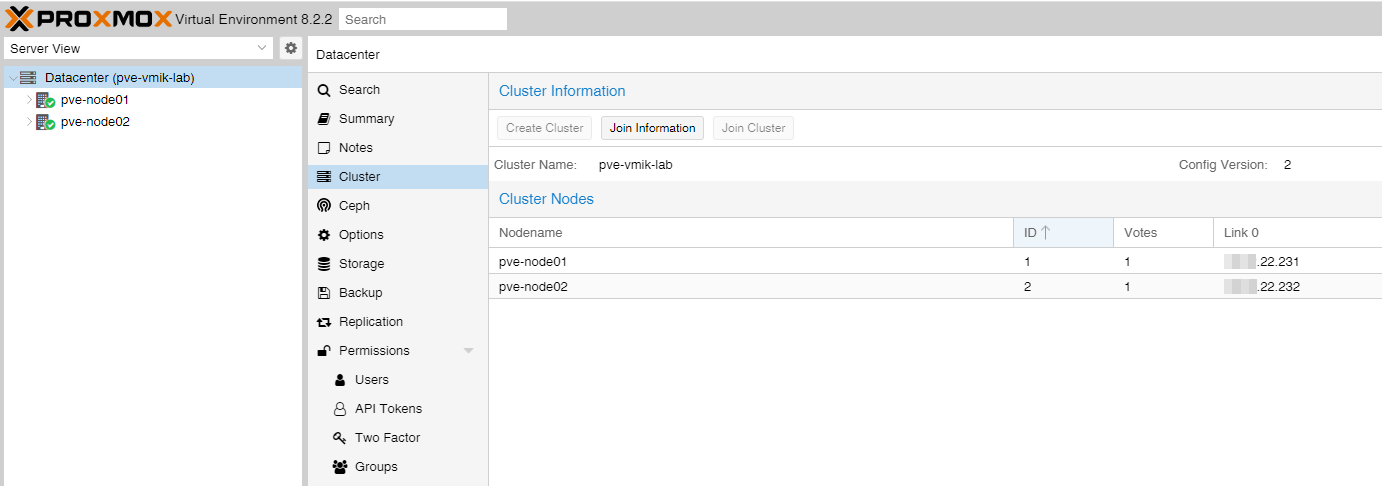
Click «Join». After a short time, the node will be connected to the cluster, and you can see two nodes, instead of one:
By the way, PVE includes powerful command-line tools to manage different aspects of the cluster, and most operations can be done using CLI.
Let’s add a third node to the cluster using CLI. You can connect to the node using SSH, or open Shell right from the web interface:
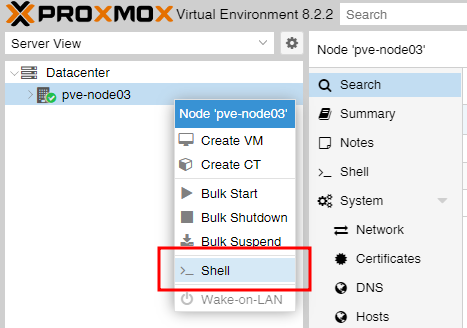
A shell to the server will be opened:

To add a node to the cluster, use the command pvecm add ip_node1:
root@pve-node03:~# pvecm add 192.168.22.231
Please enter superuser (root) password for '192.168.22.231': ************
Establishing API connection with host '192.168.22.231'
The authenticity of host '192.168.22.231' can't be established.
X509 SHA256 key fingerprint is 54:1C:75:81:4F:0F:9D:44:93:18:94:95:18:BA:BA:E6:B7:35:B2:10:F4:42:44:FA:00:B8:86:3B:9D:12:FC:38.
Are you sure you want to continue connecting (yes/no)? yes
Login succeeded.
check cluster join API version
No cluster network links passed explicitly, fallback to local node IP '192.168.22.233'
Request addition of this node
Join request OK, finishing setup locally
stopping pve-cluster service
backup old database to '/var/lib/pve-cluster/backup/config-1725272971.sql.gz'
waiting for quorum...OK
(re)generate node files
generate new node certificate
merge authorized SSH keys
generated new node certificate, restart pveproxy and pvedaemon services
successfully added node 'pve-node03' to cluster.
A simple 3-node cluster is ready:
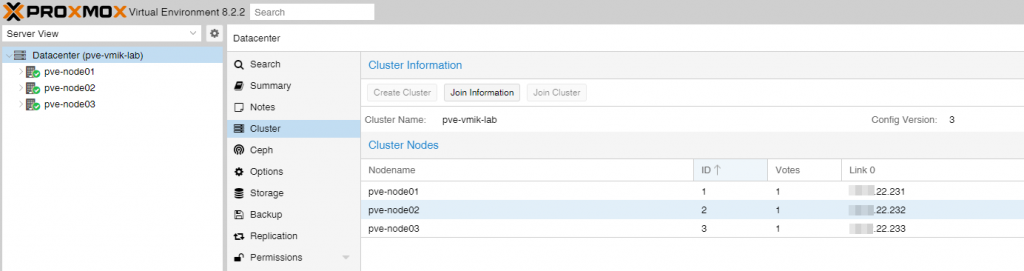
We can also check the status using CLI:
root@pve-node03:~# pvecm status
Cluster information
-------------------
Name:             pve-vmik-lab
Config Version:   3
Transport:        knet
Secure auth:      on

Quorum information
------------------
Date:             Mon Sep  2 15:33:50 2024
Quorum provider:  corosync_votequorum
Nodes:            3
Node ID:          0x00000003
Ring ID:          1.d
Quorate:          Yes

Votequorum information
----------------------
Expected votes:   3
Highest expected: 3
Total votes:      3
Quorum:           2
Flags:            Quorate

Membership information
----------------------
    Nodeid      Votes Name
0x00000001          1 192.168.22.231
0x00000002          1 192.168.22.232
0x00000003          1 192.168.22.233 (local)
The next step for me is to configure a storage.
First, I will connect a shared iSCSI LUNs. We won’t talk about how to do it right and about multipathing. But in a production environment, it will be better to use a separate network, preferably separate NICs for the storage network.
I didn’t find a direct way to create a “shared datastore” using iSCSI LUN in Proxmox, and in terms of VMware, you can use iSCSI disks only like RDM devices – connect a LUN as a disk to a VM.
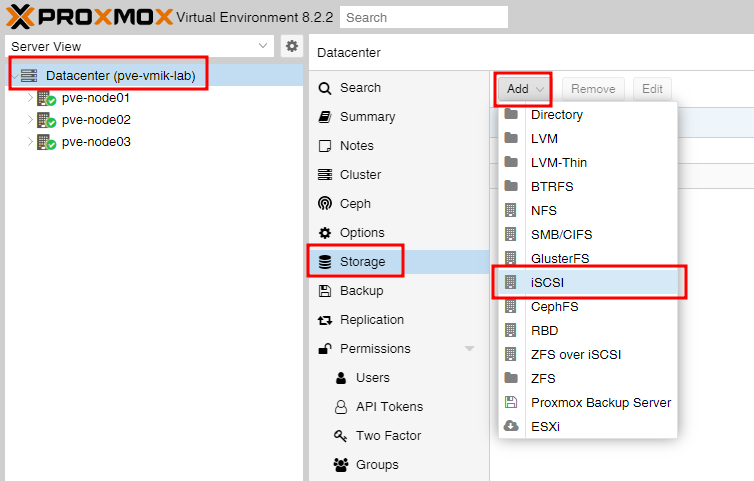
Click on Datacenter, then Storage – Add – iSCSI:
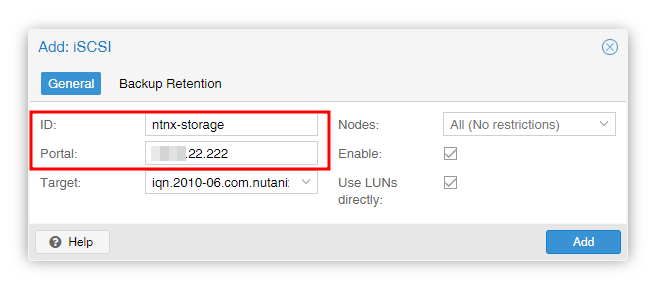
Set the ID and iSCSI Portal IP. The target should be automatically discovered:
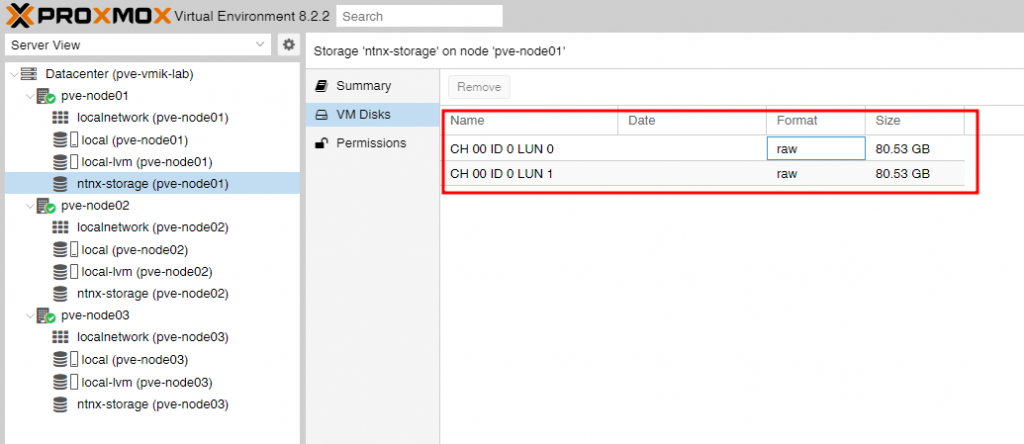
Now you can see a new storage with two disks connected to each node:
During VM creation, you can select this type of disk:
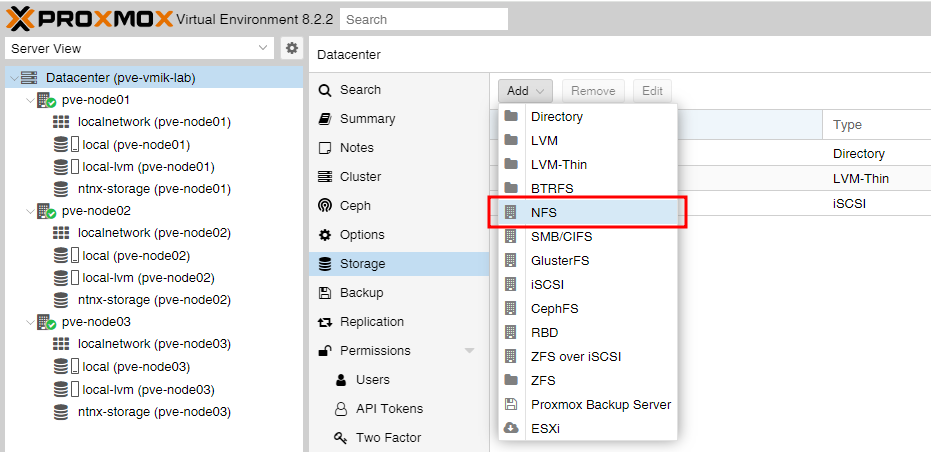
Now let’s connect an NFS-based shared storage for ISOs and VMs. From the Storage configuration tab add an NFS:
Specify ID, NFS server address, and Export. Also, select a content type from a drop-down list:
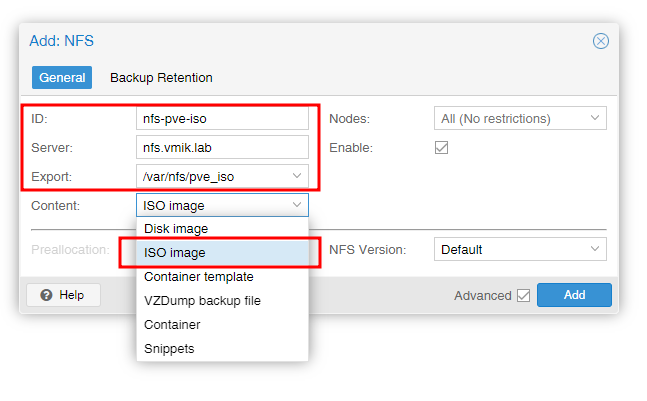
You can choose multiple types, but I created two different shares. One for ISOs (ISO Image) and one for VMs (Disk Image).
By the way, when you enter an NFS server address, it will discover available shares. If you don’t see any, check the NFS server exports, firewall, and so on:

We’ve added two new storages to our nodes:

If you select a storage, you may see that depending on the content type, you have a different view.
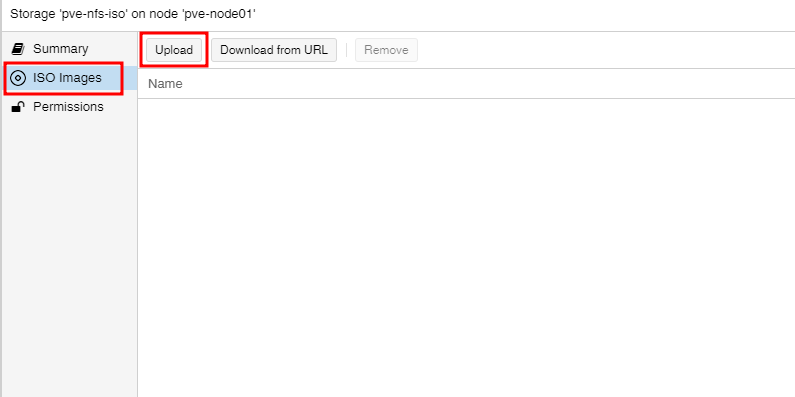
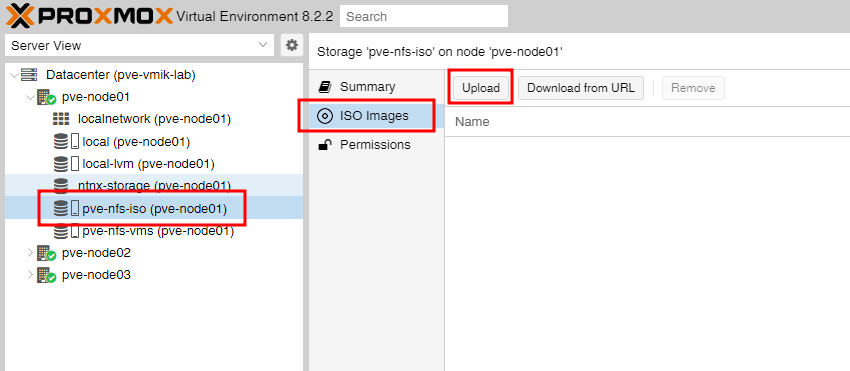
Storage marked as ISO gives you the ability to upload ISO images:
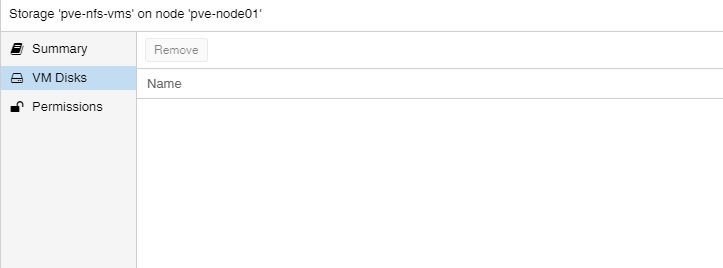
While storage marked as «Disk Image» shows you VM’s disks (no one at the moment):
We created the cluster and added shared storage. It’s time to create a VM.
First, let’s upload an ISO image with the OS to install. To do that, select a storage and click Upload under the ISO Images section:
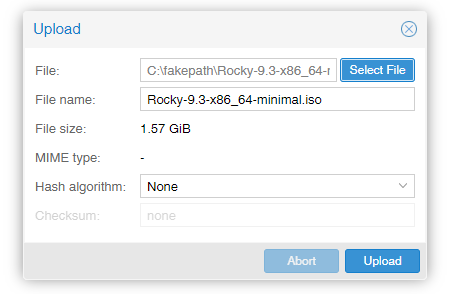
Select an image and click upload:
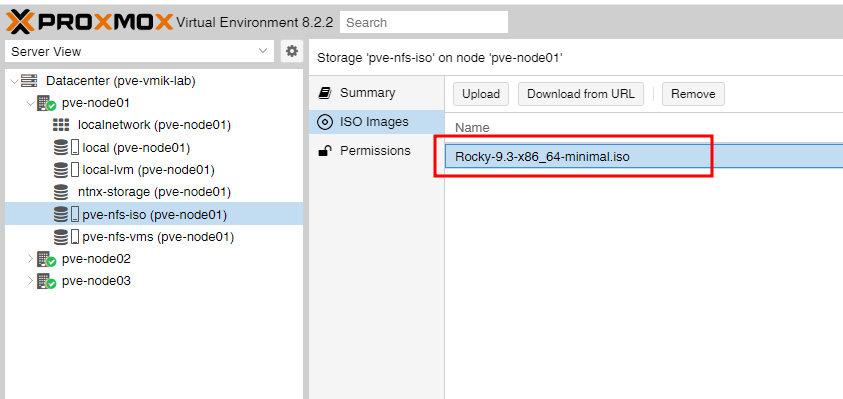
After uploading, you will see a new image on the list:
Right-click on any host – Create VM:

Set the VM’s name and a host where you want to run it:

Next, select a storage with ISO files and boot an ISO image:

On the next screen, we can change BIOS to UEFI or change the SCSI Controller type:

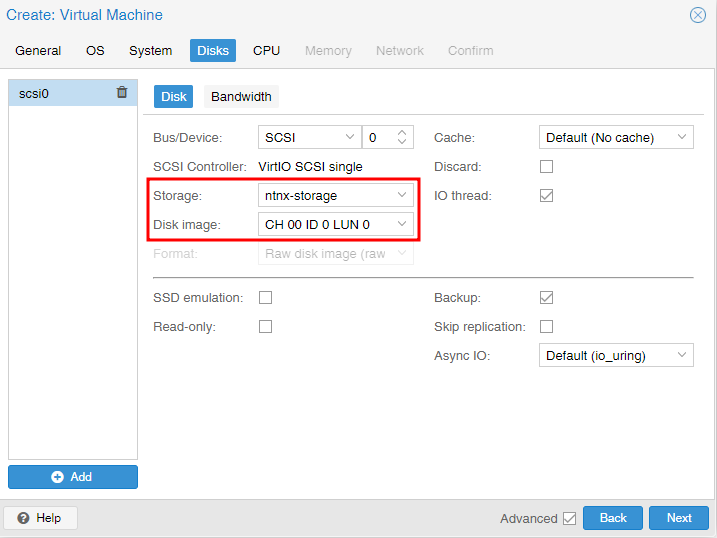
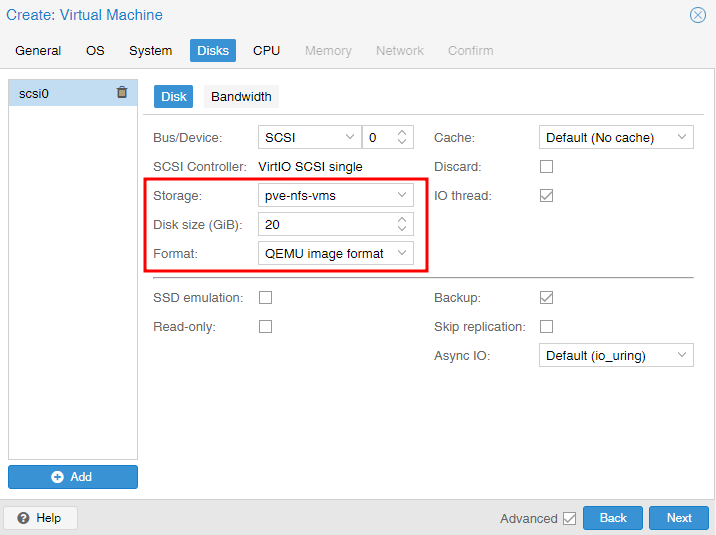
The Disks section allows us to configure storage for the VM. In my lab, I can use three types of storage. Local disk, shared NFS, or iSCSI.
I’ve selected a shared NFS storage:
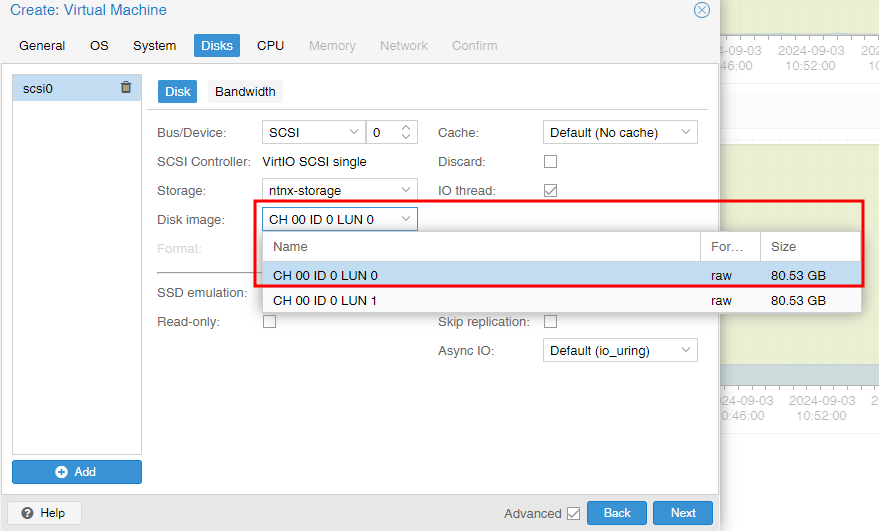
If I select iSCSI, I need to choose one of the available LUNs as a disk for VM:
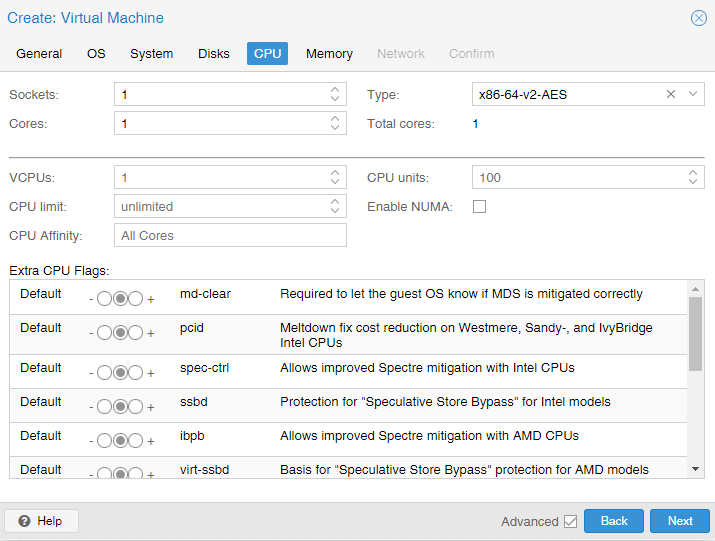
Next, we can configure a lot of the CPU settings. I will use defaults:
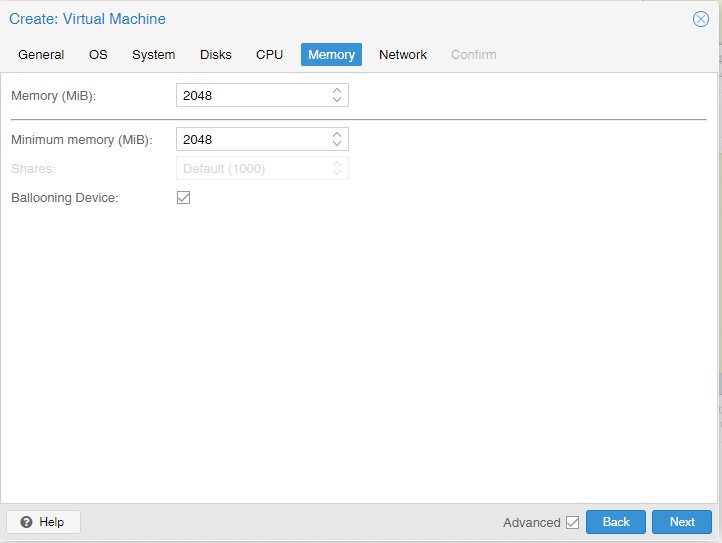
On the memory page, we can adjust the memory size and enable ballooning:
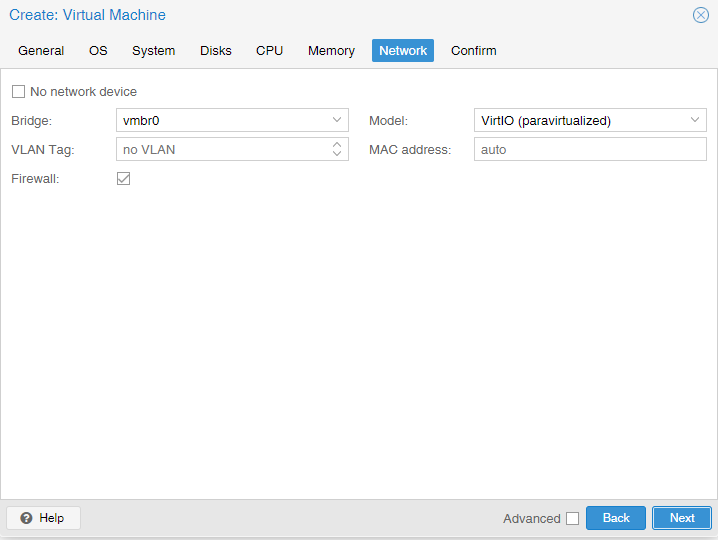
In the network section, I will go with a default bridge interface and default NIC type:
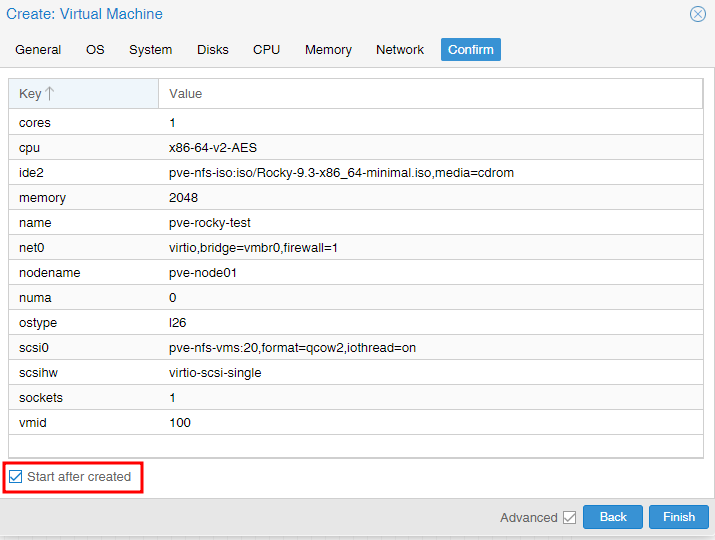
Review the settings. We can also start the VM after creation:
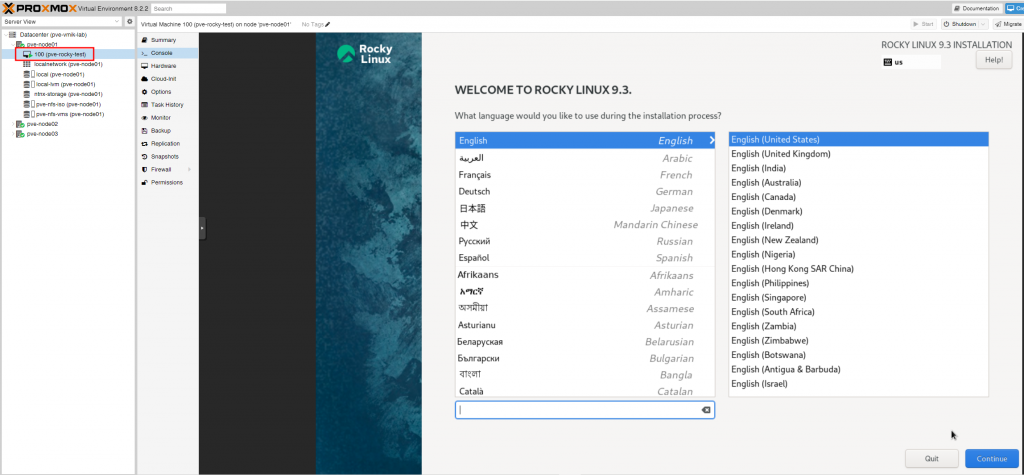
The VM started on the selected node and the OS is ready to install:
Configuring High Availability.
It was a surprise for me that in PVE High Availability is a VM-level feature and not cluster-wide, as it was in most virtualization platforms I worked with.
By default, if I shut down the host, the VM won’t be restarted on another host in the cluster:
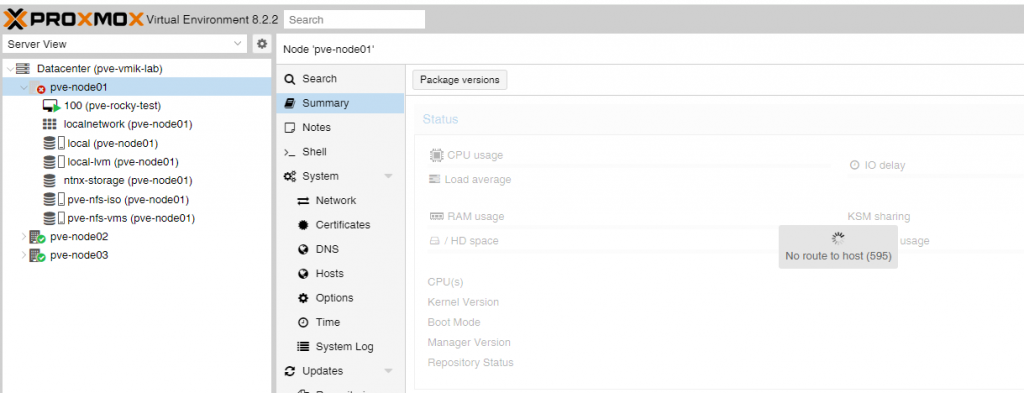
After powering on the host, the VM will be in the powered-off state on the host:
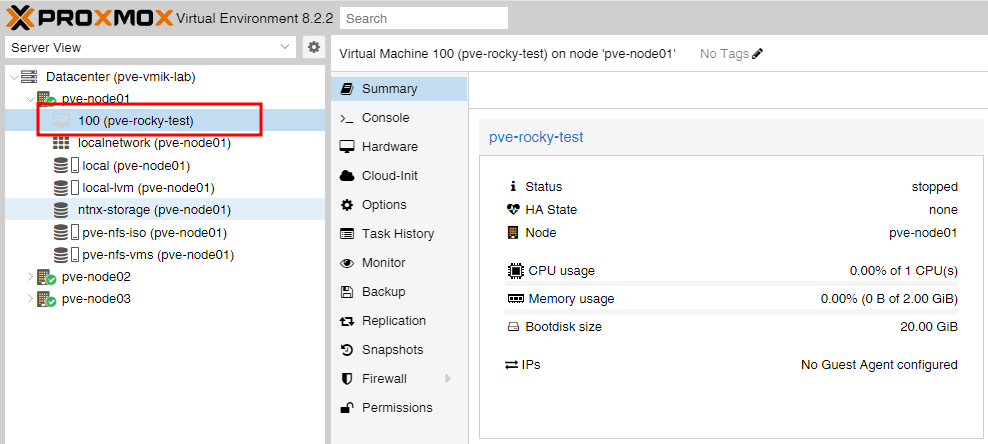
In the screenshot above, you can see a field – HA State. By default, it’s none, meaning HA is not configured for the VM.
Two main requirements to create an HA cluster are:
- Three nodes to form a Quorum for High Availability cluster – we have three nodes;
- Shared storage – we added NFS storage to all nodes.
To configure High Availability for the VM, we need to select a datacenter and then the HA menu:
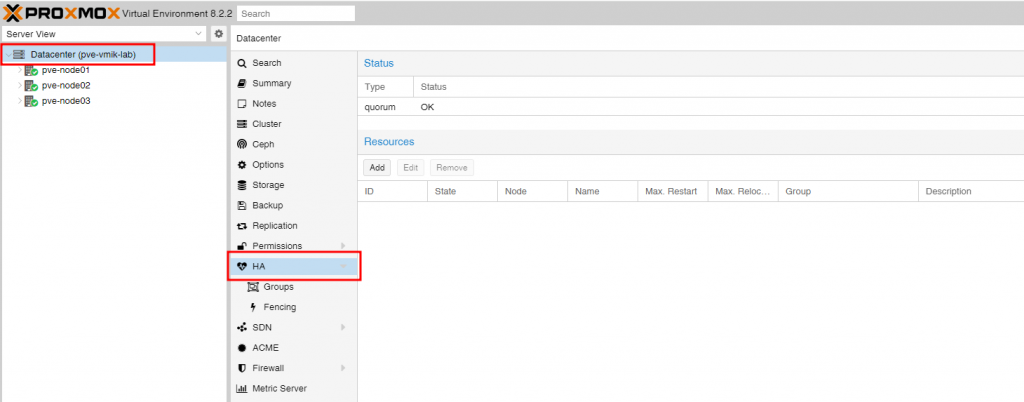
By default, there are no resources. Click Add, and select a VM:

We can create a group of hosts to limit the options for VMs to run, but it’s not necessary.
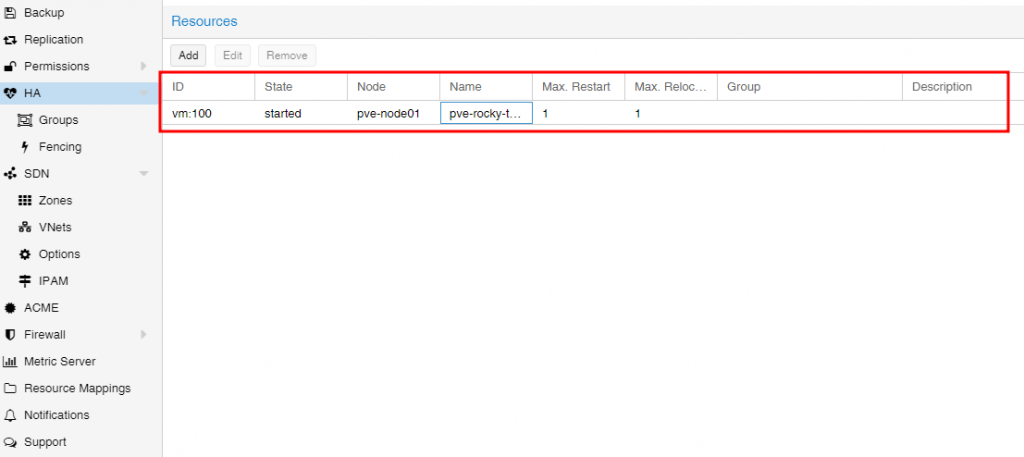
We configured one VM to use the High Availability feature:
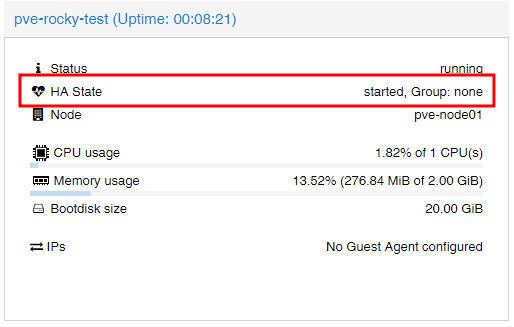
VM displays that HA is configured:
Now, after powering off the host, the VM will be restarted on another node in the cluster:
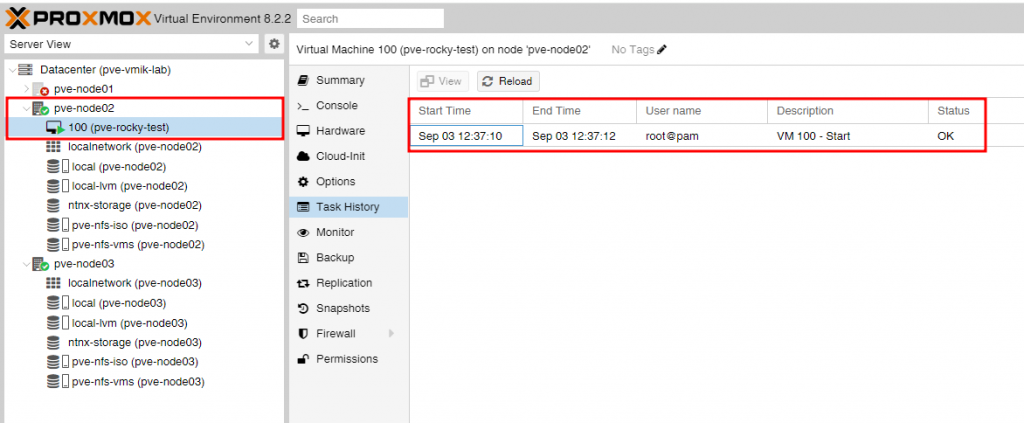
In the host’s system logs, we can find current entries:
Sep 03 12:37:09 pve-node02 pve-ha-lrm[1067]: successfully acquired lock 'ha_agent_pve-node02_lock'
Sep 03 12:37:09 pve-node02 pve-ha-lrm[1067]: watchdog active
Sep 03 12:37:09 pve-node02 pve-ha-lrm[1067]: status change wait_for_agent_lock => active
Sep 03 12:37:09 pve-node02 pve-ha-lrm[723384]: starting service vm:100
Sep 03 12:37:10 pve-node02 pve-ha-lrm[723384]: <root@pam> starting task UPID:pve-node02:000B09B9:01449AA2:66D6BCA6:qmstart:100:root@pam:
Sep 03 12:37:10 pve-node02 pve-ha-lrm[723385]: start VM 100: UPID:pve-node02:000B09B9:01449AA2:66D6BCA6:qmstart:100:root@pam:
Sep 03 12:37:10 pve-node02 systemd[1]: Created slice qemu.slice - Slice /qemu.
Sep 03 12:37:10 pve-node02 systemd[1]: Started 100.scope.
In conclusion
This is what my journey with Proxmox looks like. I tried to show some basics and hope this post could be useful.
![]()