In this article, we will cover how to connect PVE hosts to the Veeam infrastructure, back up PVE VMs, and restore them.
Let me remind you that previously I wrote about how to deploy Proxmox Virtual Environment 8 as a nested virtualization on VMware vSphere for testing. Read it, if you’re interested in it.
You will find this guide familiar if you read my articles about backing up Nutanix with Veeam.
The overall procedure is the same:
- Connect hosts/clusters;
- Deploy a worker node in the cluster, which will act like a proxy;
- Create a backup task;
- Restore if needed.
Connecting and deploying a worker
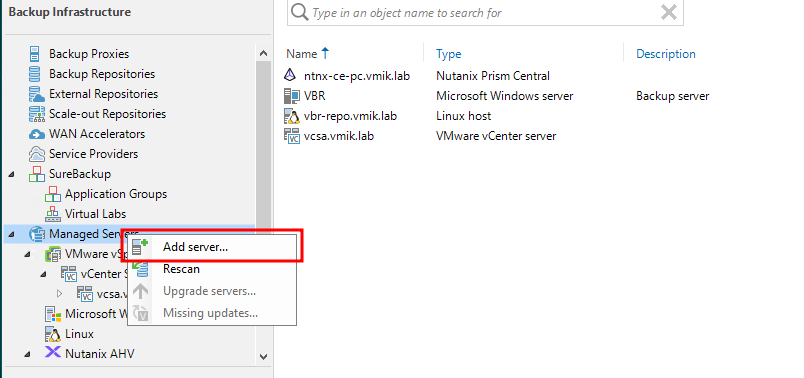
As usual, we begin with adding a server in the Managed Server section:
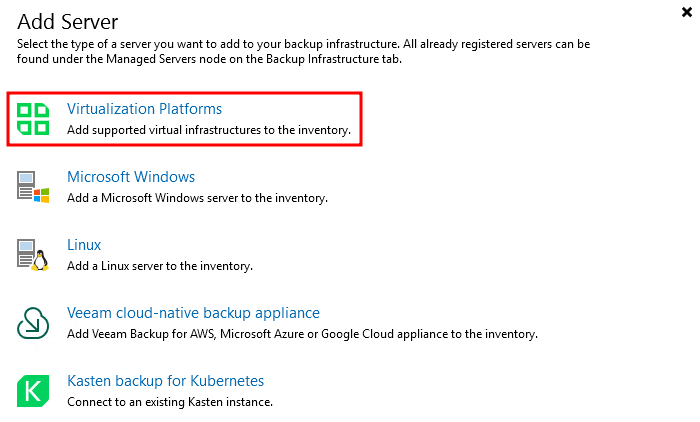
Select Virtualization Platforms:
You will see the list of supported platforms. Select Proxmox VE:
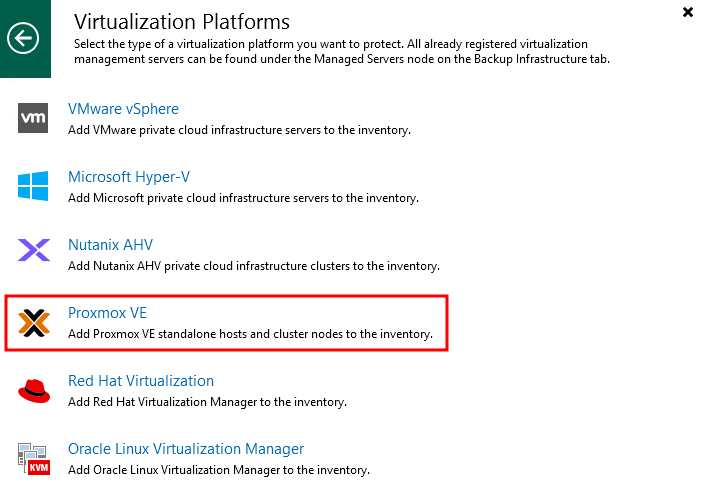
Do you remember when only VMware vSphere and Microsoft Hyper-V were supported?
In the opened dialog, provide the Proxmox host IP address or DNS name:
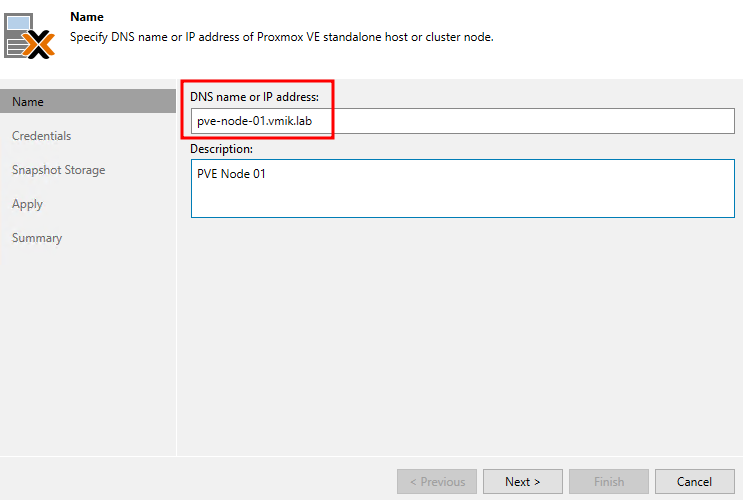
In this example, I set the first node’s DNS name.
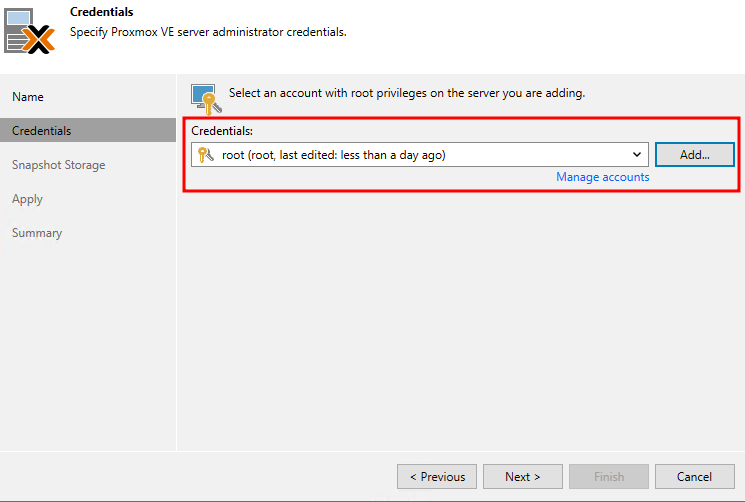
Next, add a node’s admin credentials and click next:
After connecting, select storage for Snapshots:
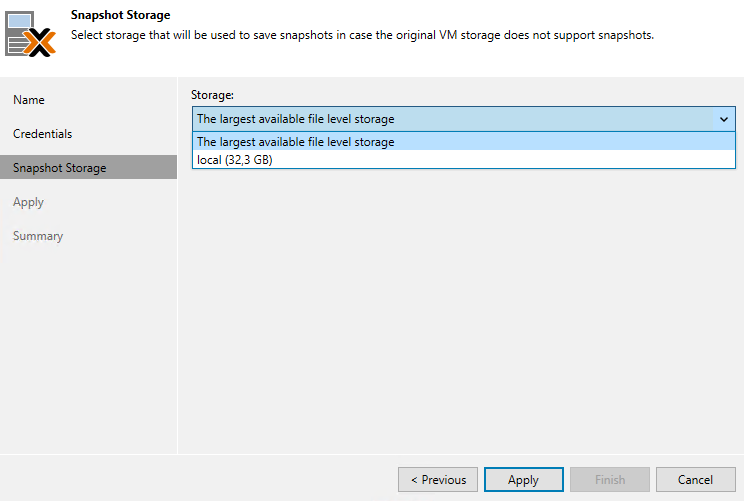
As mentioned, snapshot storage will be used to save snapshots in case the original VM storage does not support snapshots.
Click apply. The host will be added to the Veeam infrastructure. Right after, you will be asked to deploy a new worker (proxy) to backup VMs:
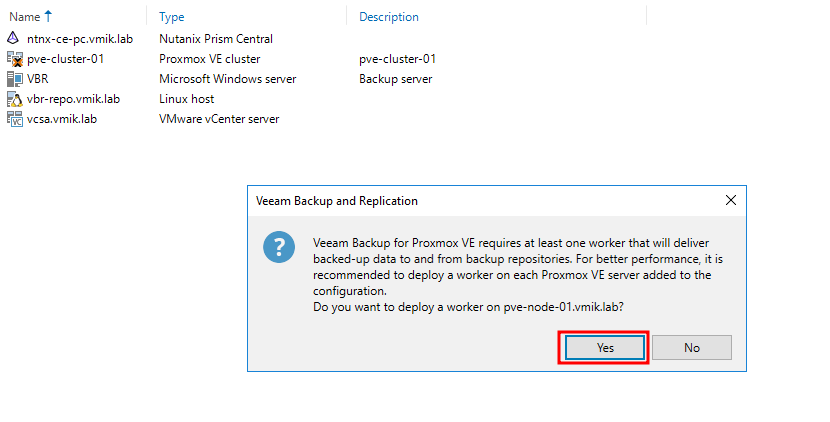
Agree and provide worker configuration:
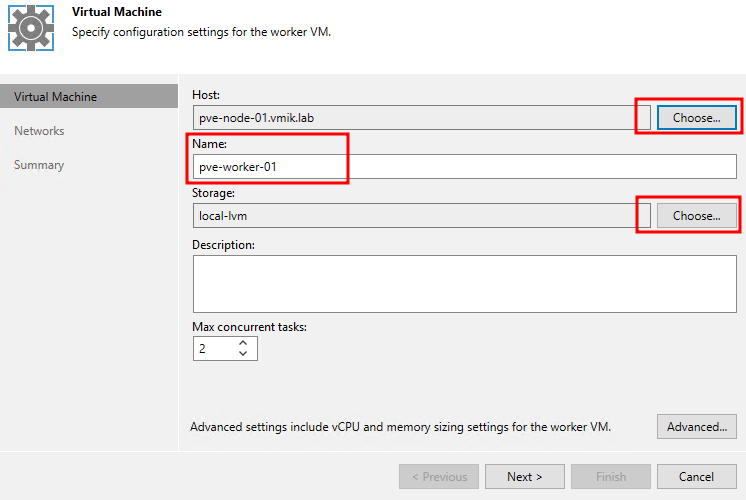
First, it requires selecting a host, if you have more than one. Then set the VM name and storage for deployment.
At the bottom, we can select max concurrent tasks and we can adjust vCPU and Memory using advanced settings.
The appliance requires 2vCPU/2GB RAM and 1vCPU/1GB RAM for each concurrent task. The same as for the Nutanix AHV worker.
Click next and add an IP address:
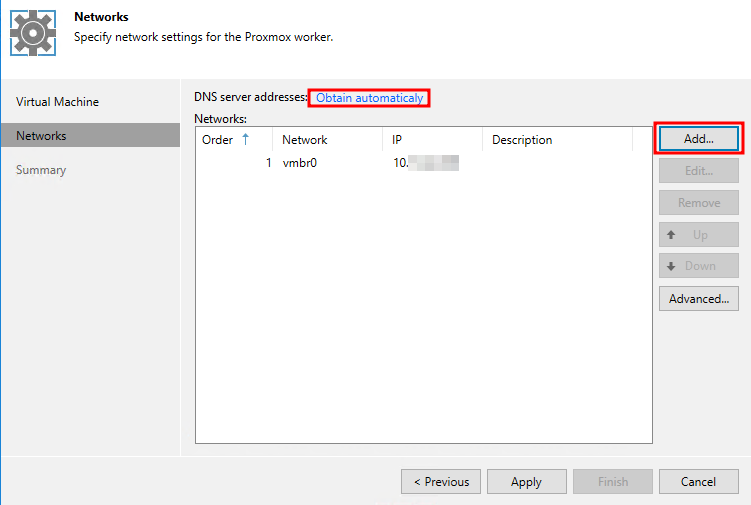
It’s possible to add multiple addresses. Keep in mind, that if you setting the static IP address, you need to add a DNS server as well. To do that, click on the “Obtain automatically” link on the top.
Click apply and review the settings:
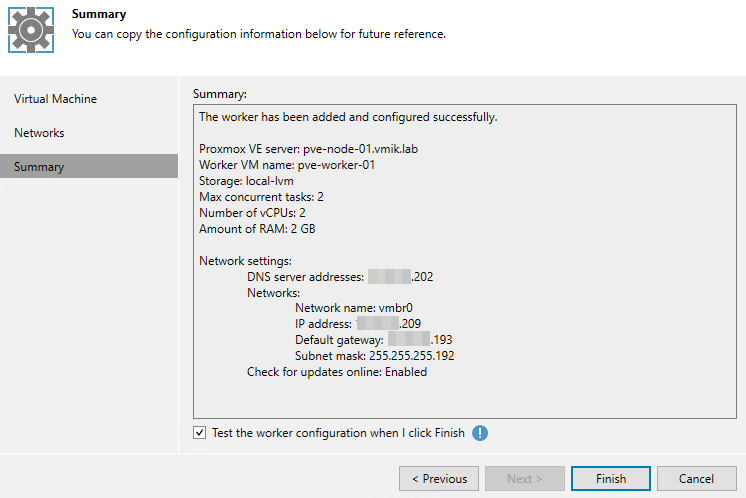
Next, you may click Finish to deploy a new worker or mark a checkbox to test it after deployment.
During testing, it also checks the updates and installs them:
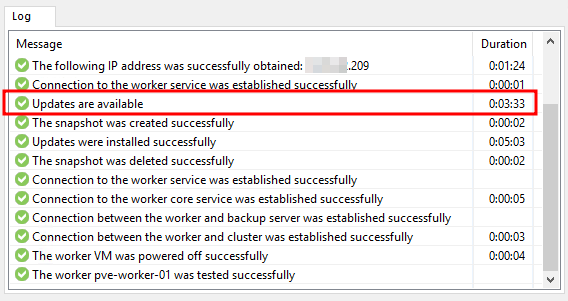
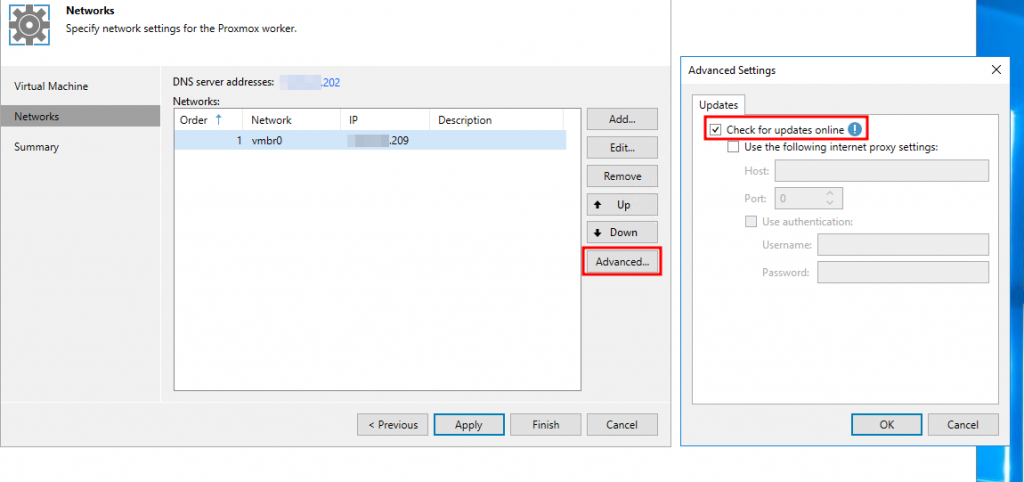
If your worker does not have an internet connection, or you don’t want to install updates, you can disable it in the workers’ network configuration section:
After adding the worker, we can see that the first node of the cluster was added:
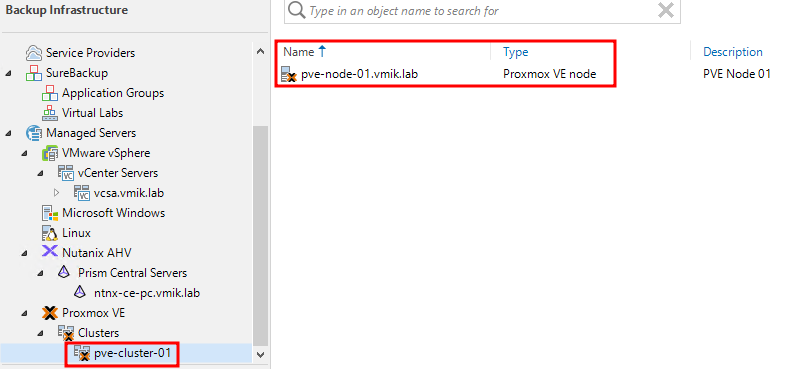
And, it can be strange, but according to the documentation, we should add each node of the cluster separately.
So, repeat the previous steps for each node in the cluster:
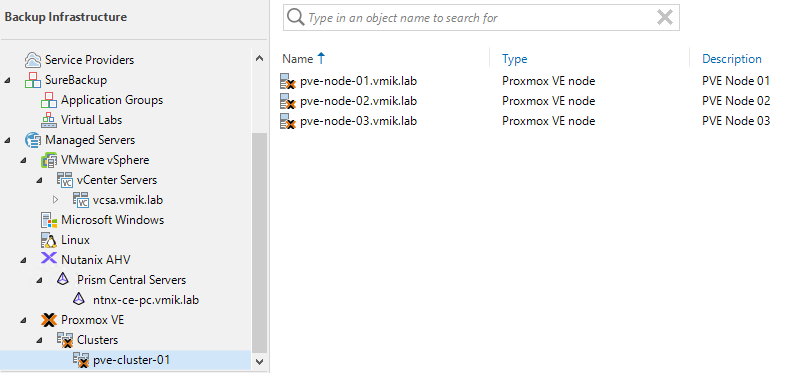
Things to consider: You will be asked each time to deploy a new worker on the added server. You can do it, or not. But, if you decide not to add a new worker and use an existing one, during backup or restore, it may use NBD mode instead of HotAdd.
Creating a backup job
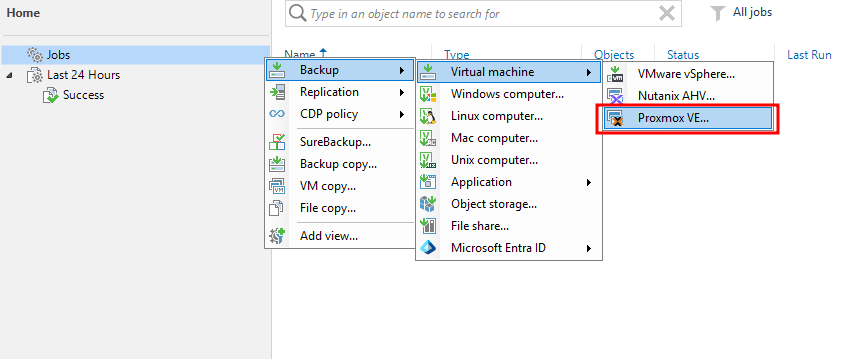
The procedure is pretty simple, like with the other platforms. Create a new backup job and select Proxmox VE:
Set the job name and proceed further. In the next screen, click Add and select the VMs you want to backup:
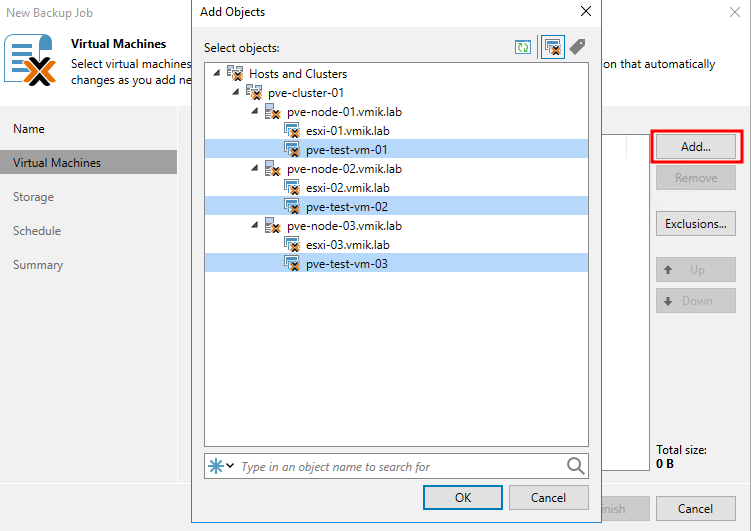
Here is the list of VMs:
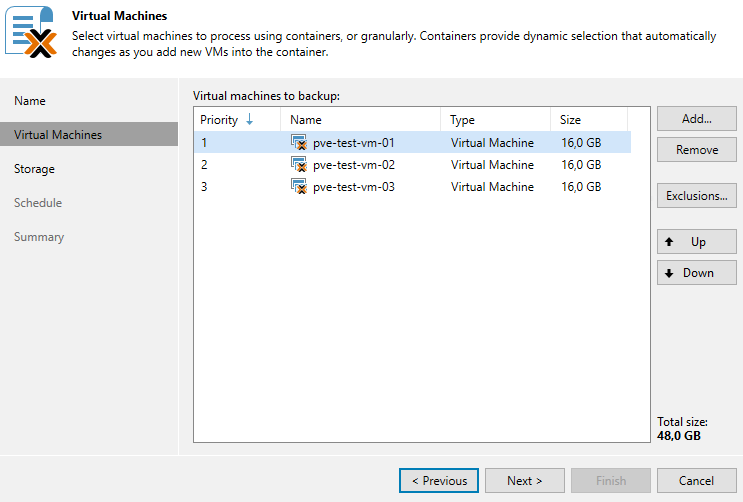
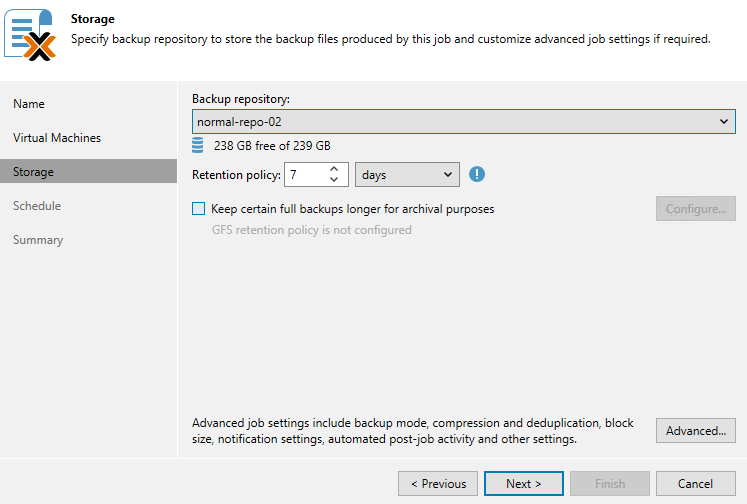
Next, select the backup repository and points or days to keep the backup:
The last task is to set the schedule:
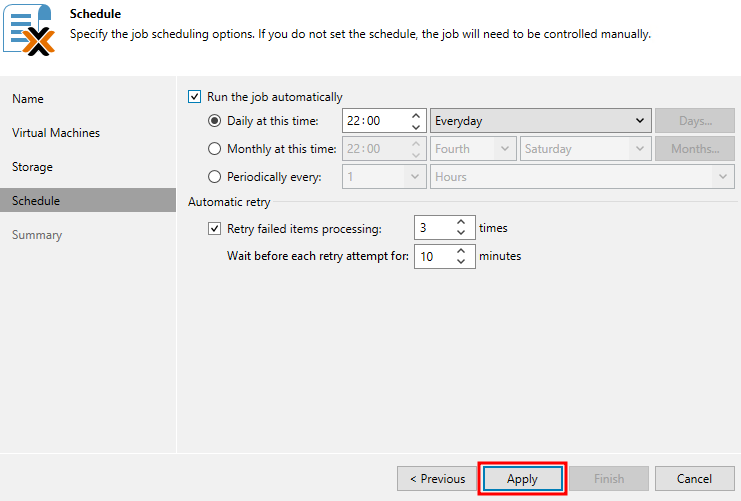
At this point, a backup job is created and should run according to schedule.
During the backup, you may see warning messages like the one in the screenshot below:
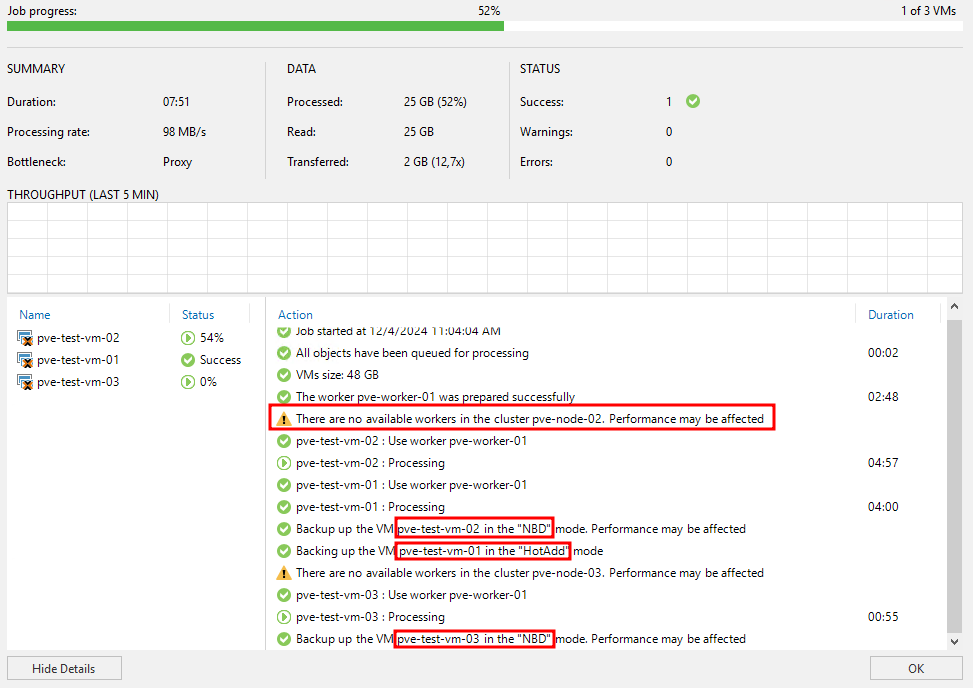
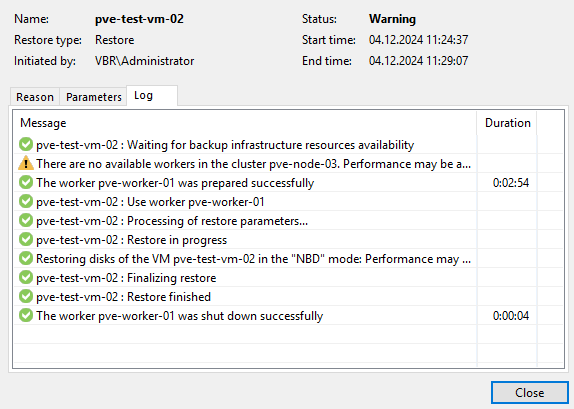
This is what I talked about earlier when the worker chose NBD mode instead of HotAdd.
In my case, the worker is located on the first node, where pve-test-vm-01 is located on the local disk. In this case, the worker uses HotAdd mode. Two other VMs located on the local disks of their nodes and the worker uses NBD mode in that case.
During backup (or restore) you may notice running worker:
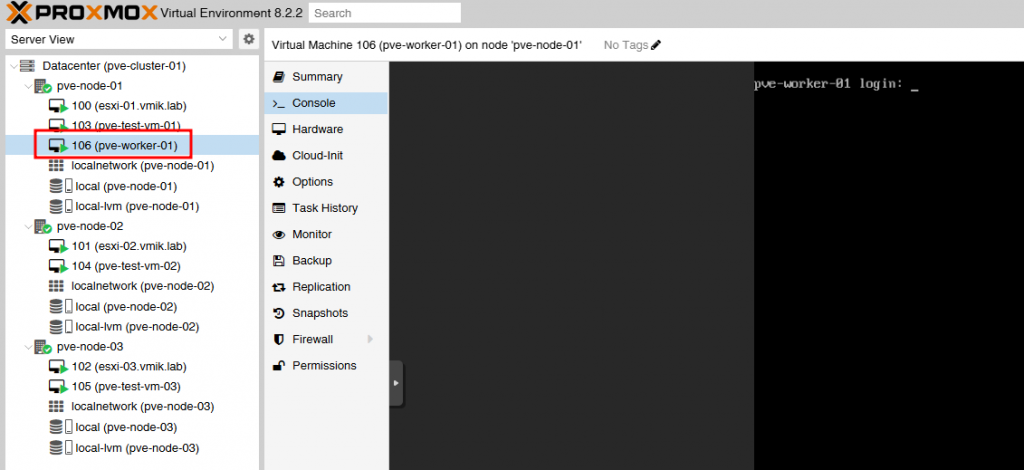
This VM is usually in the stopped state while not performing any actions.
Restoring from backups
Nothing special here. Select a backup, right-click, and select where you want to restore:
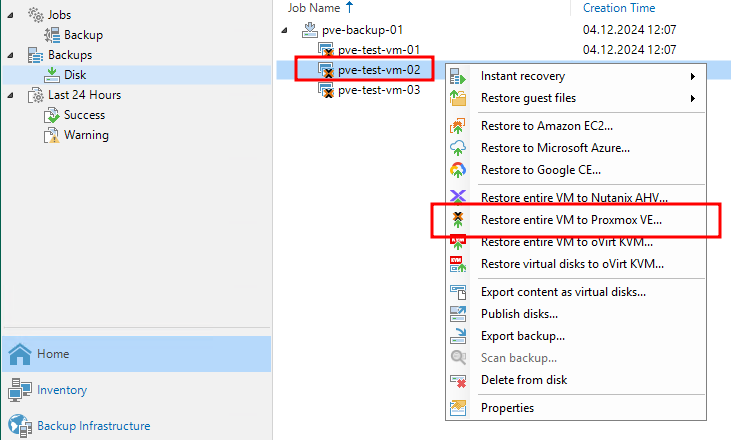
You can restore to the cloud providers or the other KVM-based systems, including AHV and oVirt.
If you want to restore this backup to VMware vSphere, you can use Instant Recovery:
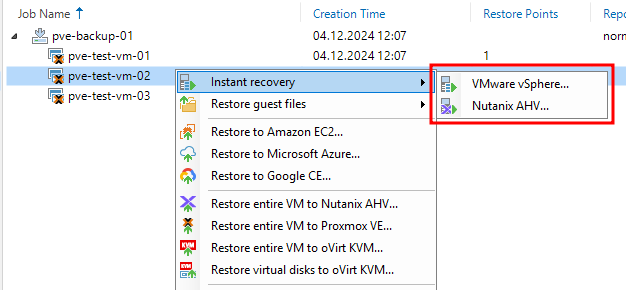
To restore select the restore point:
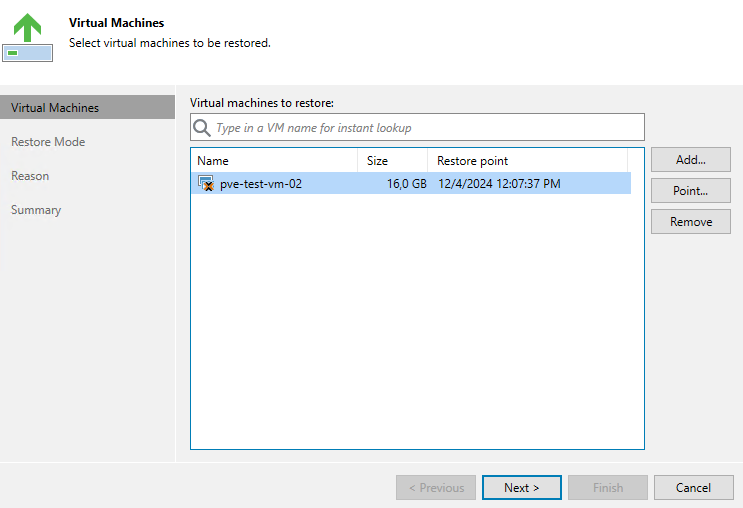
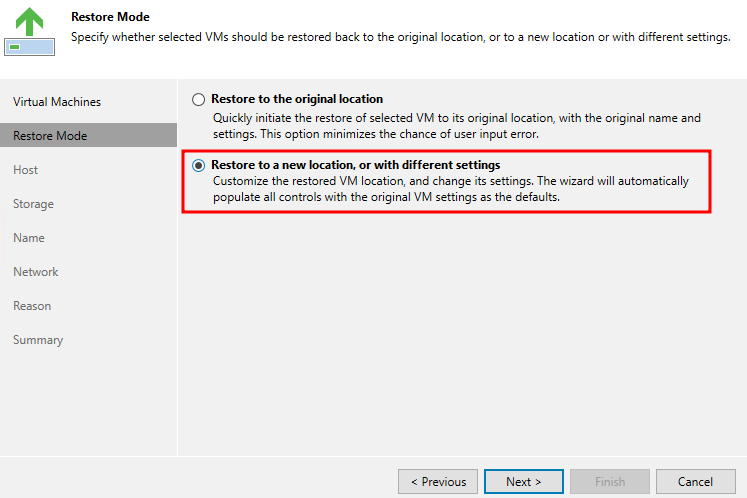
Restore to the original location or the new one. I prefer the second option:
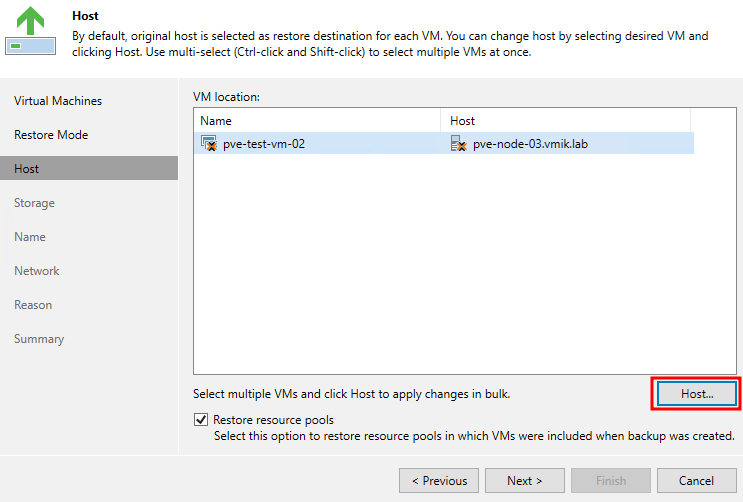
Select a PVE host:
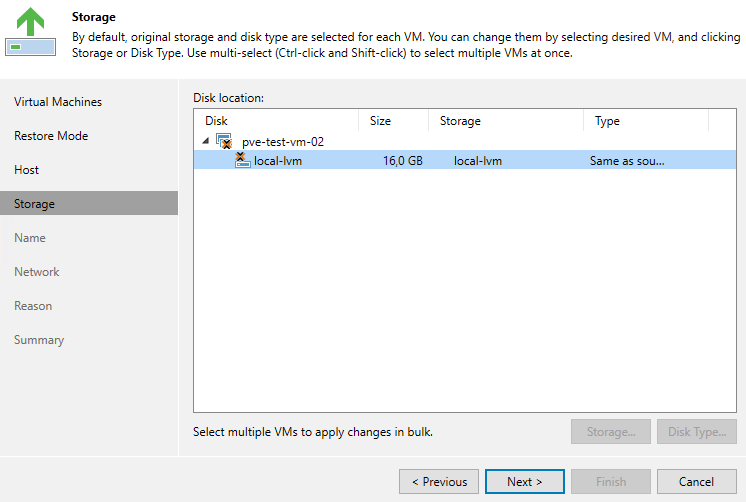
And desired storage, where the VM should be placed:
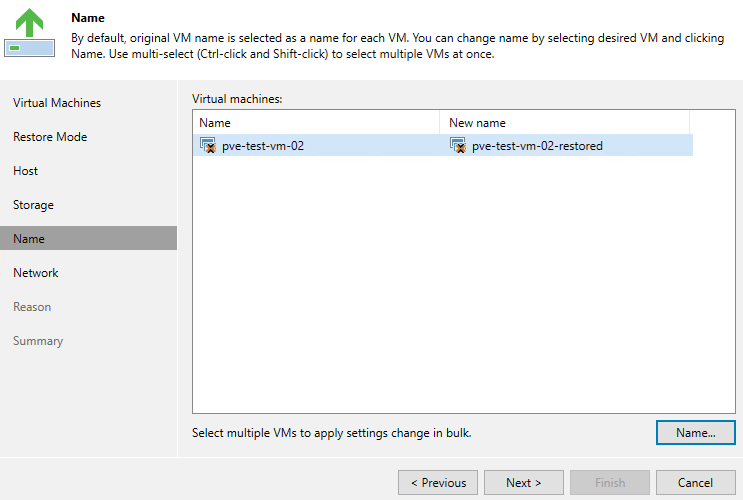
Set the VM name:
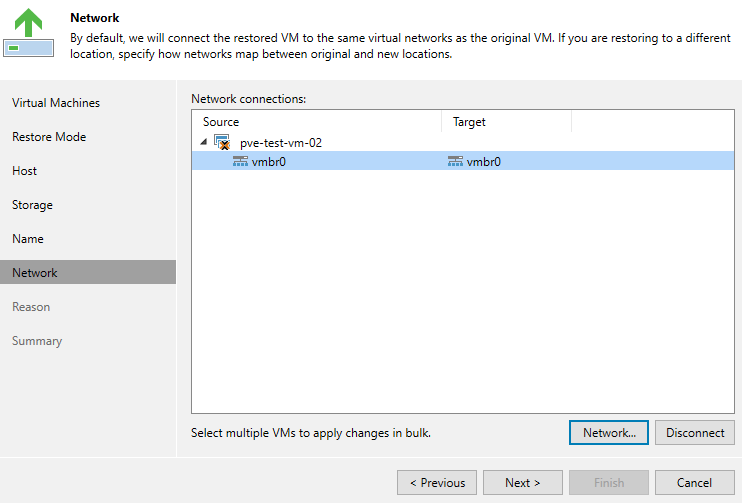
In the network section we can change the VM’s network, disconnect it, or keep the same settings:
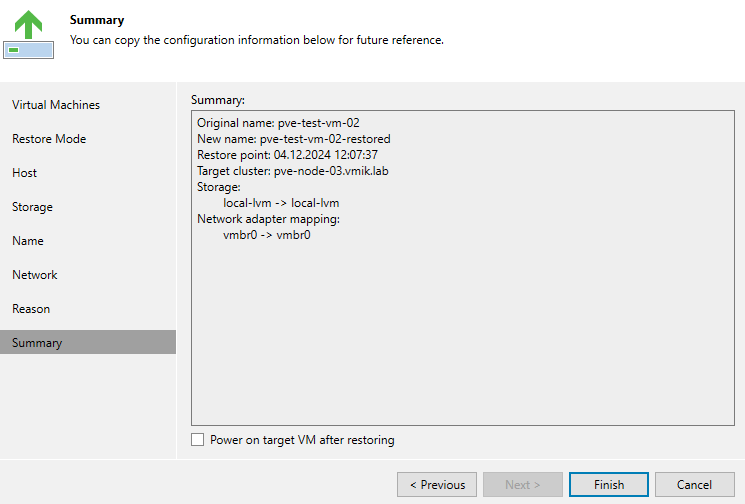
Review the settings and begin the restoration process:
You may see the same warning messages, meaning that NBD mode is in use:
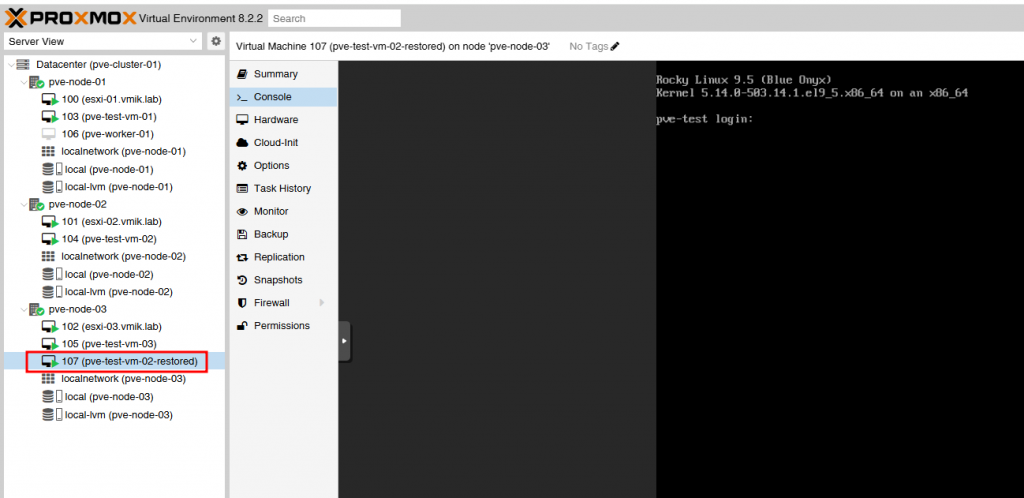
And here is the restored VM:
In conclusion
This is how easily you can back up Proxmox VE using Veeam.
For more information, please follow the official Veeam documentation for Veeam Backup for Proxmox VE.
![]()