The purpose of this article is to demonstrate how to replace certificates for both Prisms – Element and Central.
In this article, we will look at how to generate self-signed certificates and add them to the Prism Element and to the Prism Central.
To replace the certificate, we need three files:
- Private Key;
- Public Certificate;
- CA Certificate/Chain, used to sign your certificate.
The subject alternative name (SAN) extension record should include the DNS name (address you use to connect to the Prism Central) and the cluster public IP address as well.
In addition, Nutanix recommends including a DNS name for all CVMs in the CSR using the Subject Alternative Name (SAN) extension. This avoids SSL certificate errors when you access a CVM by direct DNS instead of the shared cluster IP address.
In this example, I will generate a CA certificate and sign both certificates for Prisms using this cert.
In a production environment, you need to sign your certificates using your organization’s CA. Usually this CA certificate is installed on all computers, and you shouldn’t experience any problems accessing websites signed using your ORG CA.
First, let’s make a directory to store our new certificates:
[root@linux-host ~]# mkdir ./certs
[root@linux-host ~]# cd ./certs/
Generating CA key and certificate:
[root@linux-host certs]# openssl genrsa 2048 > ntnx-ca-key.pem
[root@linux-host certs]# openssl req -new -x509 -nodes -days 3650 -key ntnx-ca-key.pem -out ntnx-ca-cert.pem
In the next step, we need to create a Certificate Signing Request (CSR), for two certificates. One for Prism Element and another for Prism Central.
We need to create two configuration files:
[root@linux-host tls]# echo "[v3_ca]
subjectAltName = @alt_names
[alt_names]
DNS.1 = ntnx-ce-pe.vmik.lab
IP.1 = 192.168.22.200
" > ./cert-ntnx-ce-pe.cfg

[root@linux-host tls]# echo "[v3_ca]
subjectAltName = @alt_names
[alt_names]
DNS.1 = ntnx-ce-pc.vmik.lab
IP.1 = 192.168.22.201
" > ./cert-ntnx-ce-pc.cfg
In the first file, we provide DNS and IP addresses for the prism element. The second file pertains to Prism Central.
Create two CSRs based on configuration files:
[root@linux-host certs]# openssl req -newkey rsa:2048 -nodes -keyout ntnx-ce-pe-key.pem -out ntnx-ce-pe-csr.pem -subj "/CN=ntnx-ce-pe.vmik.lab"
[root@linux-host certs]# openssl req -newkey rsa:2048 -nodes -keyout ntnx-ce-pc-key.pem -out ntnx-ce-pc-csr.pem -subj "/CN=ntnx-ce-pc.vmik.lab"
The last step is to generate two certificates using CSRs and signed by a previously generated CA certificate:
[root@linux-host certs]# openssl x509 -req -set_serial 01 -days 3650 -in ntnx-ce-pe-csr.pem -out ntnx-ce-pe-cert.pem -CA ntnx-ca-cert.pem -CAkey ntnx-ca-key.pem -extensions v3_ca -extfile ./cert-ntnx-ce-pe.cfg
[root@linux-host certs]# openssl x509 -req -set_serial 01 -days 3650 -in ntnx-ce-pc-csr.pem -out ntnx-ce-pc-cert.pem -CA ntnx-ca-cert.pem -CAkey ntnx-ca-key.pem -extensions v3_ca -extfile ./cert-ntnx-ce-pc.cfg
As a result, we should have a cert and key file for CA and both Prisms:
[root@linux-host certs]#
cert-ntnx-ce-pc.cfg
cert-ntnx-ce-pe.cfg
ntnx-ca-cert.pem
ntnx-ca-key.pem
ntnx-ce-pc-cert.pem
ntnx-ce-pc-csr.pem
ntnx-ce-pc-key.pem
ntnx-ce-pe-cert.pem
ntnx-ce-pe-csr.pem
ntnx-ce-pe-key.pem
Now it is time to replace the certificate. Please copy the CA certificate, certificates, and keys for both Prism to the workstation you use for replacing certificates.
Replacing the certificate in Prism Element
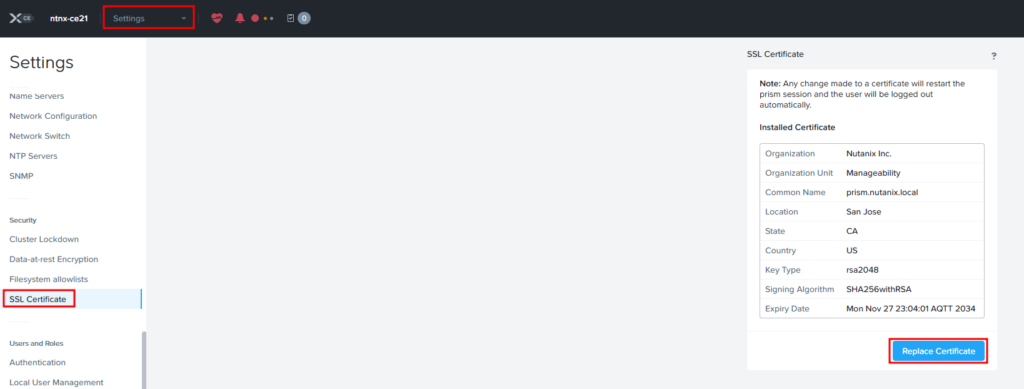
Open the Settings menu; on the left pane, find the SSL Certificate section. We will be able to get information about the existing certificate.
Click Replace Certificate:
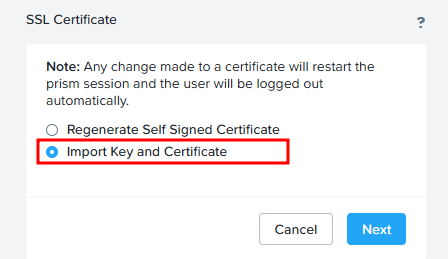
Click “Import Key and Certificate”:
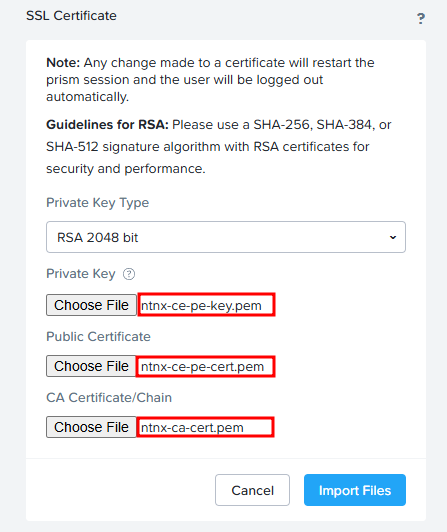
Choose certificate files and click “Import Files”:
You will receive a message:
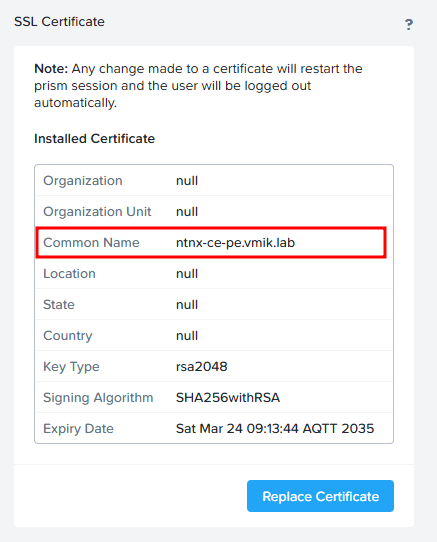
The certificate has been successfully updated, and the prism session is in the process of restarting. This page will automatically refresh shortly.If the browser page does not automatically refresh, do so in a few minutes. We will see a new certificate:
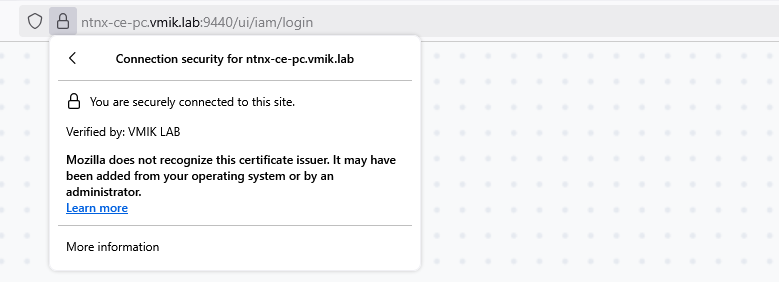
In addition, we can see the same using the browser information:
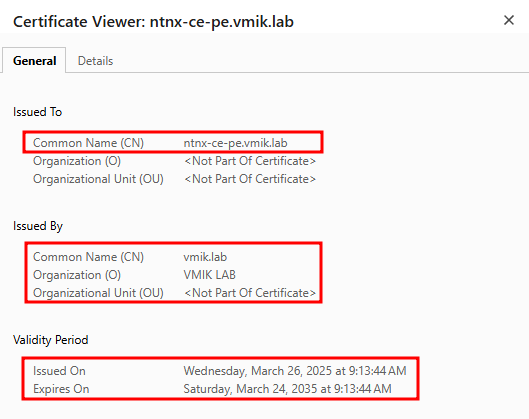
Issued To – this is our Prism certificate; Issued By – this is our CA certificate.
Replacing the certificate in Prism Central
The overall procedure is the same as in the Prism Element.
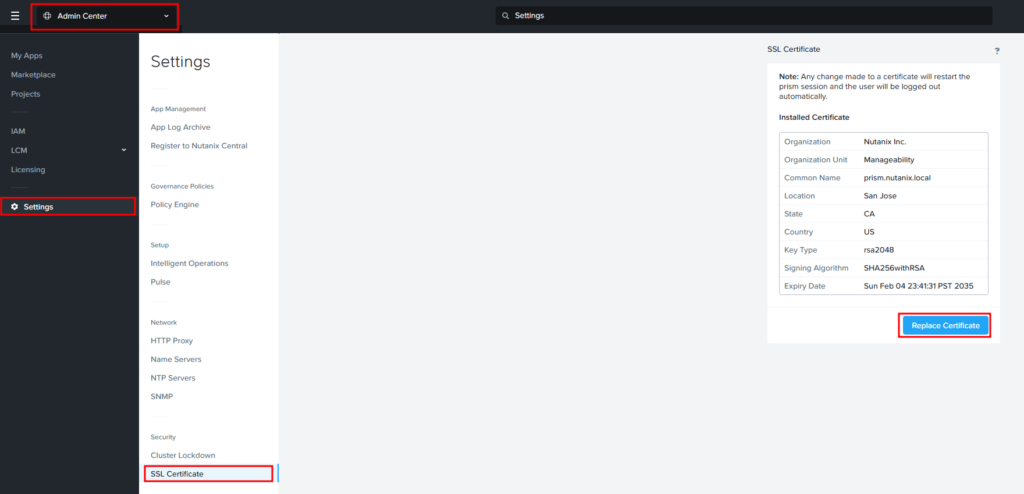
For Prism Central 2024.x, we need to open the Admin Center and Settings menu. From the settings, select the SSL Certificate section and then click “Replace Certificate”:
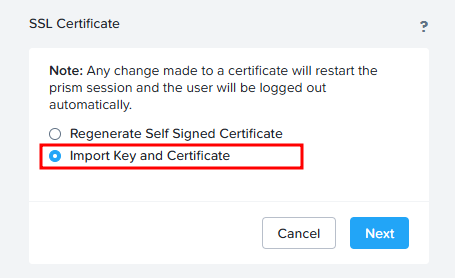
Click “Import Key and Certificate”:
Choose certificate files and click “Import Files”:
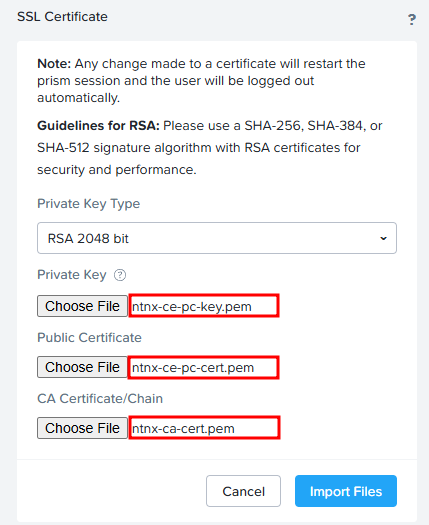
You will receive a message:
The certificate has been successfully updated, and the prism session is in the process of restarting. This page will automatically refresh shortly.If the browser page does not automatically refresh, do so in a few minutes. We will see a new certificate:
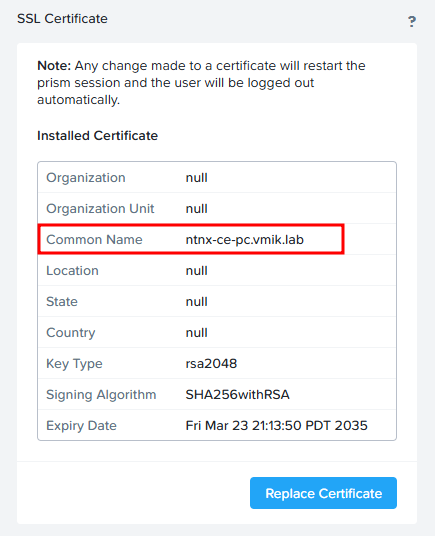
In addition, we can see the same using the browser information:
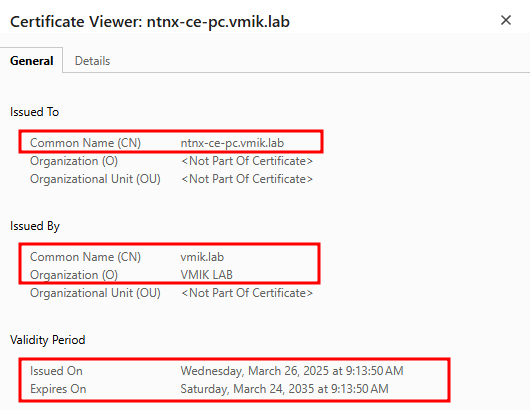
This is how easily we can replace Prism’s certificates.
What to do next with self-signed certificates?
This example uses self-signed certificates, so the web browser will warn you when you log in to Prism.
The simplest method to solve this issue is to add our CA certificate to the Trusted Root Certification list in the OS.
In this example, I use Rocky Linux and try to connect to the Prism web interface:
 [root@linux-host certs]# curl -vv https://ntnx-ce-pe.vmik.lab:9440
*   Trying 192.168.22.200:9440...
* Connected to ntnx-ce-pe.vmik.lab (192.168.22.200) port 9440 (#0)
* ALPN, offering h2
* ALPN, offering http/1.1
*  CAfile: /etc/pki/tls/certs/ca-bundle.crt
* TLSv1.0 (OUT), TLS header, Certificate Status (22):
* TLSv1.3 (OUT), TLS handshake, Client hello (1):
* TLSv1.2 (IN), TLS header, Certificate Status (22):
* TLSv1.3 (IN), TLS handshake, Server hello (2):
* TLSv1.2 (IN), TLS header, Certificate Status (22):
* TLSv1.2 (IN), TLS handshake, Certificate (11):
* TLSv1.2 (OUT), TLS header, Unknown (21):
* TLSv1.2 (OUT), TLS alert, unknown CA (560):
* SSL certificate problem: self-signed certificate in certificate chain
* Closing connection 0
As you can see, I received an error:
* SSL certificate problem: self-signed certificate in certificate chainLet’s fix this error by adding our CA certificate to the trusted list. To do this we need to copy our CA certificate to the /usr/share/pki/ca-trust-source/anchors/ directory:
[root@linux-host certs]# cp ./ntnx-ca-cert.pem /usr/share/pki/ca-trust-source/anchors/And update CA trust certificates:
[root@linux-host certs]# update-ca-trustNow cURL will not show any errors:
[root@linux-host certs]# curl -vv https://ntnx-ce-pe.vmik.lab:9440
* Server certificate:
*  subject: CN=ntnx-ce-pe.vmik.lab
*  start date: Mar 26 04:13:44 2025 GMT
*  expire date: Mar 24 04:13:44 2035 GMT
*  subjectAltName: host "ntnx-ce-pe.vmik.lab" matched cert's "ntnx-ce-pe.vmik.lab"
*  issuer: C=KZ; ST=Aqm; L=Default City; O=VMIK LAB; CN=vmik.lab
*  SSL certificate verify ok.
As you can see, the certificate is ok!
Please note: this example is based on an RHEL-like distribution. For Ubuntu, follow the current instruction.
For Windows, we can use certmgr to add CA certificates to the trusted list.
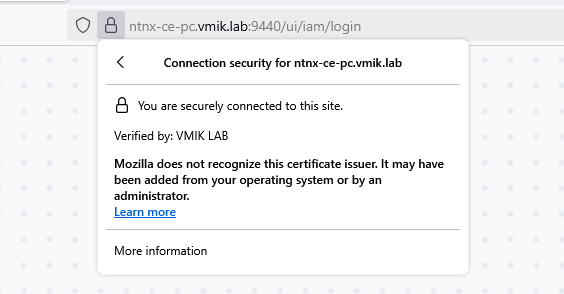
Now your browser will not warn you because the Windows machine trusts the certificate authority you added, and all certificates signed using this certificate authority are considered valid:
![]()
