Did you know about Veeam Managed Hardened Repository ISO? This is a Rocky-based Linux distro, which is already pre-hardened to comply with DISA STIG requirements. In addition, Veeam Hardened Repository ISO provides simplified installation and management; there is a text-based user interface that includes all the basic features needed to configure OS and use it as a Veeam Repository.
You can get more information about features, requirements, and limitations on the Veeam R&D Forum.
With the build 0.1.17, this ISO left the technical preview state and got the production-ready status, including Veeam Experimental Support, so you can consider putting it to use.
In this article we will look at how to deploy a server, using Veeam Hardened Repository ISO and how to create a hardened repository using this server.
Before we begin, let’s look at the main requirements and limitations:
- Requires at least two separate disks (100GB minimum). First and smallest used for the OS, all other disks forming an LVM to use the entire capacity as a single repository;
- A physical or virtual server can be used, but the second option is not recommended to reduce the attack surface;
- UEFI-only systems;
- No FC or iSCSI for now, only local disks;
- Re-installing the base OS while keeping backups is not currently possible.
For more information please visit an R&D thread.
How do I get the ISO?
Option 1 – Use the Customer portal. Select Products – Extensions and Others – Veeam Hardened Repository ISO.
Option 2 – Using trial download. Select Veeam Data Platform – Extensions and Others – Veeam Hardened Repository ISO.
Installation and initial configuration
Although it’s not recommended, in this example I will use a virtual machine with two disks. First – 100GB and Second – 120GB.
Connect the ISO to the server and run the installer:
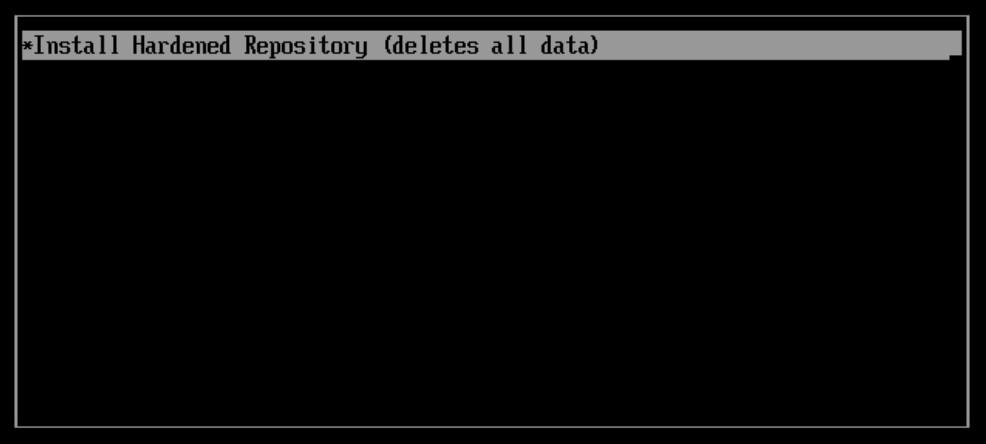
Next, we will see a simplified RHEL-based installer:
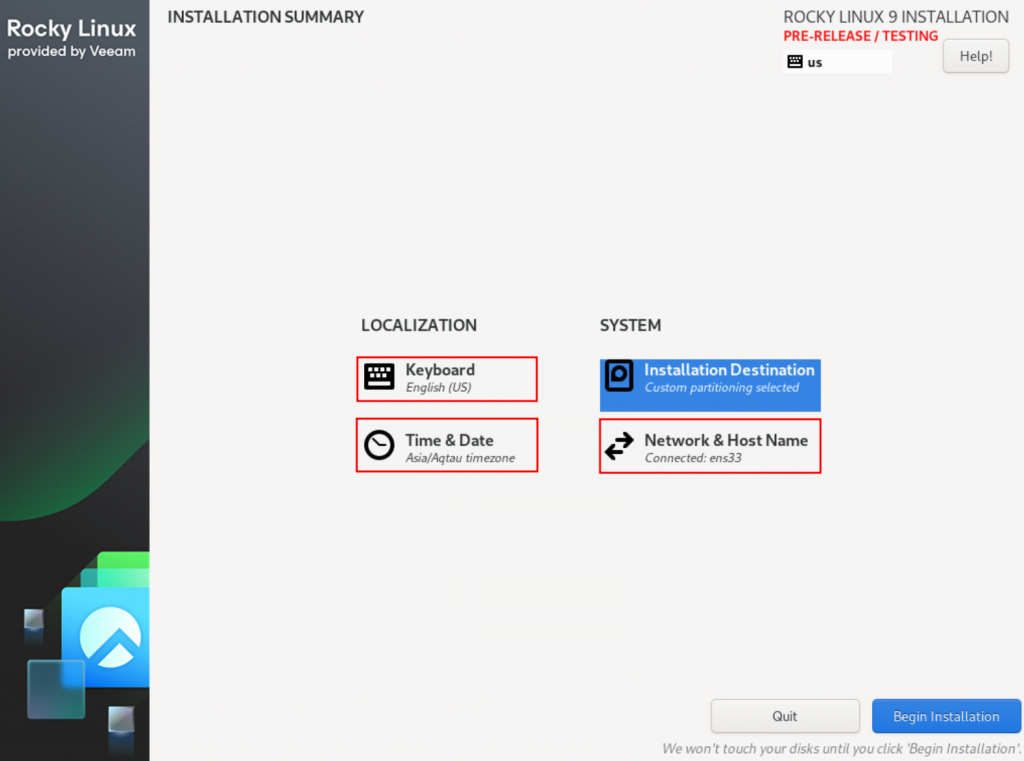
All we need to do is:
- Select Keyboard (only one option is available at this moment);
- Set an IP address and hostname;
- Set timezone and NTP servers. Better to do it after setting up the IP.
We don’t need to configure the installation destination. The system disk (smallest) will be automatically partitioned, and all other disks will be used as storage for the repository.
Click Begin Installation to install the OS. You may notice that it’s also not required to create a user and set any password.
After the reboot, we need to set the admin password. The default login is vhradmin, and the default password is vhradmin:
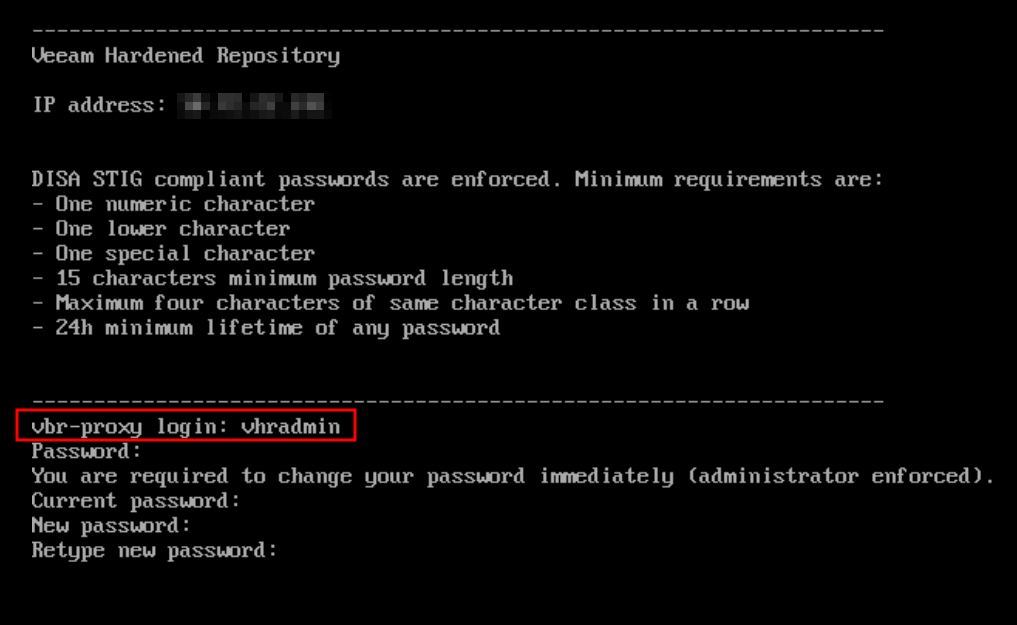
On the top of the screen, you can see the DISA STIG password requirements.
After changing the password, we will be able to log in using the vhradmin account. Accept EULA:
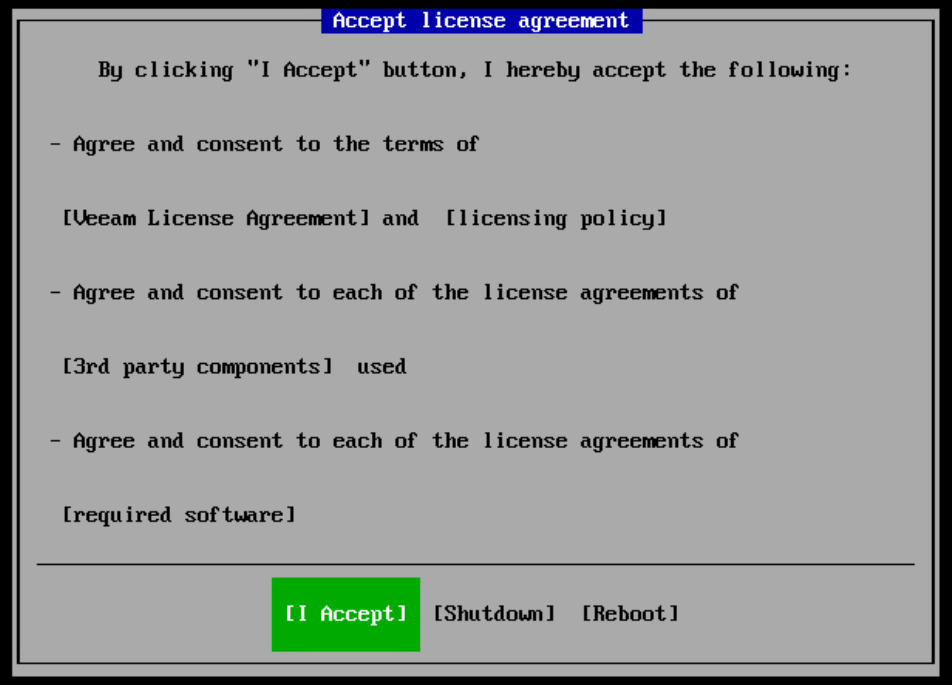
And we can see the configuration menu:
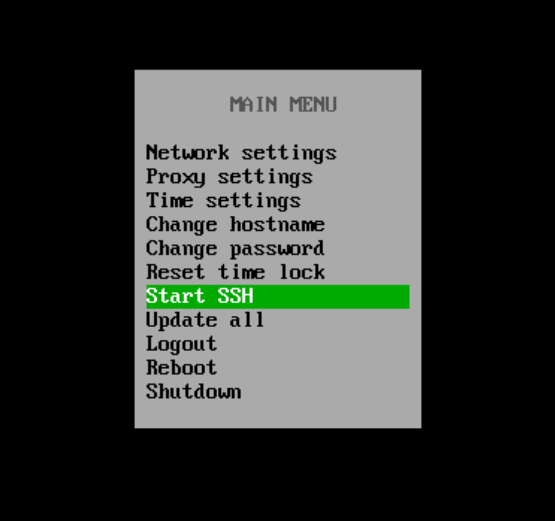
In this menu, we can configure basic settings as well as update the server. One thing we will use now is Start SSH. By default, SSH is disabled for security reasons, and it’s ok because the Veeam Hardened Repository uses SSH only once, during initial configuration. All other communications use Veeam Transport Service.
Select Start SSH and hit enter. A new window will be opened:
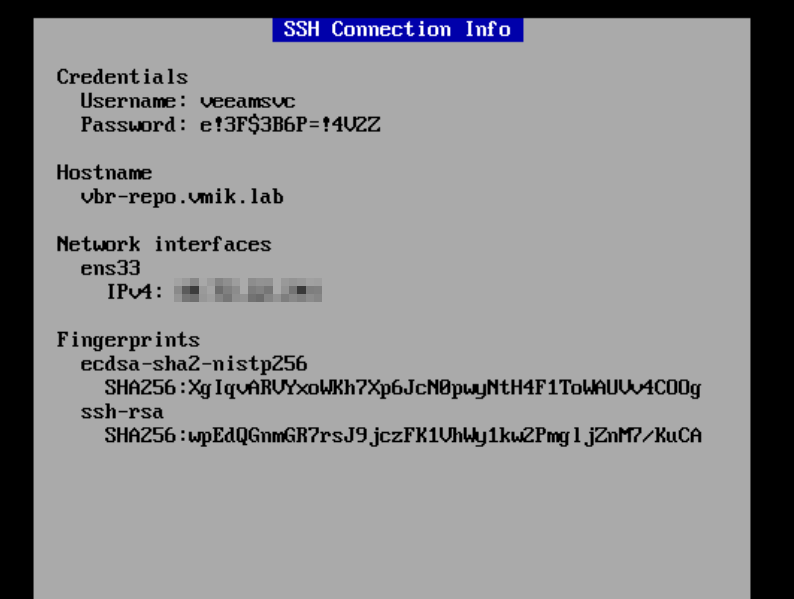
Look for credentials: username and password. Those credentials should be used during connection to the repository from the Veeam server. Write it somewhere.
Adding the Repo server to the infrastructure
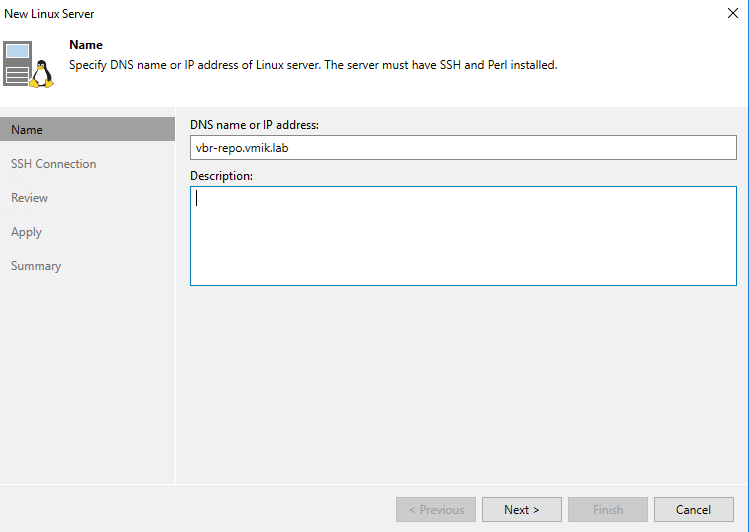
When we’ve enabled the SSH on the Repo, it’s time to open the Veeam console and add a new Linux server to the infrastructure.
Provide the server DNS or IP:
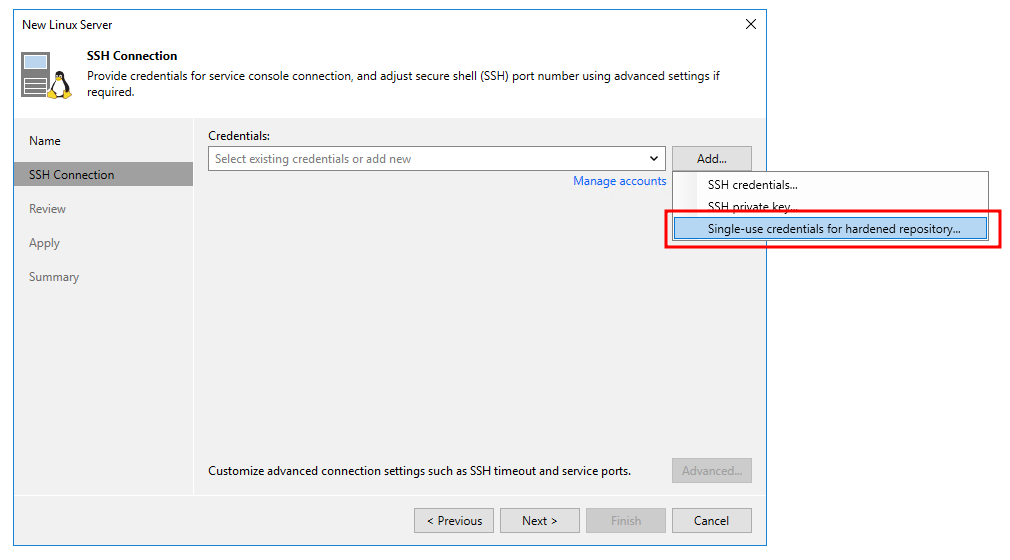
Add an account, using single-use credentials
One thing to remember is that when we add a Linux server for the Hardened Repository, we must use single-use credentials. This type of credential is used once and is not stored in the Veeam configuration database.
Provide the veeamvsc (Not vhradmin!) account and password you gathered while enabling SSH:
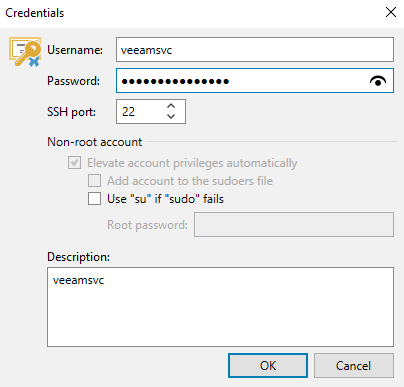
Now move forward to finish adding the server. You shouldn’t face any issues.
After adding a Linux server to the Veeam infrastructure, connect to the repo and stop the SSH service. You don’t need it anymore:

Creating a repository
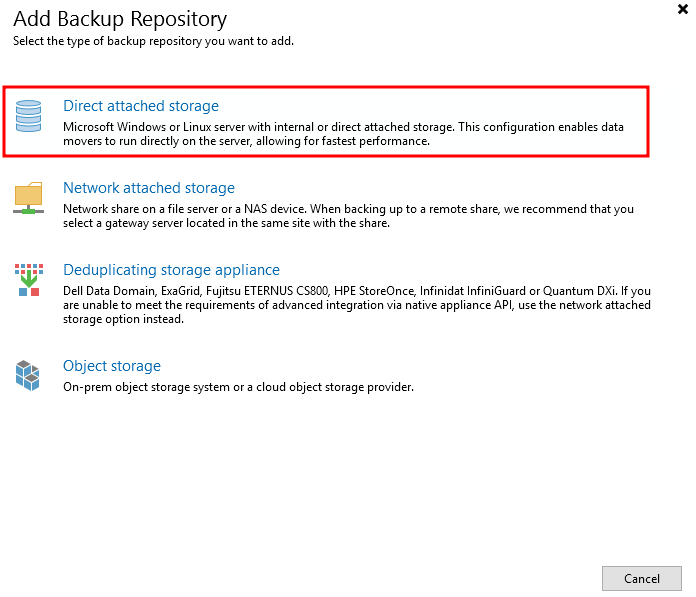
Now let’s add a repository as we always do, using direct attached storage:
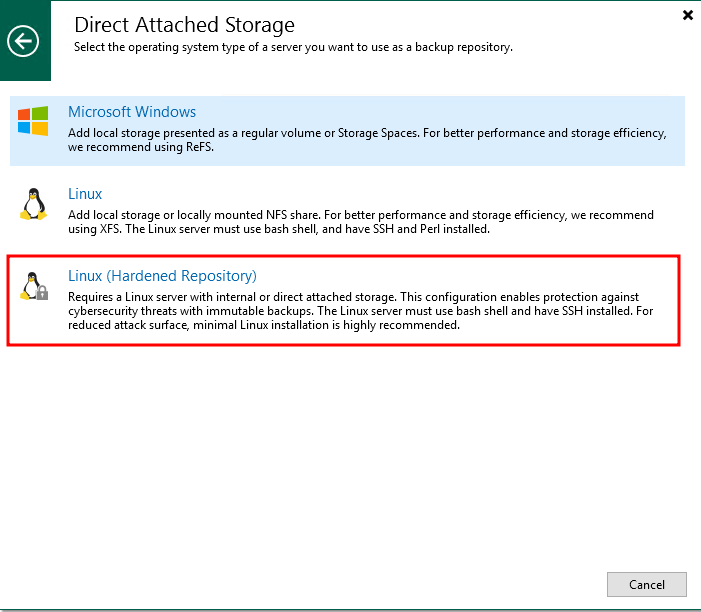
Select Linux (Hardened Repository):
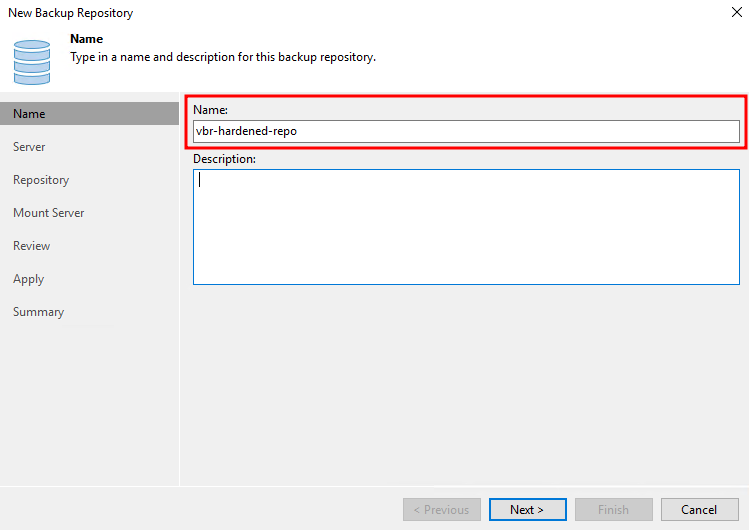
Provide repository name:
Next, select a previously added Linux server and click the Populate button to display available partitions:
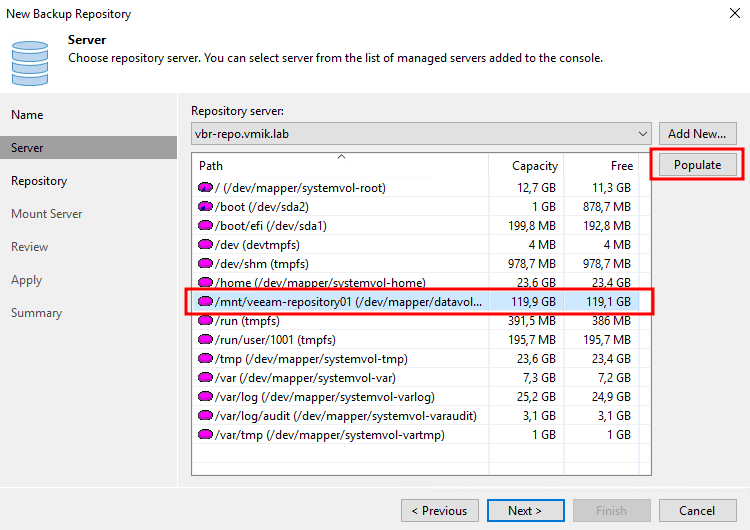
Among all the paths, we should use /mnt/veeam-repository01 for the repository. Select it and click next.
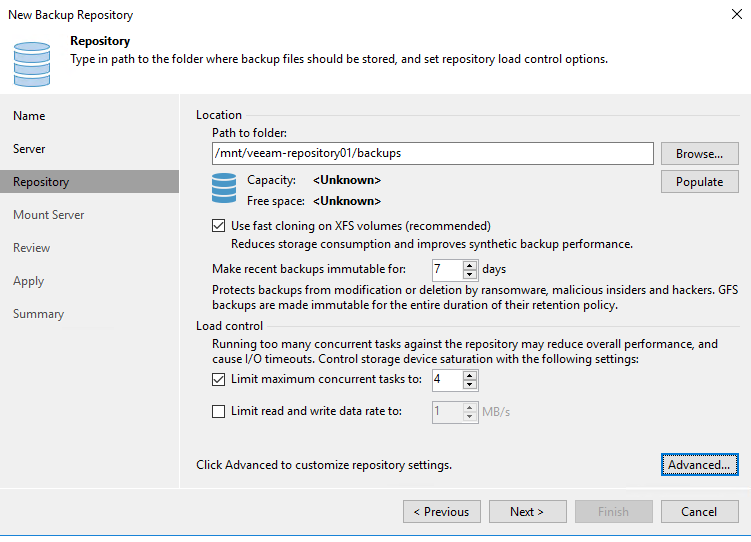
Next screen we can configure immutability (7 days minimum), XFS fast cloning (enabled by default), max tasks, and so on:
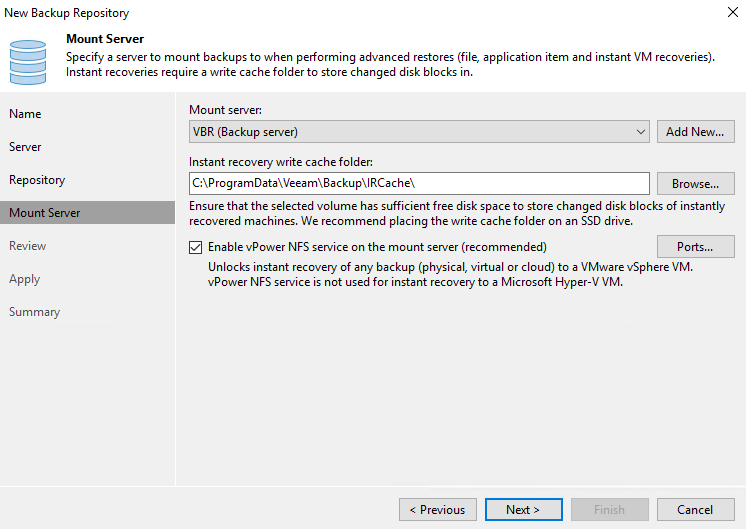
Next, we should configure the Mount Server and vPowerNFS server; it still should be a Windows machine:
Review and apply the settings, and here it is: our Hardened Repository deployed using Veeam prepared ISO:

In conclusion
As you can see, Veeam Hardened Repository ISO significantly decreases the time to deploy a new Linux repository and reduces the amount of Linux skills you need to master. All configurations can be done using TUI, and you don’t even need a shell. And among all this simplicity, it is really a hardened repository, compliant with the DISA STIG.
Suppose you use a physical server without external storage. In that case, I believe that this repository Image can be a standard, and you should give it a try, especially because you can contact Support if you have any issues.
I wish this project good luck and hope to see FC and iSCSI options in the future.
![]()
Hi!
Is it possible to have a second folder in /mnt/ (e.g. veeam-repository02) so that i can add a second repository (non immutable) with the same user so that i have a repo for testing or tempstorage (backupcopy space for tapeout)?
And if yes, how you will do that?
Hello!
Yes, you can create a non-immutable (not hardened) repository in the folder /mnt/veeam-repository01
In my lab I have two repos: /mnt/veeam-repository01/hrdnd-repo-01 and /mnt/veeam-repository01/normal-repo-01. Both repositories will consume the same storage space, but one repo will be without immutability enabled.
The procedure to add a non-hardened repository is the same as a usual Veeam repo. All you have to do is select a Linux repo (not hardened) and set another folder name after veeam-repository01, for example, veeam-repository01/test-bkp