Today, AI is everywhere, and everyone wants a VM with a GPU adapter to deploy/test/play with AI/ML. Although it is not a problem to add a PCI device to the VM (whole GPU), sometimes it can be overkill.
For example, running a small model requires only a small amount of GPU memory, while our server is equipped with modern NVIDIA H200, B200, or even B300 GPUs that have a large amount of memory.
And this is where vGPU comes into play. vGPU allows us to divide a GPU into smaller pieces and share it among a number of VMs located on the host.
In this article, we will focus on how to configure ESXi hosts to run VMs with the vGPU support in vSphere 8.0 Update 3.
First and foremost: vGPU functionality requires an active NVIDIA AI Enterprise license. Each VM that uses vGPU with the installed NVIDIA Grid driver will contact the license server and acquire a license. The GPU will work without a license for a while, but performance will degrade over time.
Today the overall procedure requires the following steps:
- Install NVIDIA AI Enterprise vGPU driver, and NVIDIA GPU monitoring and management daemon to ESXi hosts;
- Perform some additional ESXi host GPU configurations;
- Create a VM with added vGPU device;
- Install NVIDIA Grid Driver into the VM;
- License the vGPU feature.
The first thing we need to do is to download necessary NVIDIA VIBs, which must be installed to the ESXi hosts with GPU adapters.
To download the software, we need to have an active NVIDIA AI Enterprise subscription. Necessary packages can be downloaded from the NVIDIA NGC Catalog or from the Licensing Portal download section.
In my case, I downloaded an archive called NVIDIA AI Enterprise 7.1 Software Package for VMware vSphere 8.0 from the Licensing Portal:
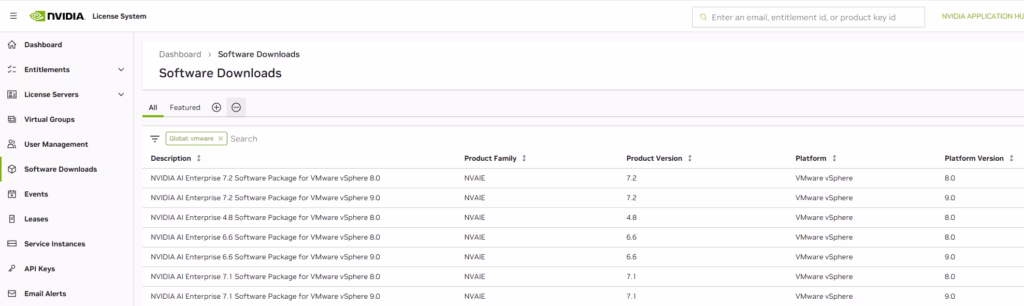
The archive contains necessary ESXi VIBs, as well as VM guest drivers for Windows and Ubuntu/RHEL operating systems.
In the archive, we will find two VIB files (your versions may be different):
NVD-AIE-800_580.82.02-1OEM.800.1.0.20613240.zip – ESXi Host Driver
nvd-gpu-mgmt-daemon_580.65.05-0.0.0000.zip – vGPU Manager
Both VIBs must be installed on the ESXi hosts. To do that, the simplest way is to configure Lifecycle Manager and add those packages to the host’s image.
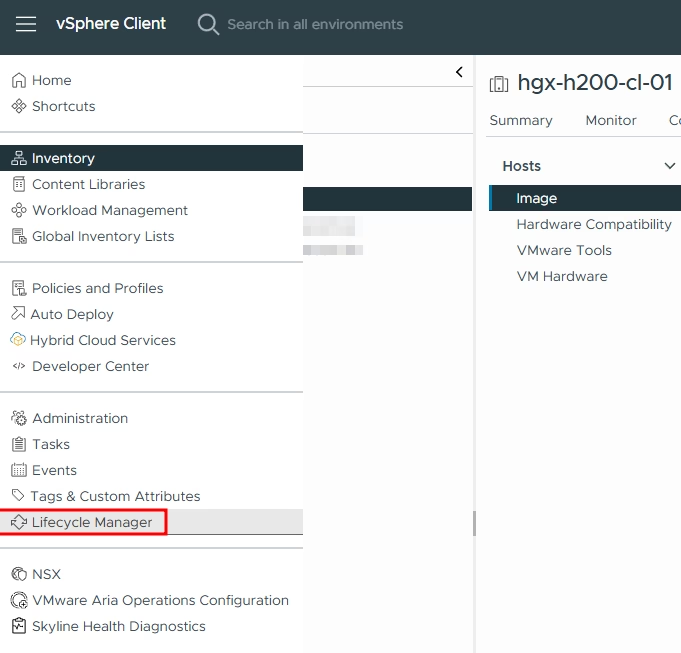
Open Lifecycle Manager:
Select ACTIONS – Import Updates:
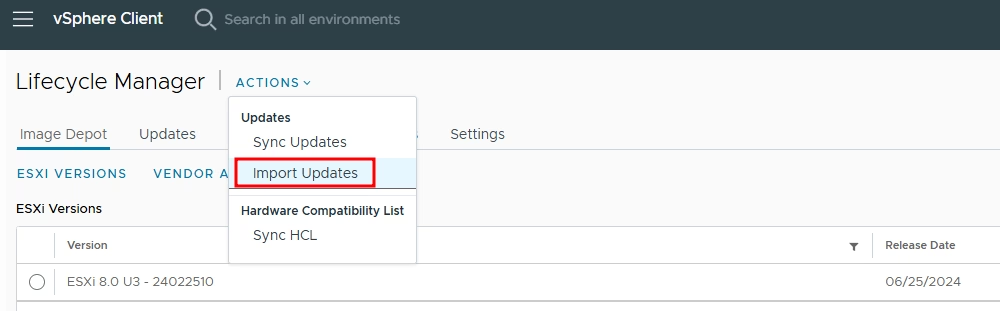
Uploaded both VIBs, we will see that two new components were added to the LCM:

I assume that you are familiar with updating ESXi hosts using a single-cluster image, but if you do not, check out the related article.
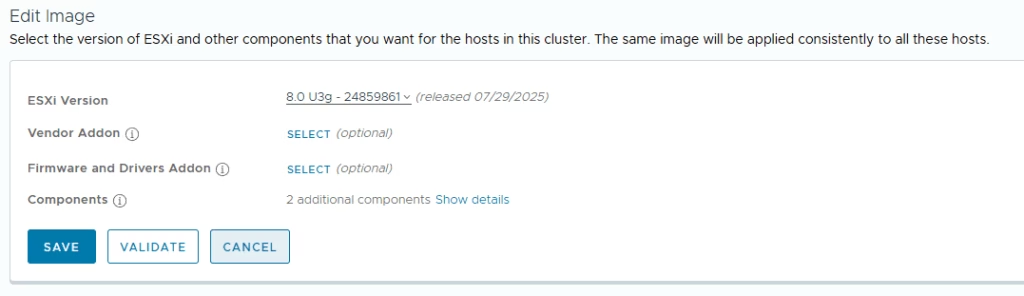
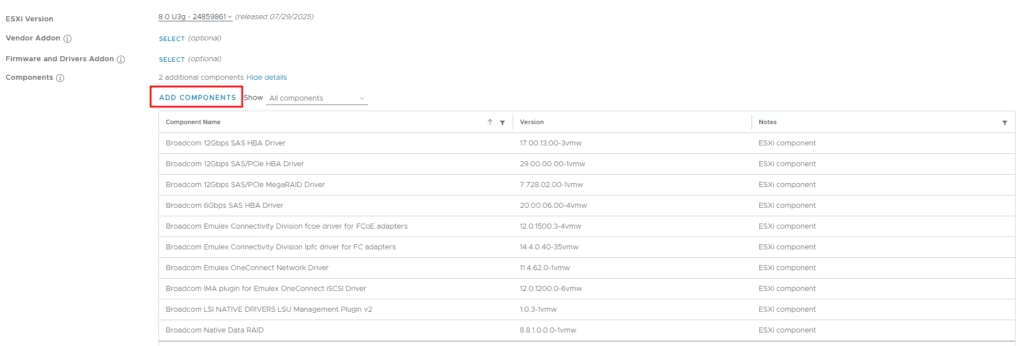
To inject NVIDIA packages into the image, we need to edit the cluster image and add them in the components section:
Click “ADD COMPONENTS”:
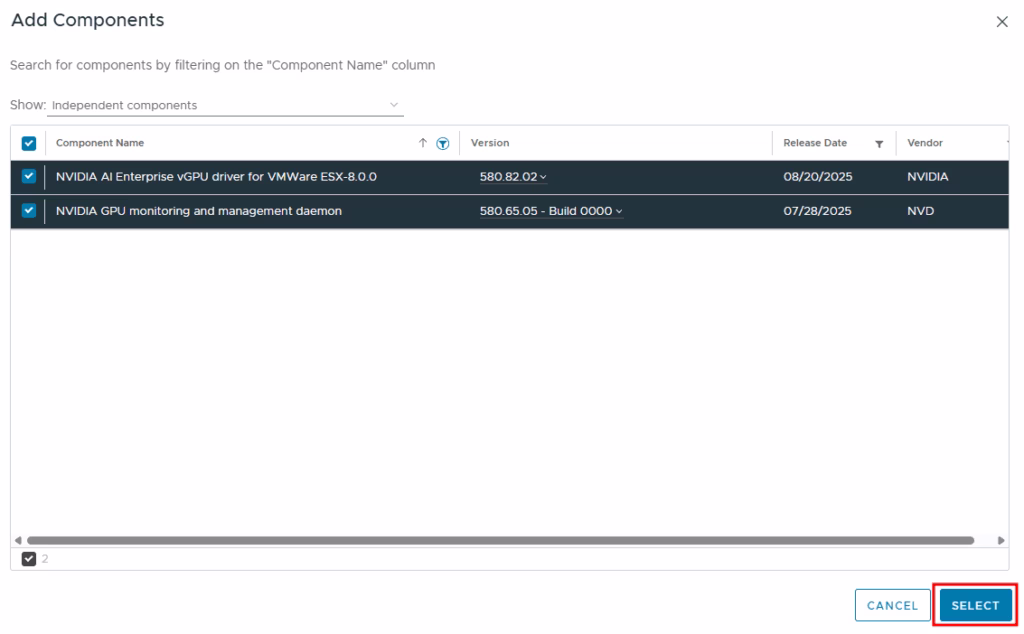
And select both previously loaded NVIDIA Packages – It should be the enterprise driver and the GPU manager:
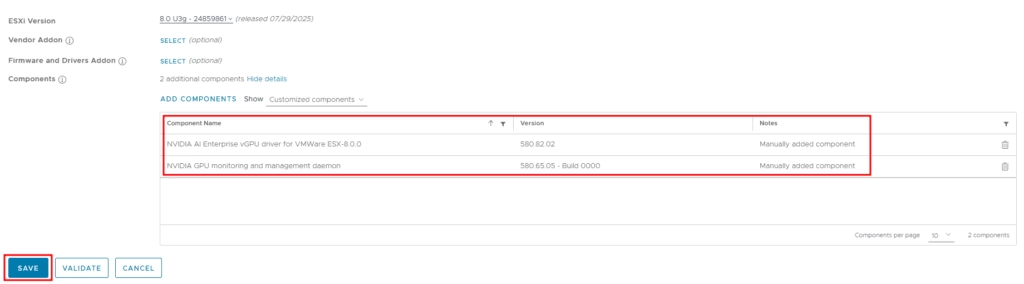
Now our image contains NVIDIA components as well. Click Save:
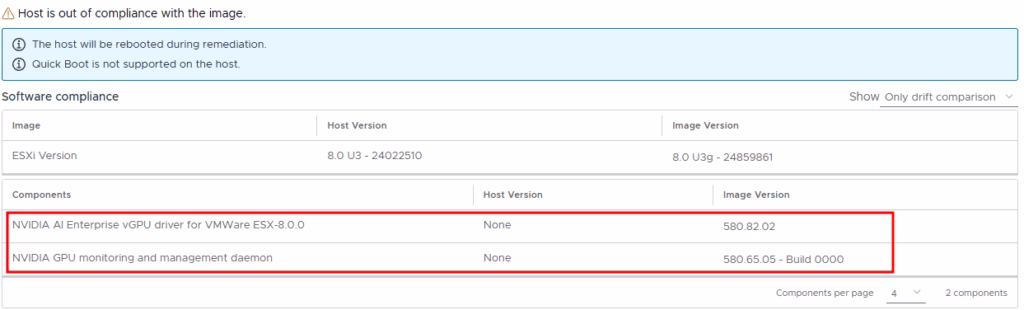
After saving the image, the cluster compliance check will run automatically. We can see that hosts are out of compliance and do not have installed NVIDIA components:
Start the remediation process. After remediation, the simplest method to verify that the driver is installed is to run the nvidia-smi command from the host:
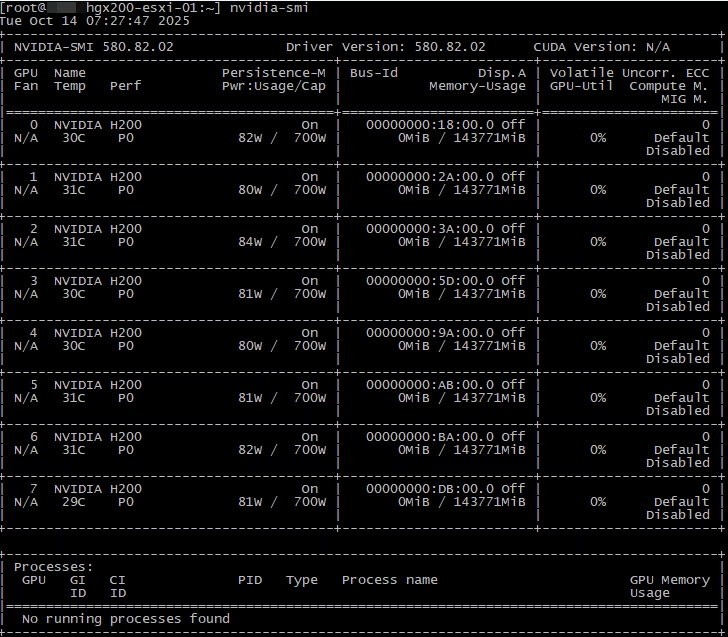
You can see that all eight H200 GPUs are available, and the version of the driver is the same as in the VIB package.
The next step is to adjust the host’s graphic settings in the ESXi hardware section. Change each GPU’s “Configured Type” from “Shared”:
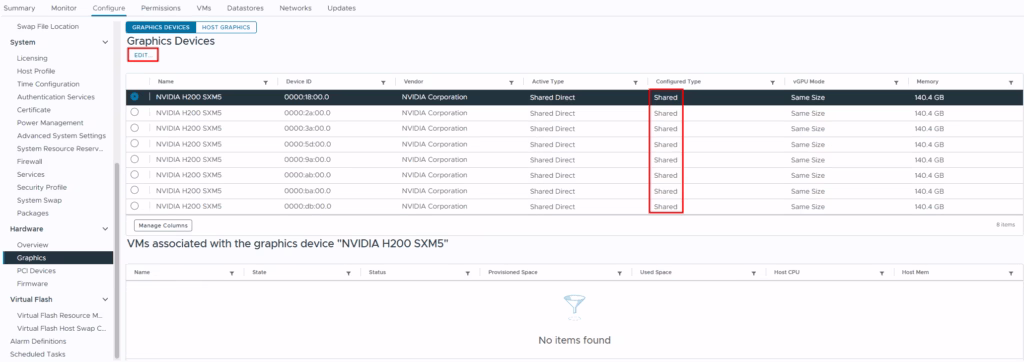
To “Shared Direct”:
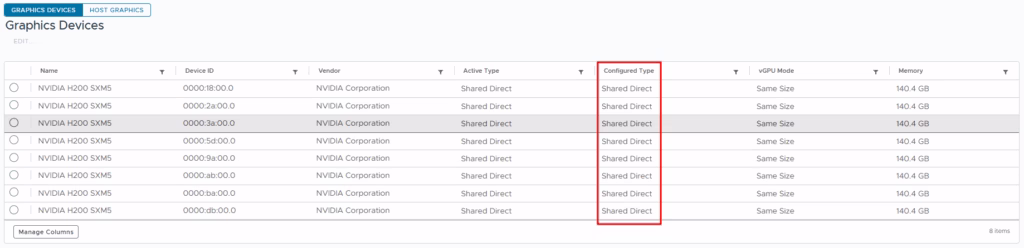
From the screenshots above, you may notice that all GPUs are identifying correctly. Without the driver, we will not see such details.
At this moment, we have finished with the host’s initial configuration. Now, let us create the first vGPU-enabled VM.
To create a VM with a vGPU, we need to add a PCI Device to the VM:
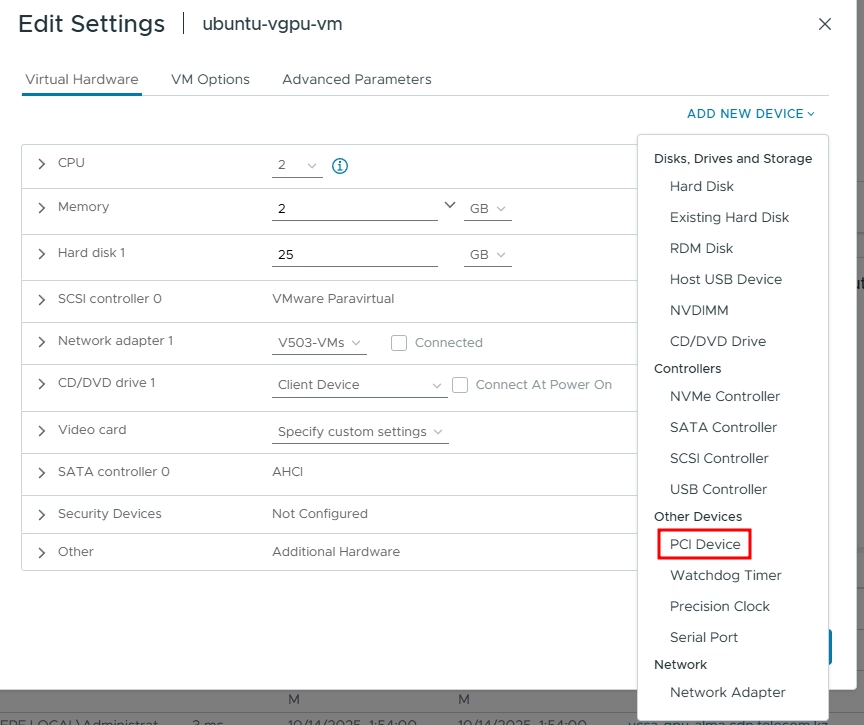
In the following window, we can see many vGPU profiles we can attach:
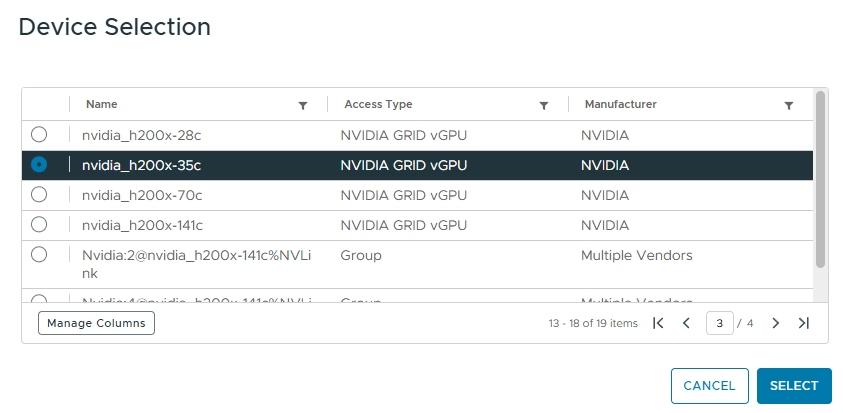
This list will depend on the underlying GPU hardware and topology. However, in short.
For example, you can see profiles like nvidia_h200x-1-35c and nvidia_h200x-35c. From the first look, there is no difference, but there is.
35c in the end, meaning that your vGPU will have 35 GB of memory. However, additional digits in the center of the profile name mean that your vGPU will use MIG sharing, while the shorter-named profile will use time-slicing sharing.
MIG – is a hardware-based feature, available in the modern GPUs, allowing you to physically divide the GPU up to 7 parts. Each part will contain its own memory and compute resources.
While time-slicing is the software feature allowing multiple VMs to use the same GPU compute in order. The amount of time each VM has access to the GPU is configured by the policy.
This is a large topic, and I will not dive into it in the article, but you need to read the pros and cons of each method to choose the right profile, depending on the workload type. Check this link for more information.
One additional type of profile is Group. A group – is a number of GPUs connected using NVLink and/or NVSwitch.
For example, a group of four GPUs can look like Nvidia:4@nvidia_h200x-141c%NVLink.
If you need more than one vGPU, you definitely should use groups, because it will take into account the high-speed interconnect between GPUs. By the way, the system will not allow you to add more than one vGPU without using a group. It can be overridden, but only if you know what you’re doing.
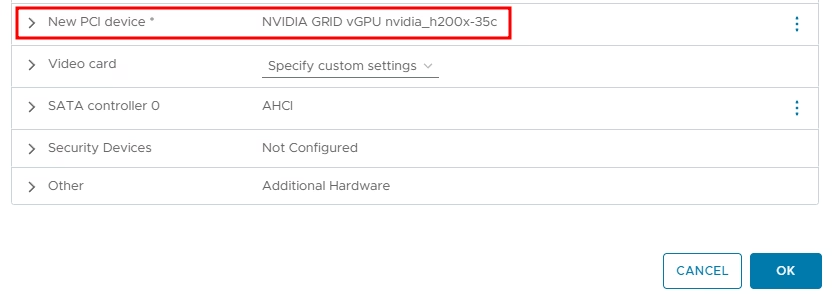
After selecting the profile, we can see that a new PCI device has been added to the VM:
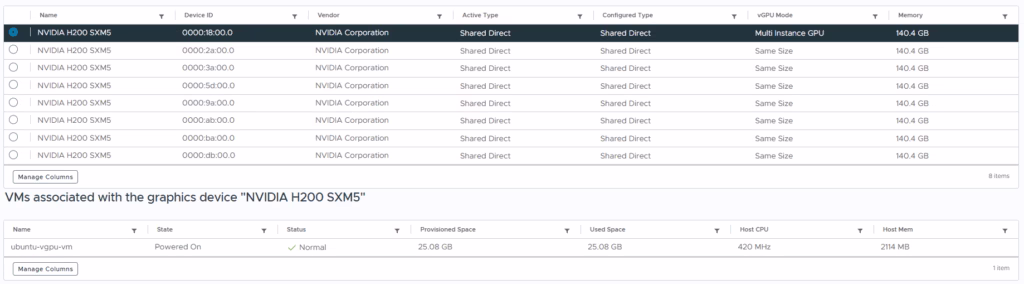
In the host’s GPU list, we can see VMs associated with GPUs:
After powering on the VM, we can verify the PCI devices:
gpu@ubuntu-gpu-vm:~$ lspci | grep NVIDIA
03:00.0 3D controller: NVIDIA Corporation GH100 [H200 SXM 141GB] (rev a1)
The next step is to copy an NVIDIA Grid driver, which you can find in the previously downloaded package, to the VM and install it:
gpu@ubuntu-gpu-vm:~$ sudo apt install /home/gpu/nvidia-linux-grid-580_580.82.07_amd64.debBy the way, one good practice is to disable the default Nouveau driver and reboot:
cat <<EOF | sudo tee /etc/modprobe.d/blacklist-nouveau.conf
blacklist nouveau
options nouveau modeset=0
EOF
sudo update-initramfs –u
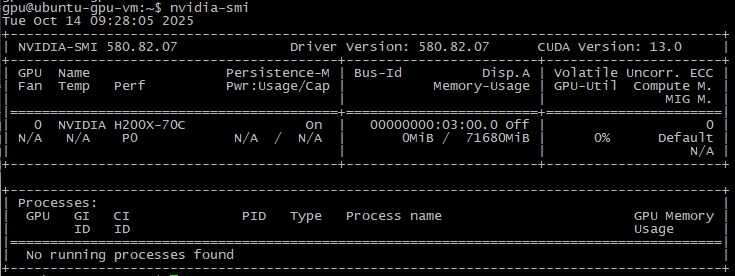
sudo rebootNow we can run the nvidia-smi command on the VM:
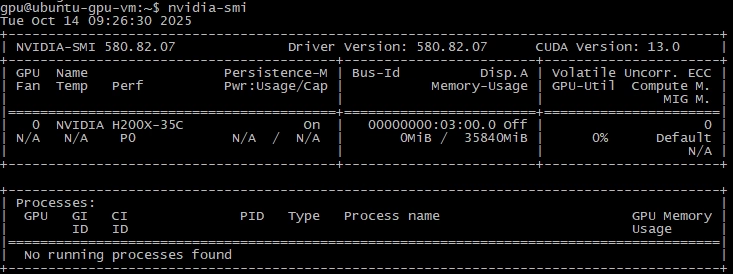
We see that we have one H200x GPU, with 35 GB of memory. Right, like the one we selected before.
The next step you should not forget is to license your vGPU by copying the NVIDIA License Server token to the VM and restarting the NVIDIA Gridd service. I will not cover this thing in the article, but I am considering writing a short post on preparing such vGPU-enabled VMs in the future.
If we need to change the vGPU size, we need to shut down the VM and select a new profile in the VM’s settings:
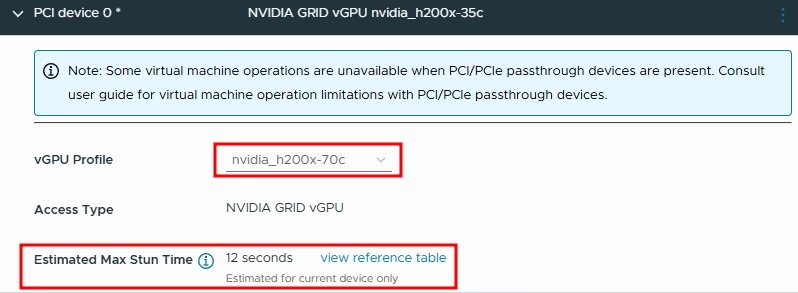
You can notice the estimated max stun time of the VM with the selected vGPU profile. The stun time depends on the vGPU size and utilization. The more resources you use – the larger the stun is.
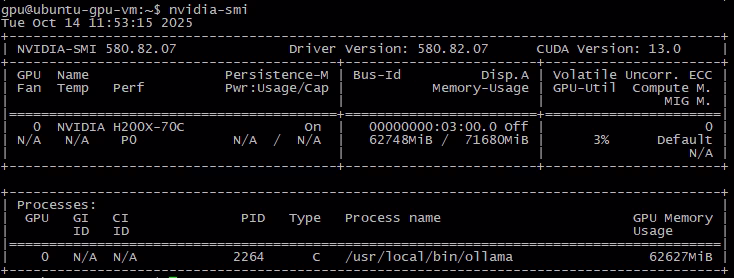
After changing the profile, using nvidia-smi, we see that our VM has 70 GB of GPU memory:
Now, just for a test, I run an Ollama instance and deploy a gpt-oss:120b model. From the VM we can see an Ollama process consuming a part of GPU memory:
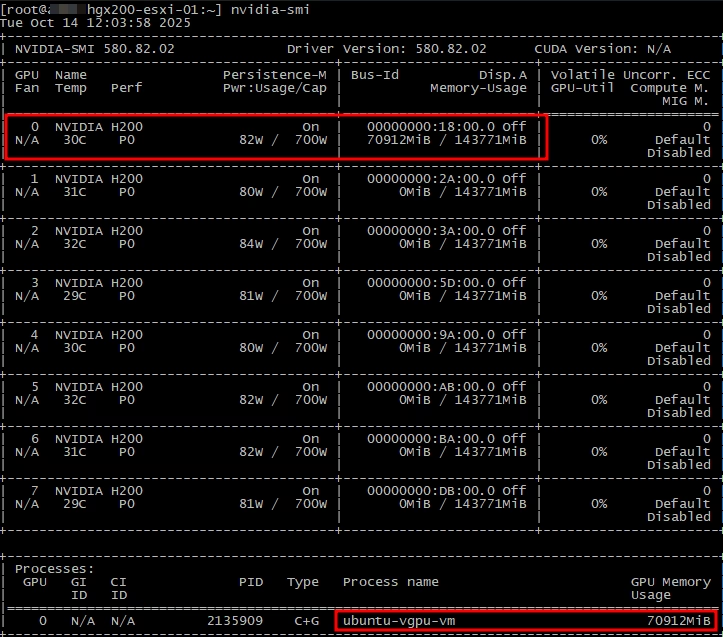
If we use the same command from the host, we will see a VM process consuming physical GPU memory:
To verify the stun time, I have tried to move this VM with the loaded gpt-oss model between two hosts, and in my case, the stun time was about a second, and I lost about one ping to the VM.
In conclusion:
This is the way to enable vGPU in the VMware vSphere 8 environment. To be honest, I am new to this field and want to say sorry for any misinformation you may find in this post. I’m considering posting more on this topic in the future, so stay tuned.
![]()