I had an opportunity to work with a reComputer J20 (based on NVIDIA Jetson Xavier NX), and one of the tasks I faced was reinstalling the OS because I killed an existing one 🙂
Although the best and recommended way is to use a laptop with installed Linux, I don’t have one, and in this article I will show my way of flashing this device from a Windows PC using WSL.
Disclaimer: Follow these steps at your own risk. It is easy to brick the device, and flashing always wipes all existing data.
If you are a happy owner of the Seeed Studio device, you should refer to the official guide, which describes all the processes and nuances.
Do not forget, the main purpose of this article is to demonstrate nuances of connecting the device to the WSL and not the demonstration of the flashing procedure for your specific device. Refer to the official manual first.
For the next steps, I assume that you have configured WSL2. I will use the Ubuntu distribution.
When you connect the Jetson Xavier NX to the PC using the micro-USB cable, usually you see a new “COM” device and can connect to it using PuTTY’s serial connection. To flash the device, you should run it in Recovery Mode.
This procedure is described in the manual I’ve provided above, but in short, you should:
1. Find a jumper.
2. Power off your device;
3. Connect FC REC and GND using jumpers. In my case I set a double jumper to pin 3 and 4;
4. Connect your device using micro-USB cable to the PC;
5. Power on the device.
This time, instead of a new “COM” device, you should see an unknown APX device in the Windows hardware manager.
After the “hardware” part, the next task is to pass this device to WSL.
If you open WSL Ubuntu and type “lsusb,” you will see something like this:
lsusb
Bus 002 Device 001: ID 1d6b:0003 Linux Foundation 3.0 root hub
Bus 001 Device 001: ID 1d6b:0002 Linux Foundation 2.0 root hub
To connect the USB device to the WSL instance, we can use usbipd-win. Check the Microsoft blog post for more info about this utility.
To install the software, open PowerShell and type:
winget install usbipdAfter installing, enter the usbipd list command, and you will see a list of your USB devices:
usbipd list

BUSID  VID:PID    DEVICE   STATE
1-14   0955:7e19  APX      Not shared
You should see an APX device, among others. Notice the BUSID; in my case, the number is 1-14.
Bind APX device:
usbipd bind --busid 1-14Attach APX device to the WSL:
usbipd attach --wsl --busid 1-14 --auto-attachIn this case we’re using “auto-attach” which will attach this device to the WSL automatically when the device is plugged and unplugged.
During flashing, the device can connect and disconnect, so usbipd will attach it automatically, and this is an essential step. You must not close the PowerShell window during the procedure.
Now open WSL and type lsusb again; you should see a new USB device:
lsusb
Bus 002 Device 001: ID 1d6b:0003 Linux Foundation 3.0 root hub
Bus 001 Device 002: ID 0955:7e19 NVIDIA Corp. APX
Bus 001 Device 001: ID 1d6b:0002 Linux Foundation 2.0 root hub
The next step is preparing the software. Follow this link to download the software for your device. Twice check the compatibility of the software with your hardware.
For example, the latest supported version for Jetson Xavier NX is 35.6.4.
You need to download two files from the Drivers section: Driver Package (BSP) and Sample Root Filesystem. As a result, you should have two files:
Jetson_Linux_R35.6.4_aarch64.tbz2
Tegra_Linux_Sample-Root-Filesystem_R35.6.4_aarch64.tbz2
All the next steps will be done from the WSL user’s home directory. It’s also an essential step.
Copy both packages to the user’s home directory:
cd ~
mv /mnt/d/Jetson_Linux_R35.6.4_aarch64.tbz2 ~
mv /mnt/d/Tegra_Linux_Sample-Root-Filesystem_R35.6.4_aarch64.tbz2 ~
Extract packages in the following order:
sudo tar xf ./Jetson_Linux_R35.6.4_aarch64.tbz2
cd Linux_for_Tegra/rootfs/
sudo tar xpf ../../Tegra_Linux_Sample-Root-Filesystem_R35.6.4_aarch64.tbz2
cd ..
After extracting, install additional required packages, which may be absent in your system:
sudo apt-get install qemu-user-static lz4 libxml2-utilsRun apply_binaries script:
sudo ./apply_binaries.sh

Selecting previously unselected package nvidia-l4t-x11.
Preparing to unpack .../nvidia-l4t-x11_35.6.4-20260126234748_arm64.deb ...
Unpacking nvidia-l4t-x11 (35.6.4-20260126234748) ...
Selecting previously unselected package nvidia-l4t-xusb-firmware.
Preparing to unpack .../nvidia-l4t-xusb-firmware_35.6.4-20260126234748_arm64.deb ...
..
Removing QEMU binary from rootfs
Removing stashed Debian packages from rootfs
L4T BSP package installation completed!
Disabling NetworkManager-wait-online.service
Disable the ondemand service by changing the runlevels to 'K'
Success!
Now we are ready to reinstall the device. Make sure that the device is attached with the –auto-attach parameter and you didn’t close PowerShell console.
Start flashing the device (this command may vary between the versions and devices; make sure to check your device documentation):
sudo ./flash.sh jetson-xavier-nx-devkit-emmc mmcblk0p1If everything is ok, you should see the output like this:
..
[  64.5713 ] Writing partition mb1 with mb1_t194_prod_aligned_sigheader.bin.encrypt [ 249008 bytes ]
[  64.5724 ] [................................................] 100%
[  64.6458 ] Writing partition mb1_b with mb1_b_t194_prod_aligned_sigheader.bin.encrypt [ 249008 bytes ]
[  66.4108 ] [................................................] 100%
[  66.4612 ] Writing partition spe-fw with spe_t194_sigheader.bin.encrypt [ 95232 bytes ]
[  68.2342 ] [................................................] 100%
[  68.2760 ] Writing partition mb2 with nvtboot_t194_sigheader.bin.encrypt [ 207584 bytes ]
[  68.9534 ] [................................................] 100%
[  68.9861 ] Writing partition mts-preboot with preboot_c10_prod_cr_sigheader.bin.encrypt [ 24016 bytes ]
[  70.4533 ] [................................................] 100%
[  70.4793 ] Writing partition mts-mce with mce_c10_prod_cr_sigheader.bin.encrypt [ 145184 bytes ]
[  70.6637 ] [................................................] 100%
[  70.6954 ] Writing partition mts-proper with mts_c10_prod_cr_sigheader.bin.encrypt [ 3429968 bytes ]
[  71.7325 ] [................................................] 100%
[  94.0898 ] Writing partition sc7 with warmboot_t194_prod_sigheader.bin.encrypt [ 55264 bytes ]
[  96.1013 ] [................................................] 100%
[  96.1155 ] Writing partition xusb-fw with xusb_sil_rel_fw [ 129024 bytes ]
..
[ 925.0564 ] Coldbooting the device
[ 925.0591 ] tegrarcm_v2 --ismb2
[ 925.1073 ] tegradevflash_v2 --reboot coldboot
[ 925.1079 ] Bootloader version 01.00.0000
*** The target t186ref has been flashed successfully. ***
Reset the board to boot from internal eMMC.
You also should see that the device is attached or detached in the PowerShell console:
WSL 2026-04-08 08:40:47 Device 1-14 is now detached.
WSL 2026-04-08 08:40:47 Device 1-14 is available. Attempting to attach...
WSL 2026-04-08 08:40:47 Attach command for device 1-14 succeeded.
WSL 2026-04-08 08:40:54 Device 1-14 is now attached.
If something goes wrong during flashing, such as missing necessary packages, you need to install the package and power-cycle the device to enter the recovery mode again. After that, start flashing again.
After that, power off the device and remove installed jumpers. Power it on again, and the device should be identified as a “COM” device.
Using PuTTY, select “Serial”, set the appropriate COM port number. and set speed to 112500. You should see a configuration menu TUI:
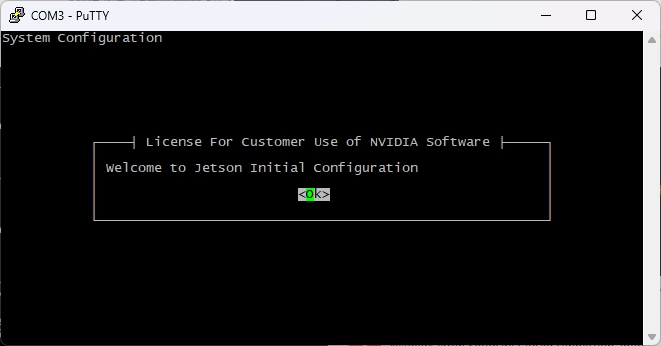
Follow the configuration steps, set up the network, and the device is ready to use.
Do not forget to install the nvidia-jetpack package, but be careful; it requires a lot of space and can fill a small SD card easily.
![]()