This year Nutanix Community Edition 2.0 (CE 2.0) was released, based on Nutanix AOS 6.5 – the most actual LTS version at the time of writing.
In this article, we’ll take a closer look at how to deploy a three-node Nutanix CE 2.0 cluster on a VMware vSphere 8 infrastructure.
Before we get started with deployment and configuration, let’s look at the existing requirements and limitations.
CPU:
Processors supporting Intel VT-x, or AMD family processors with Zen Micro architecture and higher.
The minimum processor must have 4 cores, 2 of which will allocated to the CVM.
RAM:
Minimum 20GB. But, the more functionality and virtual machines you plan to use, the more RAM you may need. 32GB or higher is recommended for most AOS features.
Hard disks:
The maximum number is 4 HDD/SSD per node, but it is noted that some users have reported success using more than 4 disks.
Cold Tier – 500GB and above. The maximum is 18TB, with 3 disks of 6TB each.
Hot Tier – 200GB and above – SSD.
You also need a separate disk with a capacity of 32GB or more on which the hypervisor will be installed. It can be USB or SATA DOM, M.2 SSD, etc.
Reliable drives that can withstand heavy loads are recommended.
Cluster:
A cluster can consist of 1 node (Single-Node), as well as 3 or 4 nodes. The maximum cluster size is 4 nodes.
Please note that if a Single-Node cluster was selected at the installation stage, it won’t be possible to expand it later to three nodes.
The ESXi hypervisor is not officially supported.
Other requirements:
1. The admin password must be changed after the first log on;
2. When logging into Prism for the first time, you will need to specify an account with a previously completed registration;
3. Outgoing ports 80 and 8443 must be open for the Pulse, which sends statistics to Nutanix, such as errors occurring in the cluster and usage statistics.
Once we have sorted out the requirements, we will begin the installation.
First of all, you need to register using the link.
Next, on the Nutanix .NEXT portal, download the ISO file phoenix-ce2.0-fraser-6.5.2-stable-fnd -5.3.4-x86_64.iso, containing CE 2.0 installation files.
When all installation files are downloaded, you can start preparing the virtual infrastructure and machines.
First, you need to consider the network and IP addressing. To deploy a cluster of 3 nodes, the minimum required number of IP addresses is 7:
- 3 for AHV hypervisor;
- 3 for CVM;
- 1 for Cluster IP.
It is also worth taking care of the IP addresses for Data Services IP and for Prism Central in advance if you plan to use it in the future.
In a virtual infrastructure, the first step is to create a network to which the Nutanix CE 2.0 virtual machines will be connected. The main point that you need to pay attention to is switching Promiscuous mode, Mac address changes and Forged transmits to Accept mode:
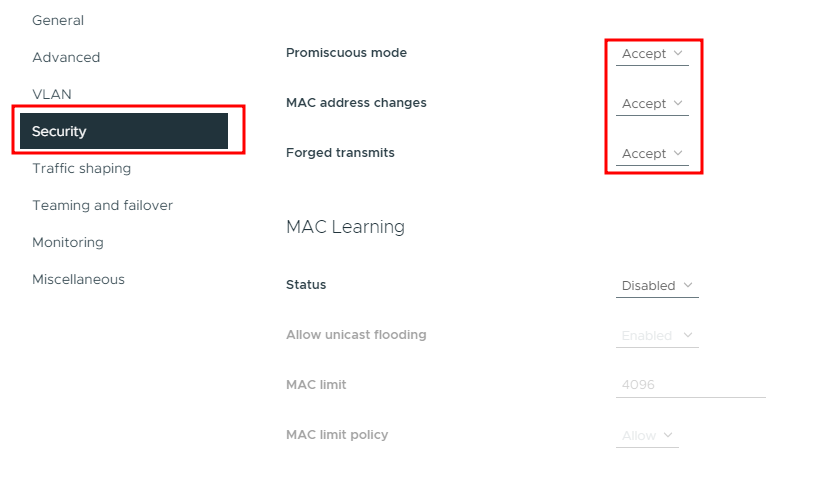
The network can be created on a standard switch or on a distributed one. My example uses a distributed switch.
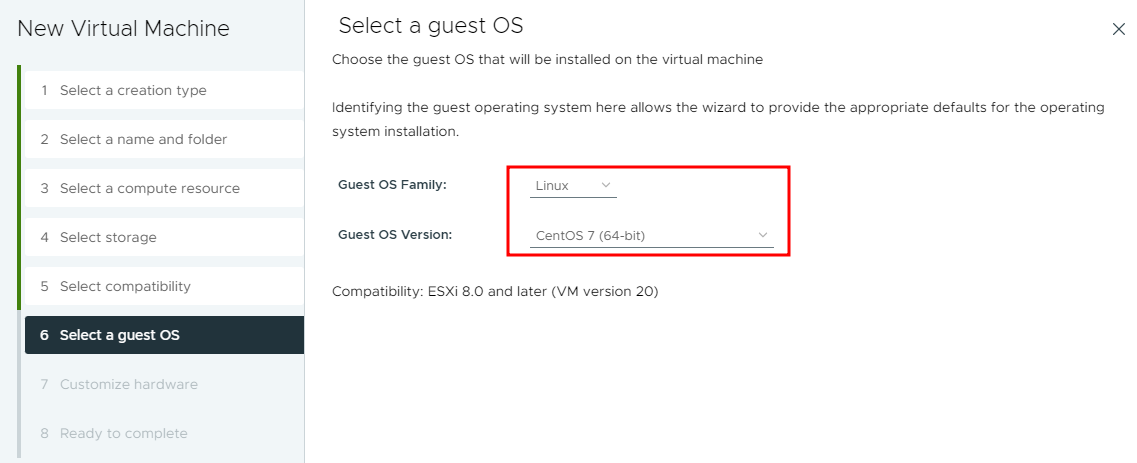
Next, we will prepare three virtual machines. I will not describe the entire process of creating a VM, but I will focus on some important points.
I choose Linux – CentOS 7 (64-Bit) as Guest OS:
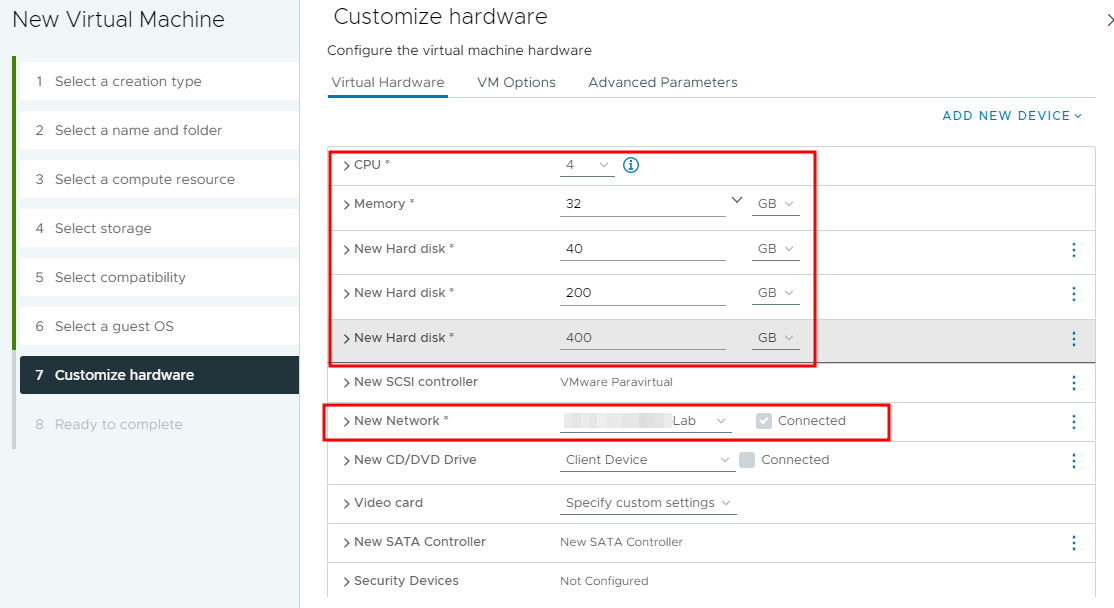
At the Customize hardware stage, we allocate the required amount of processor resources and RAM. And also 3 discs:
- Hard Disk 1 – for installing a hypervisor;
- Hard Disk 2 – Hot Tier (fast storage);
- Hard Disk 3 – Cold Tier (slow storage).
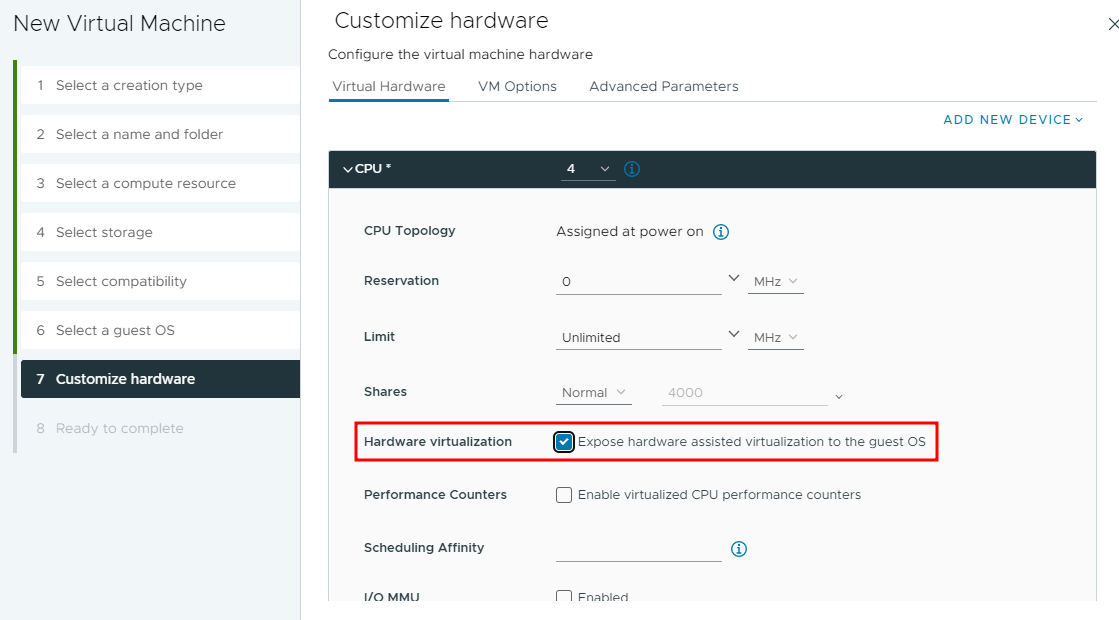
Expand the CPU tab and enable Hardware virtualization – Expose hardware assisted virtualization to the guest OS:
We also select the network created in the previous step.
Move from the Virtual Hardware tab to the Advanced Parameters tab and add the parameter disk.EnableUUID = TRUE:
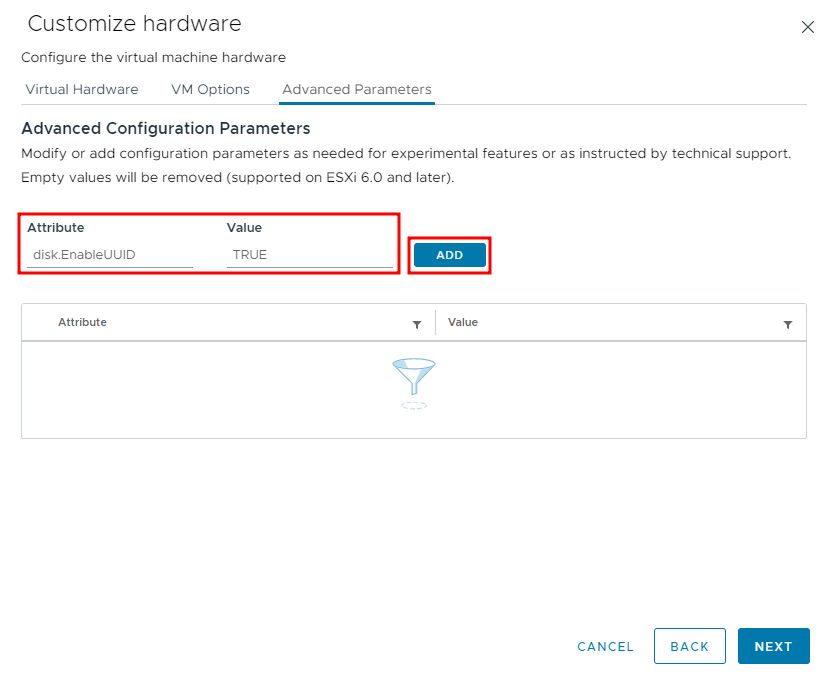
The final result of the added parameter should looks like this:
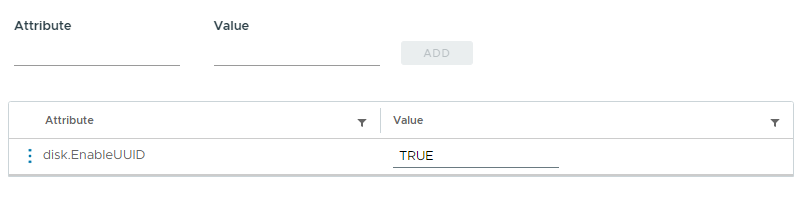
I described the need for this parameter in an article earlier.
It completes the process of preparing the virtual machine. The result should be 3 identically configured VMs:

Now start the virtual machines, and connect the ISO file, after which the Nutanix CE 2.0 installer should expectedly load:

At the first stage of installation, you need to pay attention to the following points:
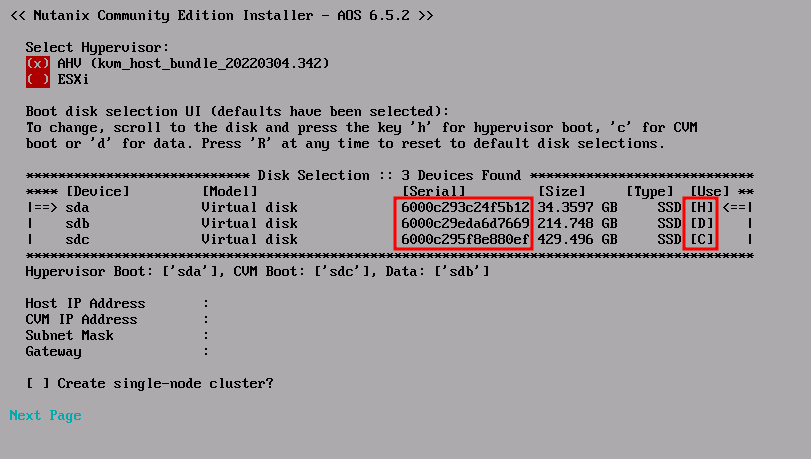
For disks, the Serial field should display correctly. Else ensure that the disk.EnableUUID parameter is set to True for the VM.
Also, opposite the disks, you can see the marks H, C, D:
- H – disk on which the hypervisor will be installed;
- C – drive for CVM, Hot Tier, usually faster;
- D – data disk.
Initially, if the installer sees that the disks are equal speed, the largest one is selected for the CVM. Changing this is quite simple. Using the Tab button, you can move to the disks section and use the h, c, d keys to select the desired disks.
Also use Tab to move below and set the IP addresses of AHV, CVM:
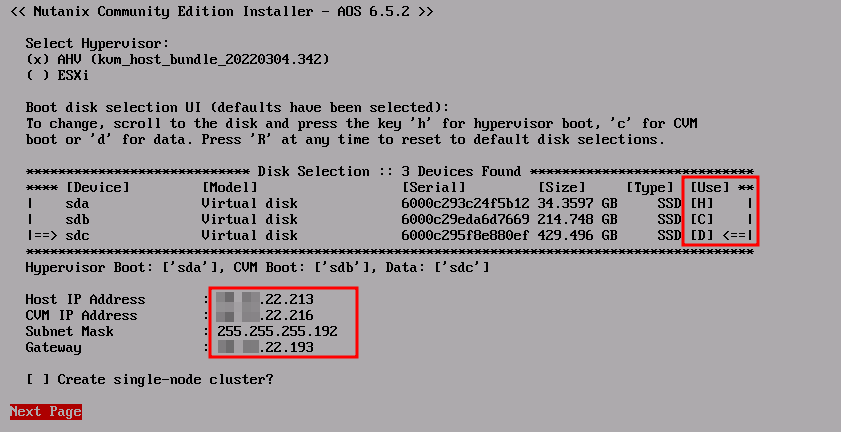
Thus, in the example above, I selected a 214GB disk for CVM (Letter C in the Use field) and a 429GB disk for the Extent Store (Letter D, respectively). I also set the IP addresses of the hypervisor and CVM, mask and gateway. Please note that the hypervisor and CVM must be located on the same network.
Since we are creating a cluster of three nodes, the “Create single-node cluster?” no need to check it.
We go to the next screen where you need to read the license agreement and accept it:
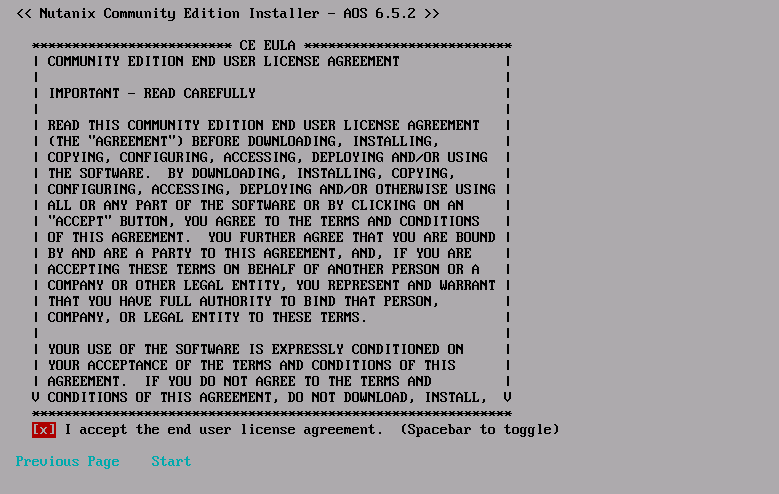
By clicking on Start, the installation will begin, however if the license message has not been read to the end, you may encounter the corresponding error:

By pressing enter, we will go back a step and read the license agreement to the end:

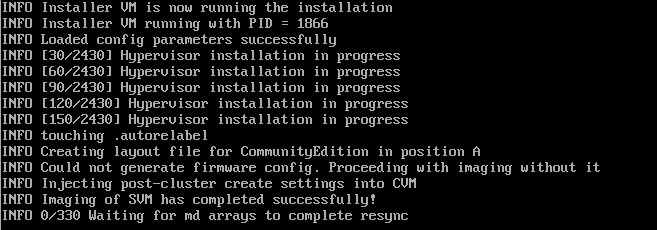
The installation procedure will now start:
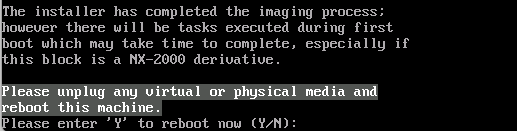
We wait for the end, disconnect the ISO image and press “Y” to reboot the node:
The remaining two servers are installed in the same way. As a result of the work, we should get 3 servers with the Nutanix AHV hypervisor installed and CVMs running on them.
Both AHV and CVM must respond to ping; if they do not respond, you should check the correctness of the portgroup settings on the virtual switch, as well as the state of the CVM on the host.
It can be done by connecting to the hypervisor with root / nutanix/4u credentials, and then checking the running virtual machines using the virsh list command:

It is expected that each of the three nodes should be running one CVM virtual machine.
If you need further troubleshooting, you can connect to CVM directly from the hypervisor via SSH:
ssh nutanix@192.168.5.254. The password in this case is similar – nutanix/4u.
Cluster creation and configuration.
Once all the virtual machines are ready, the CE 2.0 installation is completed, and the hypervisors and CVM are accessible from the network. You can start configuring the cluster.
You can configure the cluster by connecting to any of the CVMs via SSH. Login: nutanix, password: nutanix/4u
Let’s start the cluster creation procedure:
nutanix@CVM:~$ cluster -s 192.168.22.214,192.168.22.215,192.168.22.216 createSeparated by commas, we providing the IP addresses of the CVMs, that should become members of the cluster, are indicated.
Next, we’re waiting for the completion of forming a cluster and starting services. The result should be something similar to:
INFO cluster:2875 Success!Let’s check the cluster status with the cluster status command:
       CVM: 192.168.22.214 Up
                                Zeus   UP       [12963, 13052, 13053, 13123, 13139, 13157]
                           Scavenger   UP       [15569, 15671, 15672, 15673]
                              Xmount   UP       [15566, 15641, 15642, 15822]
                    SysStatCollector   UP       [19469, 19547, 19548, 19549]
                           IkatProxy   UP       [20154, 20223, 20224, 20225]
                    IkatControlPlane   UP       [20443, 20515, 20516, 20517]
                       SSLTerminator   UP       [20463, 20571, 20572]
                      SecureFileSync   UP       [20484, 20621, 20622, 20623]
                              Medusa   UP       [20879, 20994, 20995, 21014, 21261]
                  DynamicRingChanger   UP       [21518, 21576, 21577, 21589]
                              Pithos   UP       [21540, 21669, 21670, 21680]
                          InsightsDB   UP       [21599, 21821, 21822, 21913]
                              Athena   UP       [21672, 21998, 21999, 22000]
                             Mercury   UP       [30468, 30532, 30533, 30539]
                              Mantle   UP       [22134, 22355, 22356, 22366]
                          VipMonitor   UP       [24211, 24212, 24213, 24214, 24219]
                            Stargate   UP       [22651, 22699, 22700, 22711, 22712]
                InsightsDataTransfer   UP       [22937, 23046, 23047, 23050, 23051, 23052, 23053, 23054, 23055]
                               Ergon   UP       [22971, 23184, 23185, 23758]
                             GoErgon   UP       [22996, 23213, 23214, 23237]
                             Cerebro   UP       [23267, 23405, 23406, 23490]
                             Chronos   UP       [23328, 23471, 23472, 23476]
                             Curator   UP       [23424, 23582, 23583, 23626]
                               Prism   UP       [23616, 23839, 23840, 23856]
                                Hera   UP       [23722, 23991, 23992, 23993]
                                 CIM   UP       [23802, 24074, 24075, 24077, 24088]
                        AlertManager   UP       [24034, 24580, 24581, 24613]
                            Arithmos   UP       [24471, 24825, 24826, 24849]
                             Catalog   UP       [24952, 25180, 25181, 25182, 25193]
                           Acropolis   UP       [25403, 25531, 25532, 29238]
                               Uhura   UP       [25450, 25589, 25590, 28171]
                   NutanixGuestTools   UP       [25546, 25670, 25671, 25677, 25694]
                          MinervaCVM   UP       [26988, 27090, 27091, 27092, 27276]
                       ClusterConfig   UP       [27009, 27184, 27185, 27186]
                         APLOSEngine   UP       [27094, 27245, 27246, 27247]
                               APLOS   UP       [28337, 28447, 28448, 28450]
                     PlacementSolver   UP       [28381, 28524, 28525, 28526]
                               Lazan   UP       [28486, 28674, 28675, 28676]
                             Polaris   UP       [28565, 28845, 28846, 28876]
                              Delphi   UP       [28729, 28975, 28976, 28977]
                            Security   UP       [28981, 29352, 29353, 29354]
                                Flow   UP       [29435, 29585, 29586, 29587]
                             Anduril   UP       [29503, 29634, 29635, 29636]
                               XTrim   UP       [29650, 29713, 29714, 29715]
                       ClusterHealth   UP       [27149, 27173, 27174, 27510, 27531, 27532, 27533, 27535, 27536, 27537, 27544, 27546, 27554, 27558, 27564, 27586, 27597, 27660, 27663, 29670, 29801, 29861, 29862, 29864, 29867, 29957, 29958, 29959, 29961, 29962, 29963, 29964, 29968, 29969, 29970, 29973, 29974, 29975, 30111, 30112, 30113, 30114, 30116, 30117]
A successful result will be a message indicating that all services are running on all CVMs.
If not all services are started, you can try to start them with the cluster start command.
Once the cluster is created, some basic configuration can be done.
Let’s set the name of the cluster:
nutanix@CVM:~$ ncli cluster edit-params new-name=ntnx-ce20
    Cluster Name              : ntnx-ce20
Add DNS server:
nutanix@CVM:~$ ncli cluster add-to-name-servers servers="192.168.22.201"
    Name Servers              : 192.168.22.201, 8.8.8.8, 8.8.4.4
Add NTP server:
nutanix@CVM:~$ ncli cluster add-to-ntp-servers servers="192.168.23.3,192.168.23.4,192.168.23.5"
    NTP Servers               : 1.pool.ntp.org, 0.pool.ntp.org, 192.168.23.3, 192.168.23.4, 192.168.23.5
As you can see, the list contains external NTP pools that I would like to remove:
nutanix@CVM:~$ ncli cluster remove-from-ntp-servers servers="1.pool.ntp.org,0.pool.ntp.org"
    NTP Servers               : 192.168.23.3, 192.168.23.4, 192.168.23.5
Let’s set the time zone:
nutanix@CVM:~$ ncli cluster set-timezone timezone=Asia/Almaty
Daily/weekly/monthly DR schedules are impacted by cluster timezone change. Please remove existing daily/weekly/monthly DR schedules before proceeding and reconfigure those schedules later to follow the new timezone. Do you want to continue.(y/N)?: y
Please reboot the CVM or restart all services on the cluster so that logs are timestamped with the new Timezone.
    Timezone                  : Asia/Almaty
Since Internet access is necessary in this case, I will add a Proxy:
nutanix@CVM:~$ ncli http-proxy add name=vmik-proxy address=192.168.22.201 port=3128 proxy-types=http,https
    Status                    : true
The last step is to set the Cluster IP, through which the Prism Element Web interface will be available:
nutanix@CVM:~$ ncli cluster set-external-ip-address external-ip-address="192.168.22.210"
    External IP address       : 192.168.22.210
This completes the cluster configuration. Open a web browser and go to the previously specified Cluster IP address, specifying port 9440. For example, https://192.168.22.210:9440
Welcome to the Prism Element interface:
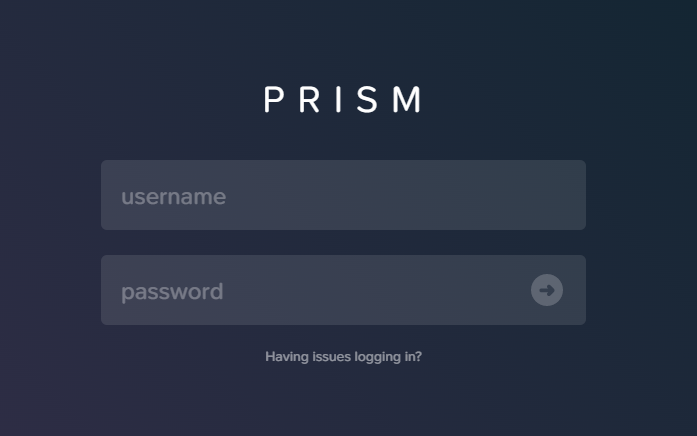
Log in using the admin account with the password nutanix/4u, after which you will be prompted to change the password:

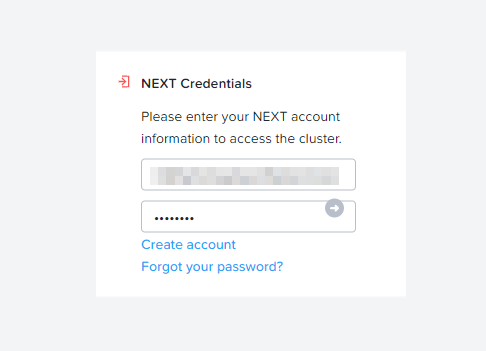
Log in with a new password. Now we will be required to specify the .NEXT account that we used earlier during the registration procedure:
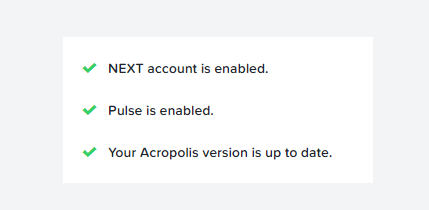
If the credentials are correct and the cluster has internet access, everything should be fine:
The Nutanix CE 2.0 three-node cluster is ready to use:

![]()