In the previous article, we talked about how to restore vCenter using native backup. In this part, we will talk about how to restore VMware vCenter Server using Veeam Backup and Replication.
Although restoring a VM using Veeam is a simple task, but when we are talking about vCenter Server a few moments should be considered.
Let’s get started.
We’re beginning with a VMware vSphere infrastructure, managed with vCenter Server 8.0 Update 2.
As in the previous article, a notice to Distributed Switch users.
The default port binging policy, when creating a port group is Static Binding. But there is a caveat. When the vCenter server is crushed and you deploy a new virtual machine, you can’t connect this VM to the network, because vCenter is responsible for port allocation in port groups with Static Binding. So, you may encounter a problem when your vCenter is down and you can’t connect a new one to the network.
The good practice is to have a port group dedicated to management VMs/VMkernels with the port binding policy Ephemeral – no binding. If you don’t have one – create it:
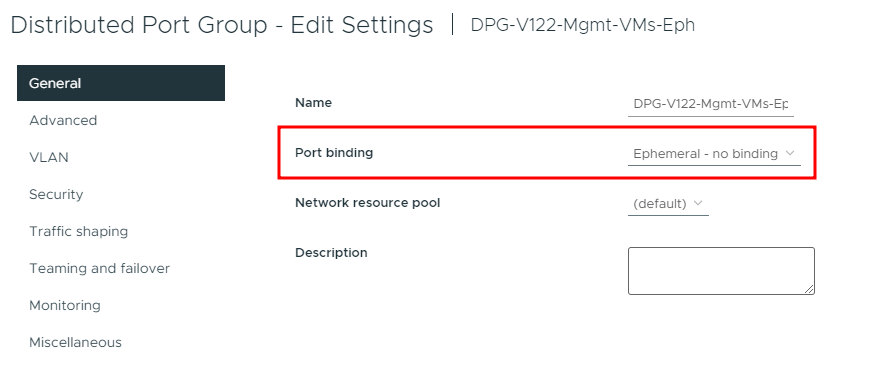
And make sure, that your vCenter is connected to this port group:

Now we can connect to the Veeam server and create a backup job, covering our vCenter Server:
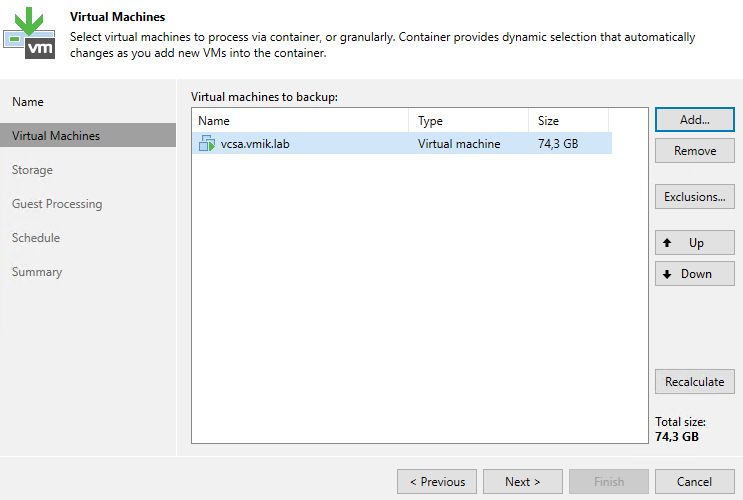
The procedure of creating a backup job is simple and familiar to each Veeam user, and I will not cover this in the article.
When our backups are created, we can proceed with a restore:

What happened during vCenter downtime? We won’t talk about VMware infrastructure but about Veeam.
Usually, when we back up vSphere VMs, we add a vCenter server to our backup infrastructure, and all inventory and restore procedures go through it. But we are talking about the situation when the vCenter Server is down and we need to restore it.
So, we need to restore the vCenter to the infrastructure but haven’t access to it to perform a restore task. The workaround is simple.
First, add one of the ESXi hosts to your backup infrastructure:
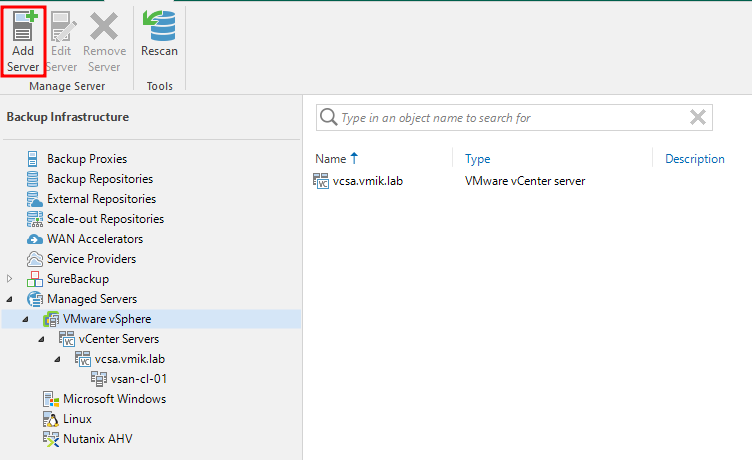
Next, provide an IP or hostname of the ESXi host:
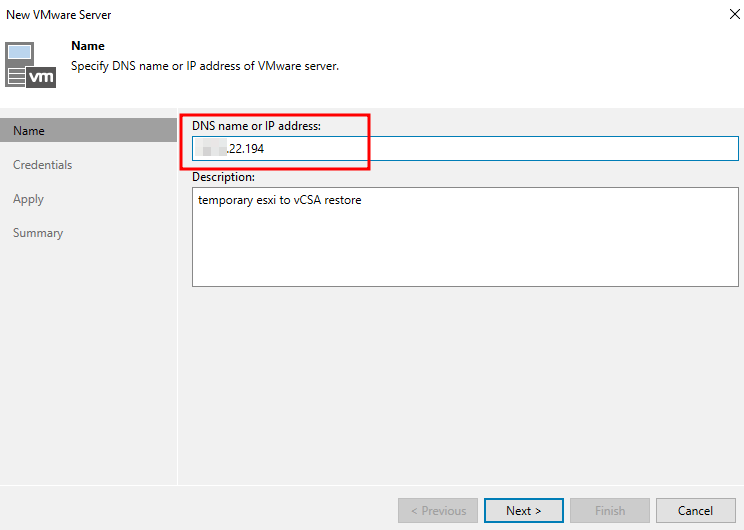
Important point. You may face an error: “VMware ESXi with name … is already exists”. In this case, if your hosts are added by DNS name, add a host with an IP address instead. And vice-versa, if your hosts are added by IP address, connect using a DNS name.
In my case, ESXi hosts were added to the infrastructure using DNS names, and I added a host to the Veeam infrastructure using an IP address.
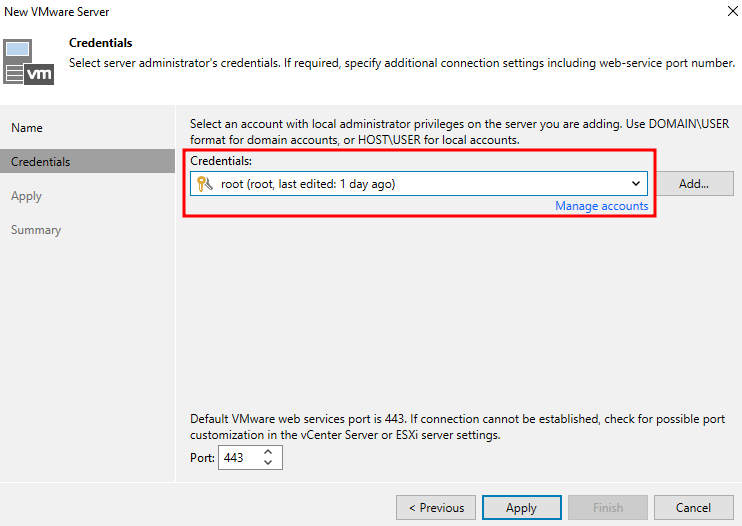
In the second step, specify ESXi root credentials and finish the procedure of adding:
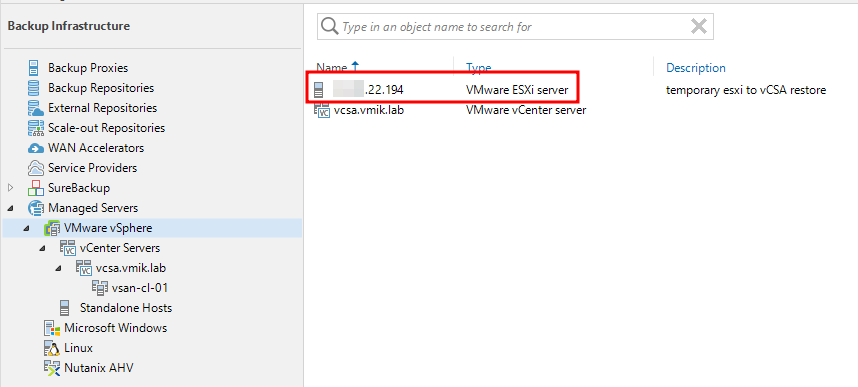
After that, you should see the added host near the vCenter server:
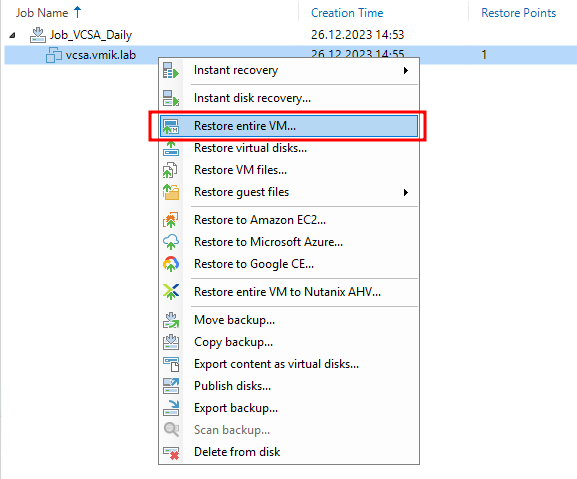
Let’s return to our backups and begin a restoration procedure by selecting vCenter VM from the backup and going with “Restore entire VM” task:
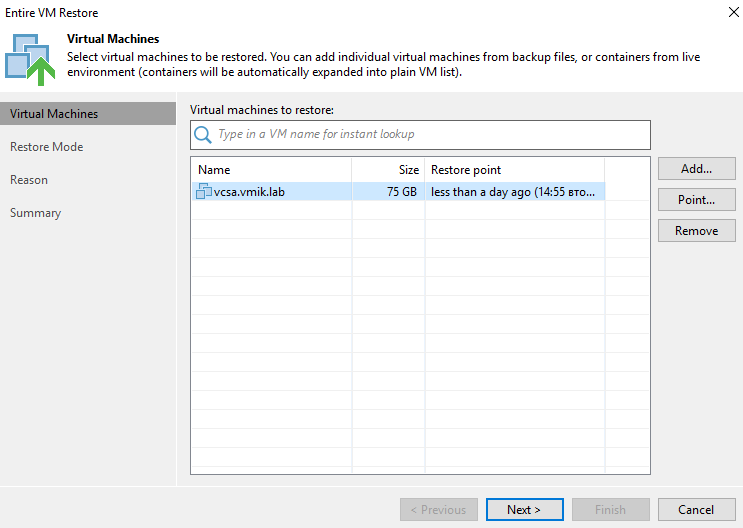
Select a restore point if needed:
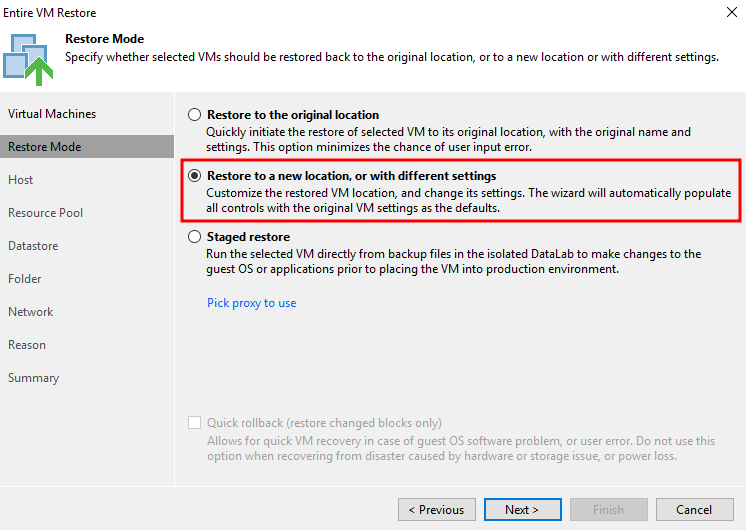
We will restore vCenter to a new location. If you select “Restore to the original location”, Veeam will try to contact a dead vCenter Server, and you will face only lags:
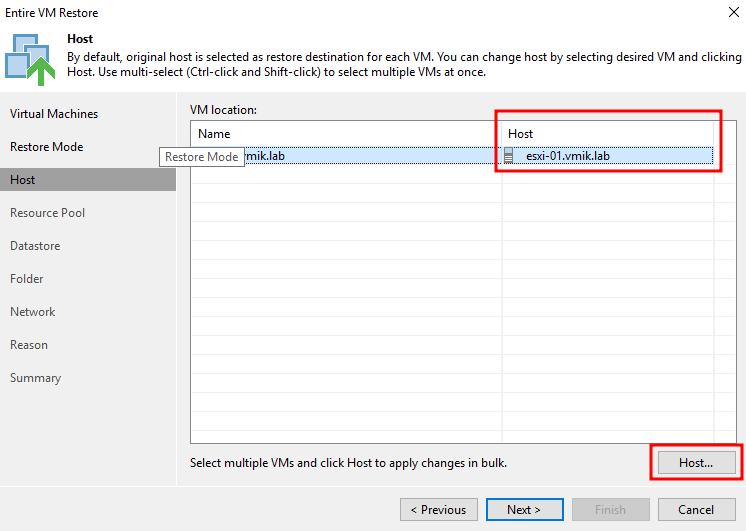
Next step, we need to specify a host added before. In this example, you may see a hostname and not an IP address:
If you click next before choosing the right host, you will face a lot of lags:

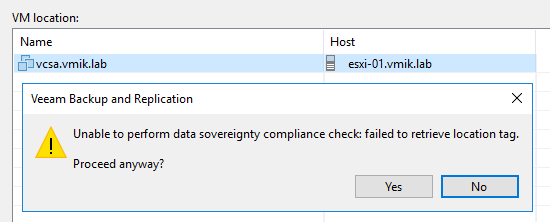
Even if you proceed further, you will fail at the next step.
So, change the host to the one added before by clicking the Host button. I selected a host, added using an IP address a few steps before:

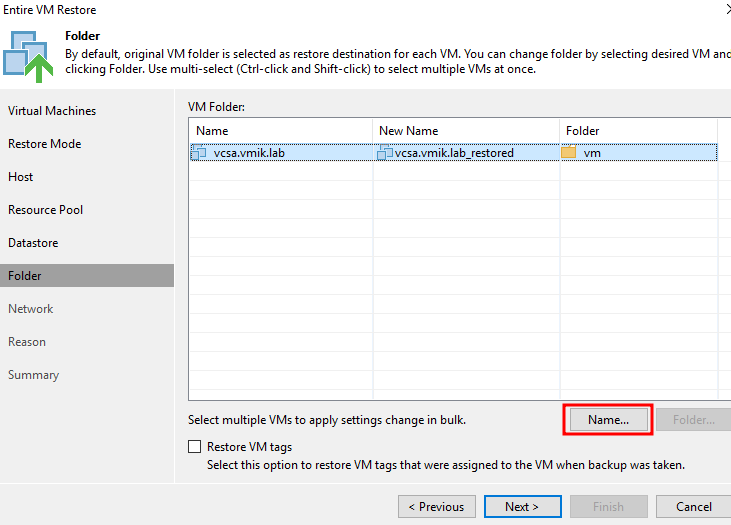
Next step, change the VM name if necessary. I prefer to add a “restored” suffix:
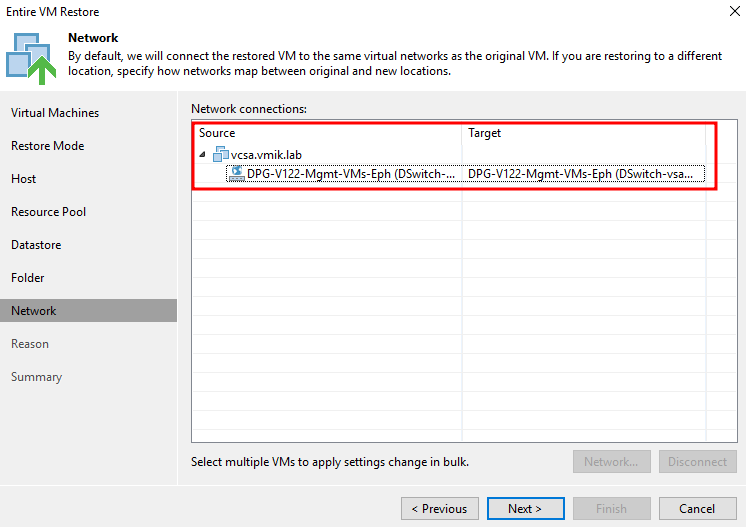
Check on the network settings. Make sure that you’re using an ephemeral port group in the case of Distributed Switch:
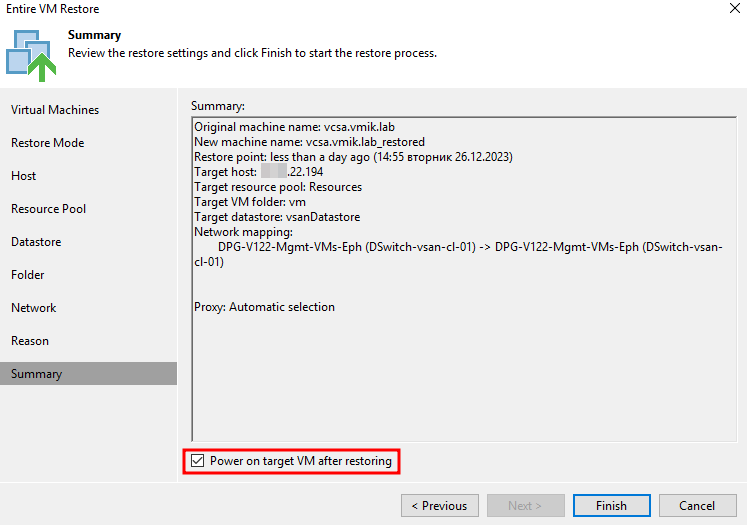
Last step. Check settings and power on VM if necessary:
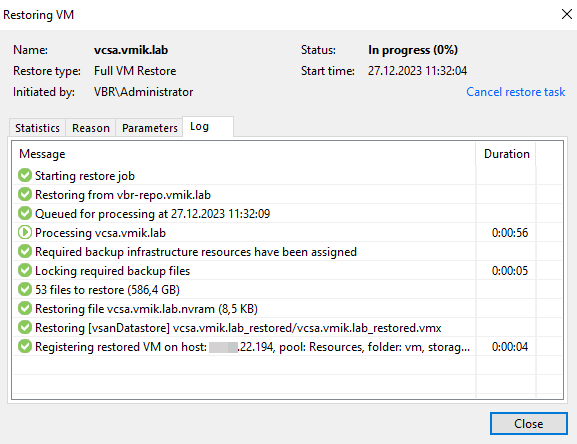
Observe the restore procedure:
After it is finished, a new vCenter VM will be up and running in your cluster, and overall infrastructure will be available:
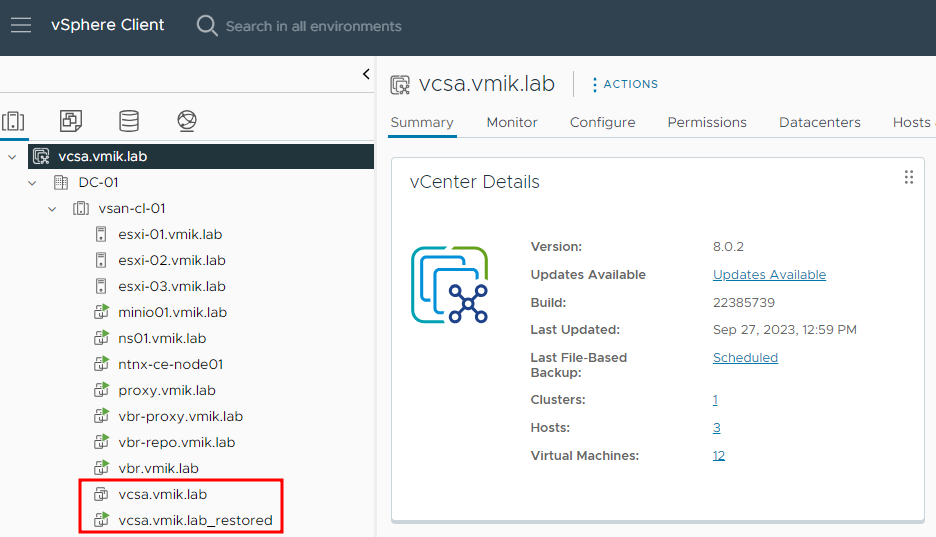
We finished with a vCenter restore procedure.
Keep in mind, that if urgent restoration is needed, you can use the Instant Recovery feature as well. The overall procedure, including adding a temporary host is the same. And don’t forget to migrate vCenter disks to the production datastore after restoring.
In conclusion
As you can see, backing up and restoring a vCenter Server using Veeam Backup & Replication is a simple task, but it has its moments.
During restore, you may face some issues, like – everything works fine and you can connect to the vCenter, but you don’t see a new vCenter VM in inventory, which requires additional manual intervention.
Based on my overall experience, I’ve found some pros and cons.
Pros:
1. Simple solution, just backup and restore;
2. Faster than native restore, especially with Instant Recovery.
Cons:
1. Requiring additional licensing;
2. May require a manual intervention after restoration.
![]()