In some cases, when we need a highly available vCenter Server, we can use vCenter HA functionality. In short – it’s a second copy of your vCenter VM (and a witness node), with configured replication between active vCenter node and passive vCenter node.
If something happens to the active node, the standby node will take over the entire process and it will reduce the overall downtime of the vCenter Server.
Let’s look at how to enable vCenter HA, and what we need to do.
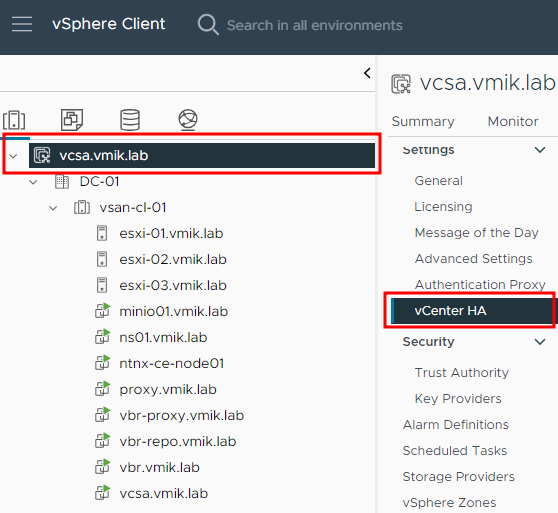
Before we start talking about what we need to do to configure the vCenter HA. Let’s click on the vCenter itself and select vCenter HA from the configuration menu:
Now you should see a diagram – how vCenter HA works:
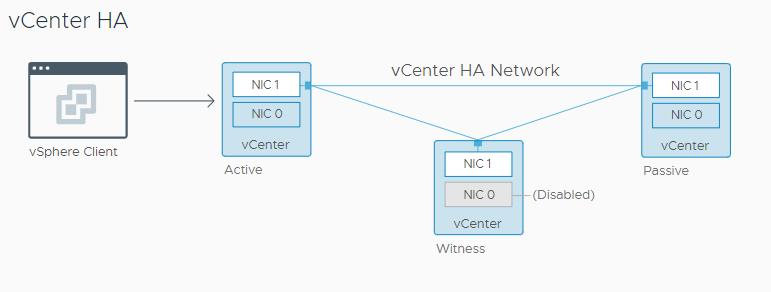
In the default situation, we have only one vCenter Server VM with one network interface (NIC0), with the IP address defined during vCSA deployment. We use this address to connect to the vCenter.
As you can see, this configuration requires three VMs:
- Active – your existing vCenter;
- Passive – standby copy of the vCenter;
- Witness – VM, responsible for detecting which vCenter node is alive in case of network segmentation or something like that.
vCenter HA requires creating an additional network (port group) and additional network interface to the vCenter Server (you don’t need to do it manually). And it’s called vCenter HA Network (NIC1 on the diagram).
This network will be used to communicate between the Active node, the Passive node, and the witness.
So, we have two network connections:
NIC0 – our management network, which already exists, and we use it when connecting to the vCenter Server;
NIC1 – vCenter HA network for communication between vCenter nodes.
You may see that the Witness node doesn’t have a NIC0 because NIC0 is used only for public access. However, the Witness node is only responsible for detecting which vCenter node is alive (active or passive).
Now, let’s configure vCenter HA.
First, we need to create a vSphere HA network on a Standard or Distributed switch:
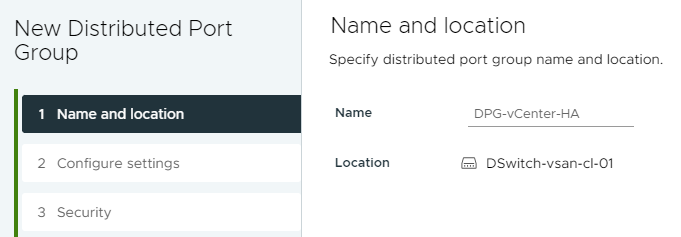
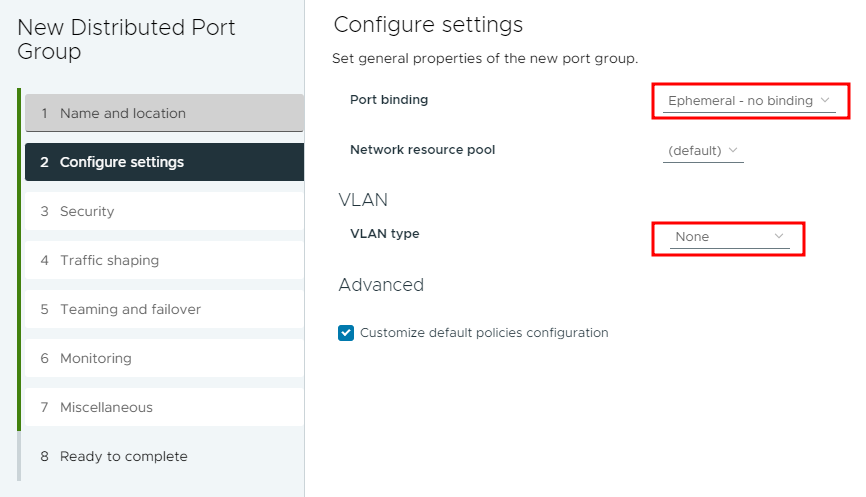
If you’re using a Distributed switch, make sure, that you’re using Ephemeral port binding, also specify a VLAN if necessary:
When the network port group is created, let’s return to the vCenter HA configuration menu and click on “Set up vCenter HA”:

Then read the recommendations:

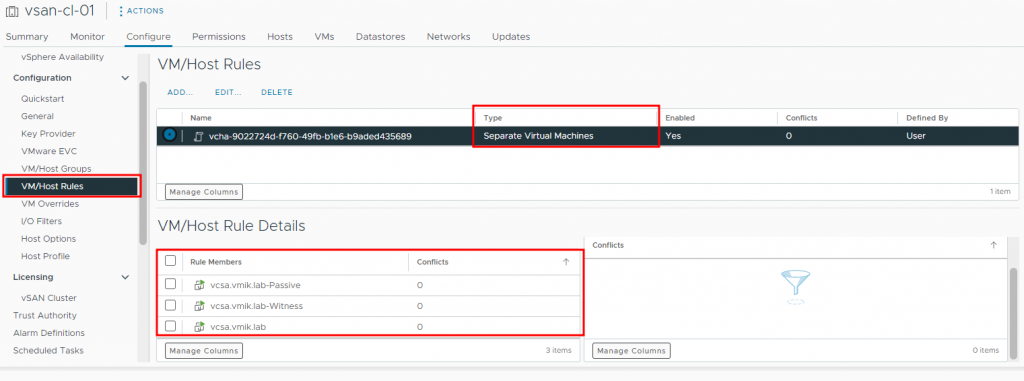
It’s recommended to put active, passive, and witness nodes on the different hosts and datastores (better if it’s even different storage arrays). Also, you need to separate nodes from each other and put them on the different ESXi hosts. If a DRS is running in your cluster, a rule will be created automatically.
From there, you need to specify a vCenter HA network created before. Also, you may mark a checkbox to automatically clone passive and witness nodes.
Next, we need to configure our nodes. Notice that you can’t configure an active one:

For the passive node, there is an edit button:

Click on it and specify the VM name and folder:
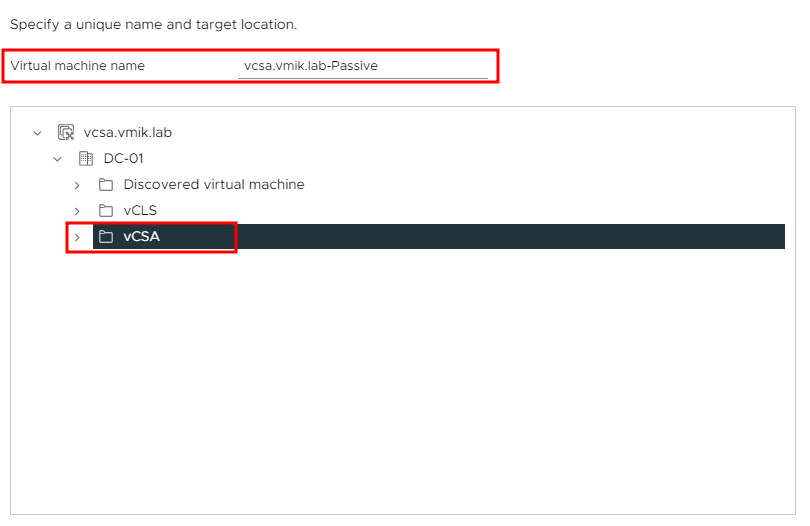
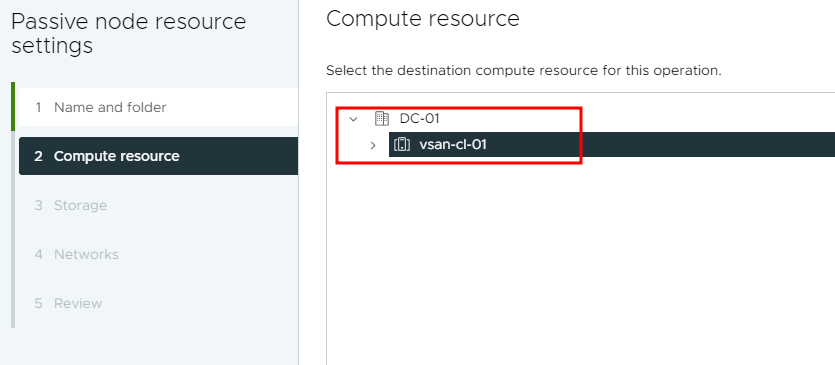
Select a vSphere cluster:
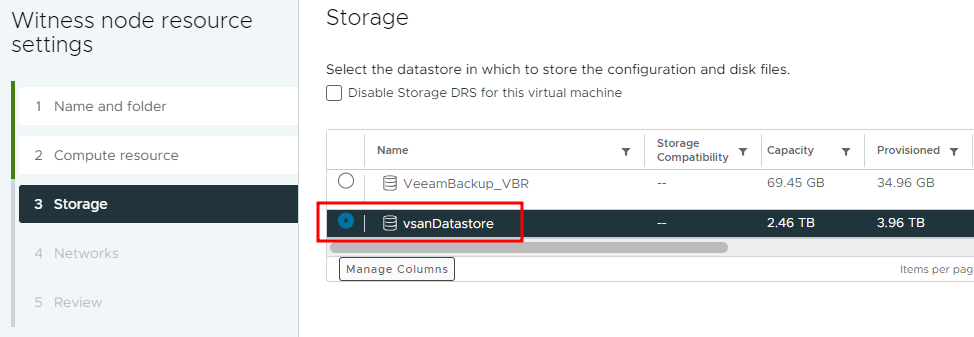
A datastore. It is better if it be a different datastore and no active or witness nodes located on it:
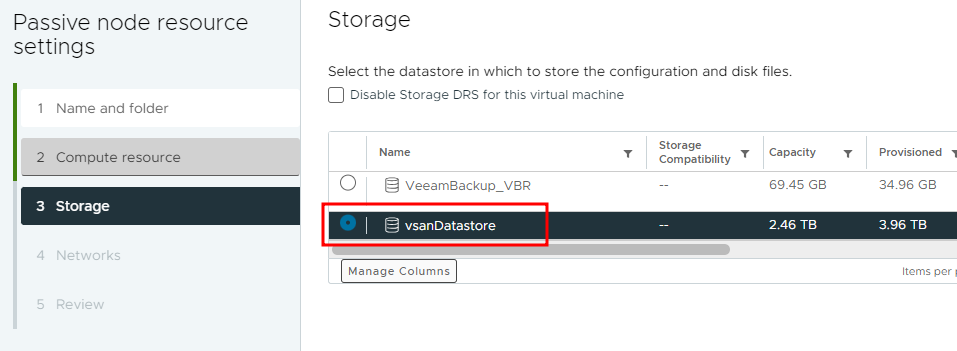
In my case, I have only one vSAN datastore, so I go with it.
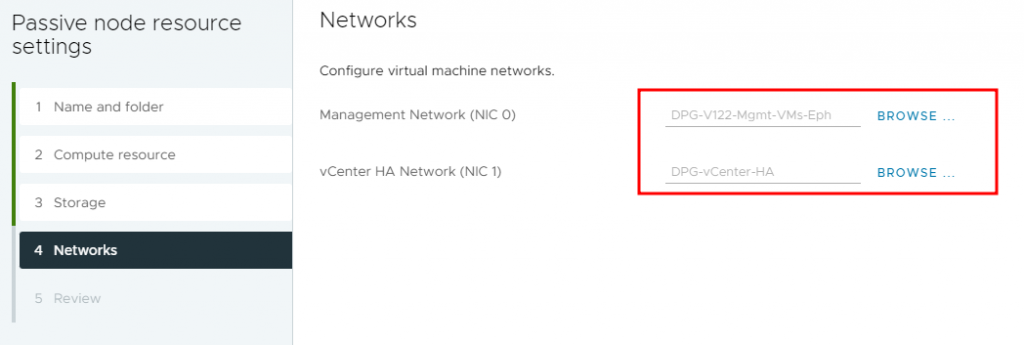
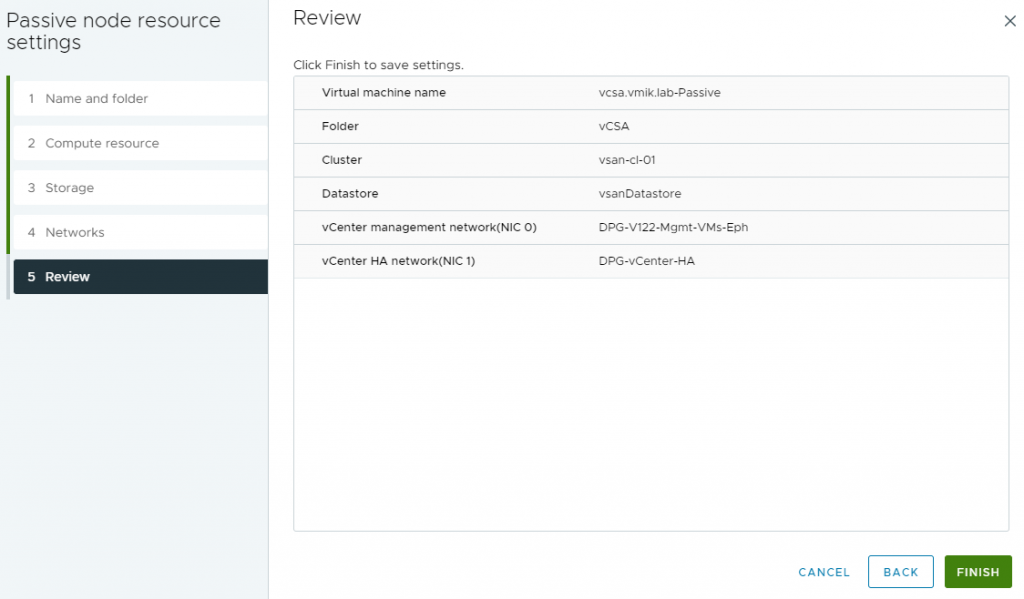
Next, specify two networks – one for management and public access (NIC0), the same as for active vCenter, and a second (NIC1) for vCenter HA:
Review the final configuration and click finish to end the passive node configuration task:
The settings are accepted:

Next, do the same with the witness node:

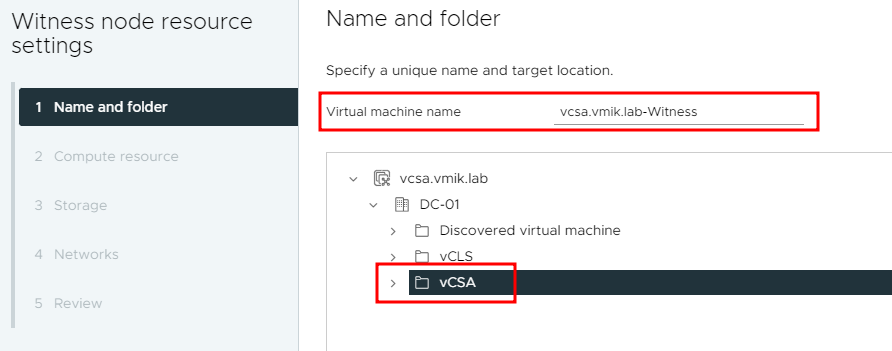
Specify VM name and folder:
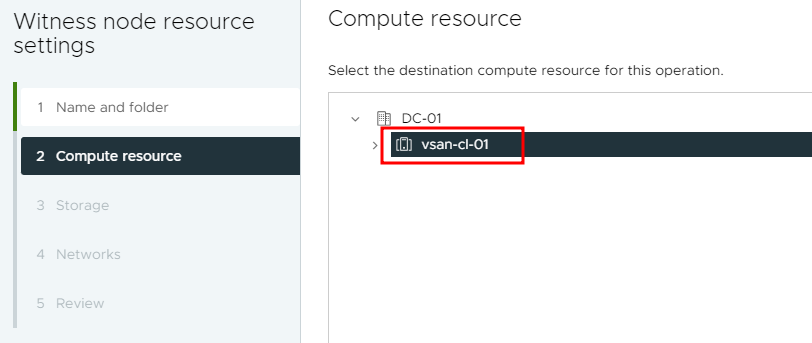
Compute resource:
Storage:
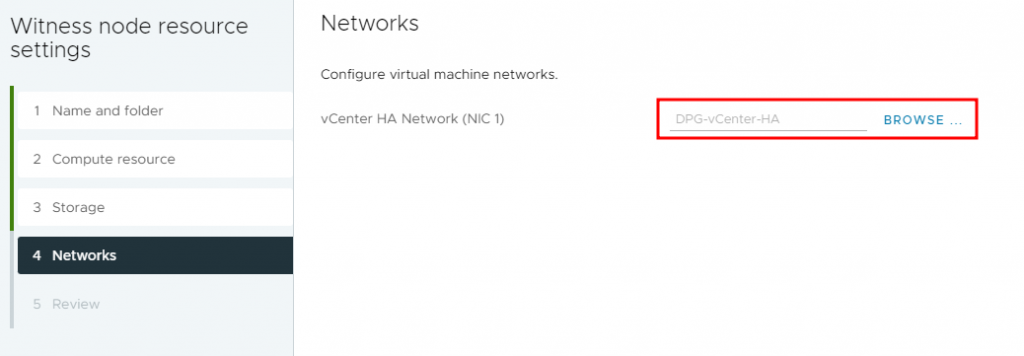
Network. Notice that for Witness VM, there is only one network adapter (NIC1) for the vCenter HA network:
Review the settings and finish:
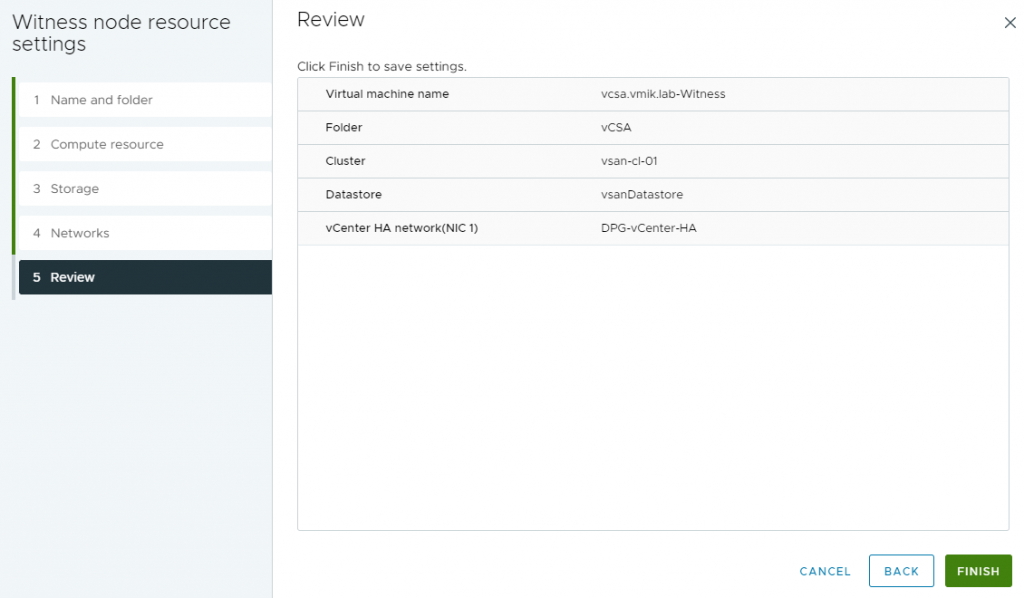
This is how configuration for Witness will look like:

Now, click next and proceed with IP configuration.
Provide IP addresses for the HA network to Active and Passive nodes:
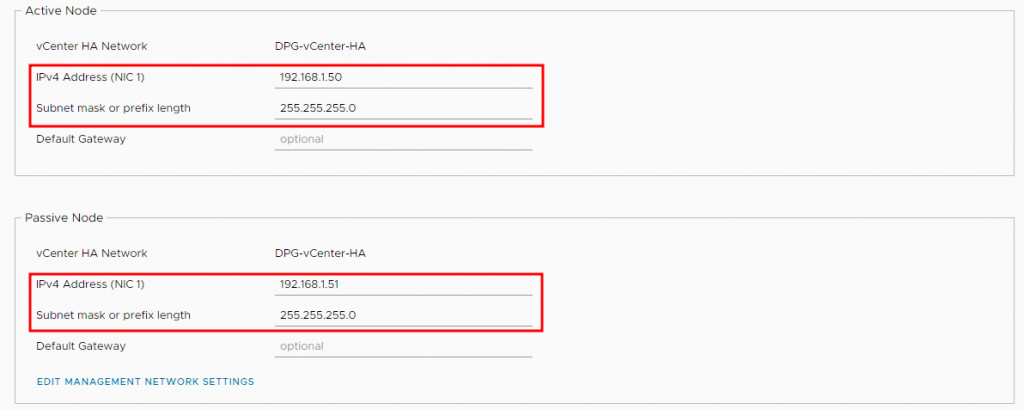
Provide an IPv4 address for the witness as well:

Click Finish to begin a vCenter HA creation:

After deployment, you will see that three VMs are active:

And displayed in the inventory:
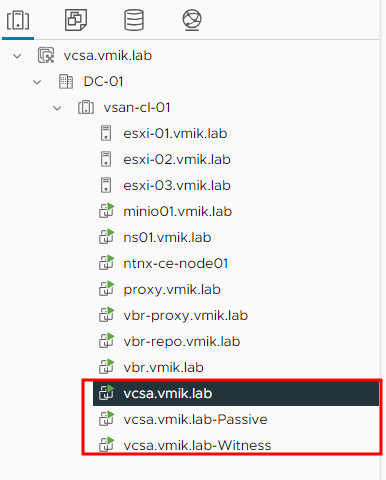
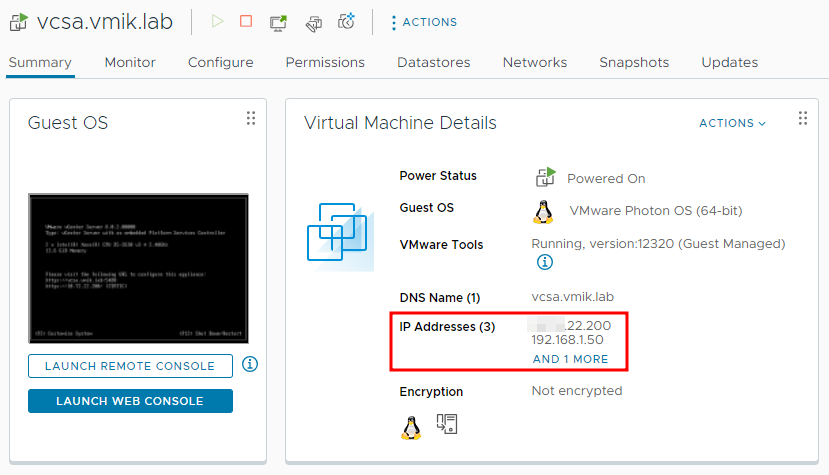
If you click on the active node, you will see two IP addresses – one for client access and one for vCenter HA:
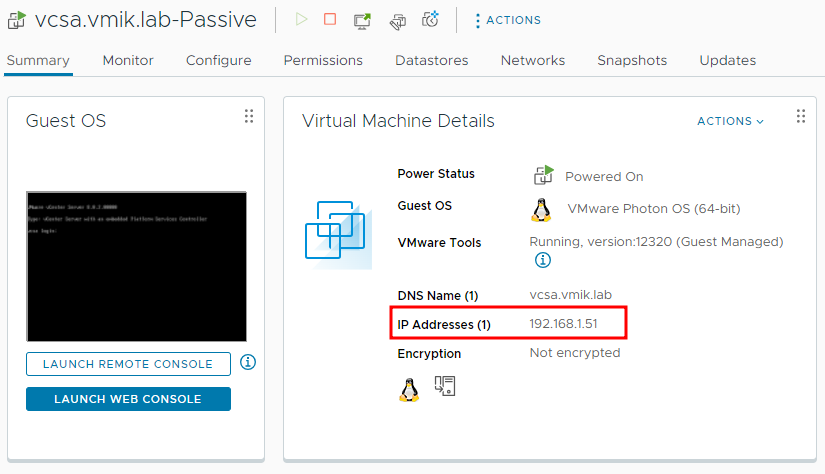
If you click on passive, it will show only one vCenter HA IP:
If we check with DRS rules, we will see an automatically generated rule not to keep together vCenter VMs and witness:
At this point, vCenter HA is configured and ready to take action in the event of failure, and it’s time to test.
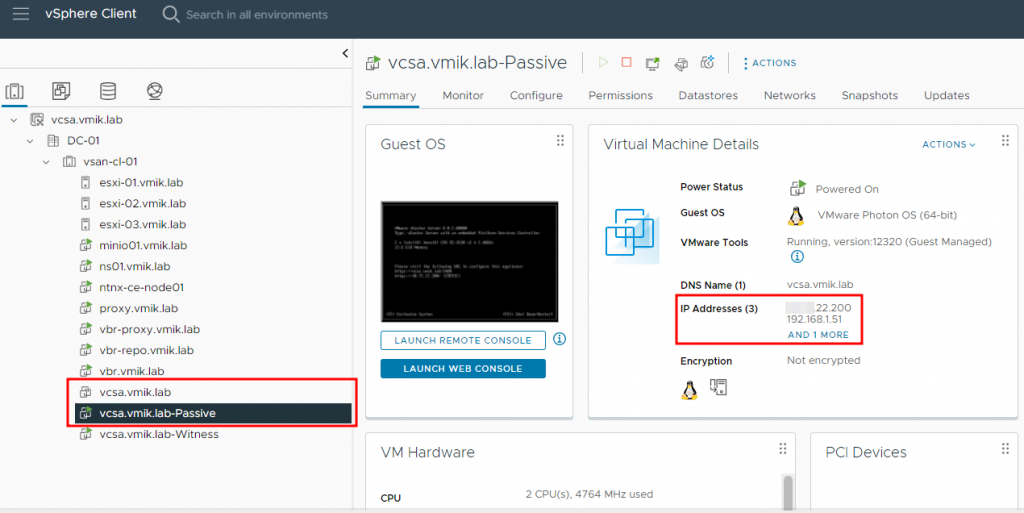
The simplest thing we can do is to power off the vCenter VM and check what will happen. The results were as expected. Active vCenter Server is down, and after a switchover, Passive vCenter is up and running:
In the vSphere HA status, you may observe that the active node is marked as passive and it is down:
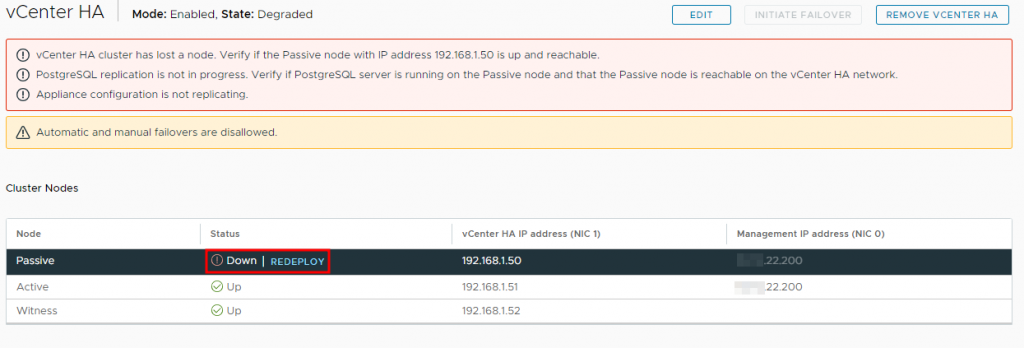
Also, there is a redeploy button. Yes, you can create a new VM in case you lose the machine, for example – dead storage.
If you click redeploy, you will follow the same menu as before to specify settings for new VMs – host, storage, networks, and so on.
What if we shut down the witness when one node is down? – vCenter will be inaccessible.
After you power on the witness back, vCenter will be available.
Now, let’s power up the previously active vCenter VM. You may see, that all three servers are UP, but the configuration is out of sync. At this point, replication of the database is occurring:

When the vCenter HA state is healthy, let’s switch back to the original Active node by clicking “Initiate Failover”:

Read the warning message. It’s good to wait for synchronization and don’t force the process:
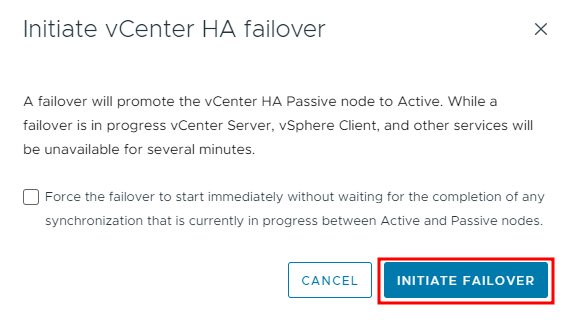
During failover, vCenter will be unavailable for a while. After that, the first node will be active again:

If you want to disable vCenter HA, click “Remove vCenter HA”. A warning message will appear:
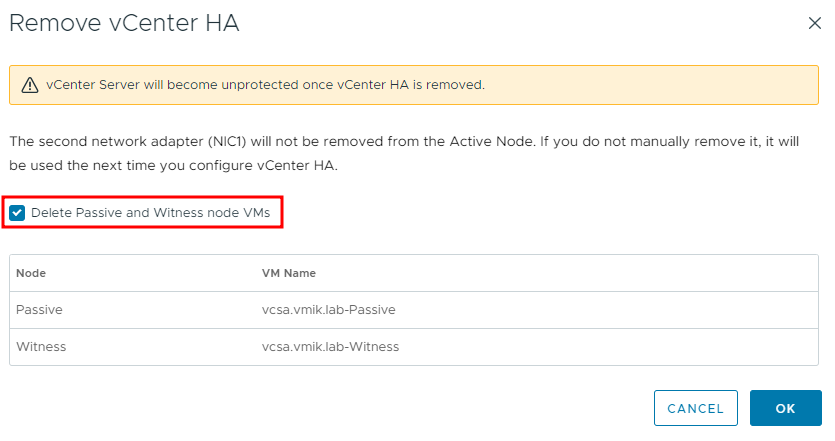
If you want, you can mark a checkbox to delete passive and witness VMs. Also, notice that NIC1, used for vCenter HA traffic won’t be removed. You can do it manually later, or keep it if you want to enable vCenter HA in the future.
After that, VMs will be deleted, and vCenter HA will be disabled:

The DRS rule will exist but will contain only one vCenter VM. You also can delete it.
This is how vCenter HA works.
![]()