I have previously written about how to connect VBR to a Nutanix cluster, as well as how to create backup tasks and restore.
In this article, we will talk about a very important VBR functionality – Instant Recovery, support for which was added with the release of Nutanix AOS 6.0 STS and AOS 6.5 LTS.
For those who don’t know how it works – Instant Recovery allows you to restore virtual machines in minutes by running them in a production environment directly from a backup file.
The backup file is in read-only mode and does not change. All changes are written to a snapshot.
Also, Instant Recovery can be used to restore virtual machines from various platforms to VMware vSphere and Nutanix AHV. For example, you can restore a backup of a VMware vSphere machine to a Nutanix cluster.
There are many supported platforms, but the main ones are VMware, Hyper-V, and backups made using agents. The full list can be found in the documentation.
Main requirements:
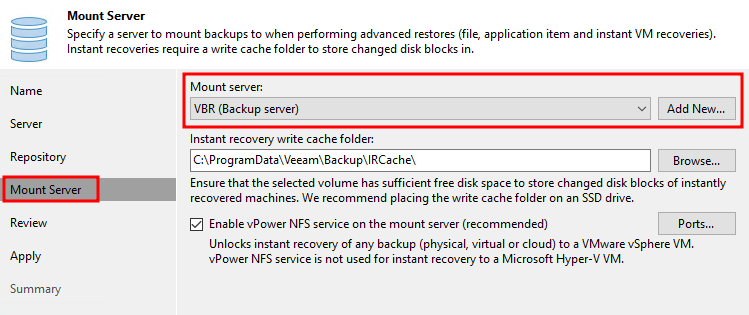
Mount Server must be deployed in the VBR infrastructure. This server is selected during configuring repositories. Often it’s located in the same machine where VBR is installed, but this is not entirely correct.
Linux VMs: disk UUID should be used in the /etc/fstab file when mounting partitions. If device names are used, the virtual machine may not boot after recovery.
Windows VMs: when restoring machines from other platforms in Nutanix AHV, you must first install the VirtIO drivers (before creating a backup and, accordingly, restoring from it). Otherwise, after recovery, the operating system will not see disks or network interfaces due to the lack of drivers.
Now let’s look at the Instant Recovery for Nutanix AHV in action.
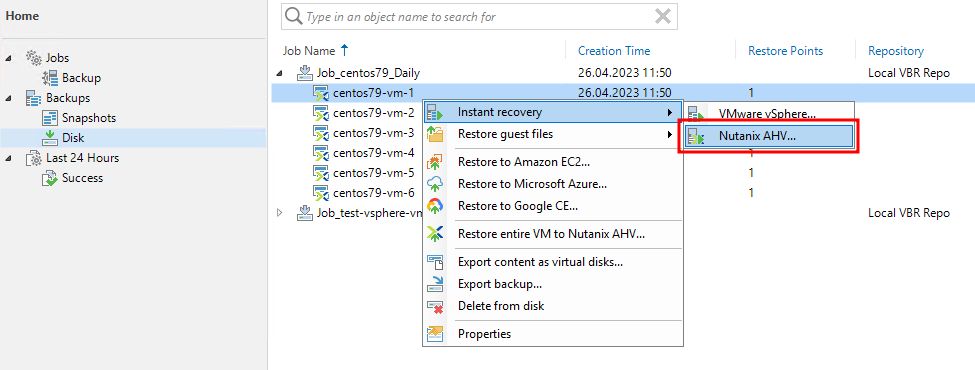
Go to the Backups section, select the desired virtual machine, right-click on it, and select Instant recovery – Nutanix AHV from the pop-up menu:
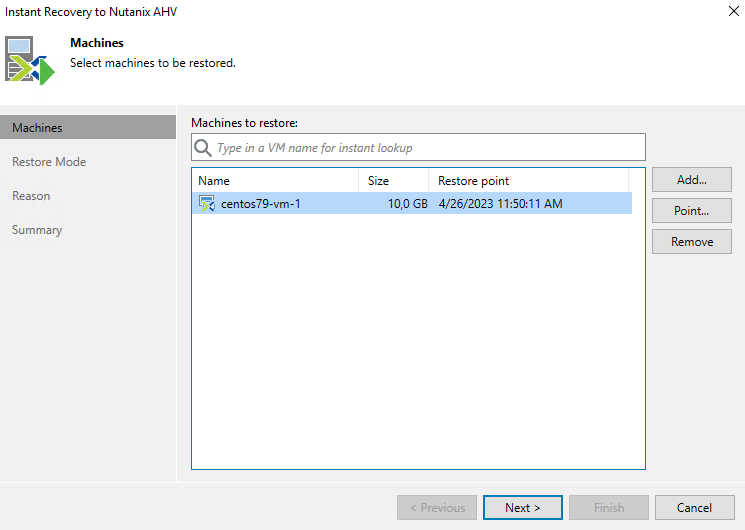
The procedure is standard. Select a restore point:
I restore the VM under a new name, and not over the existing one:

If you need to restore a virtual machine instead of an existing one, you should select the Restore to the original location option.
Next, select the Nutanix AHV cluster where the machine will be restored:
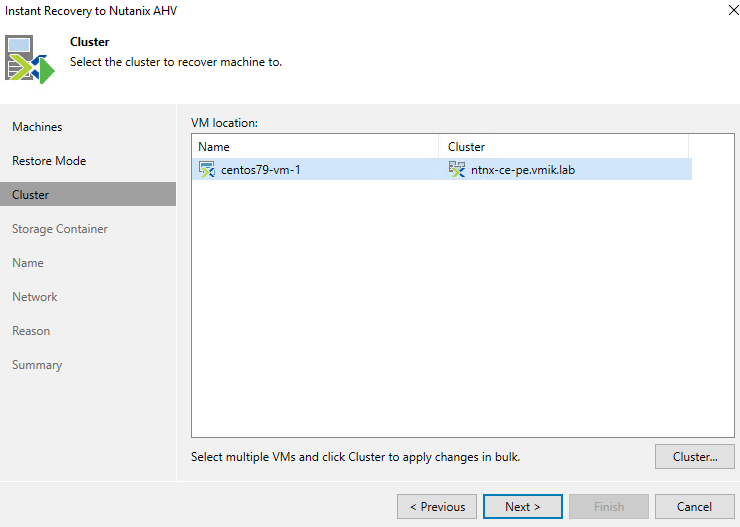
If you need to change the cluster, you can do this with the corresponding Cluster button.
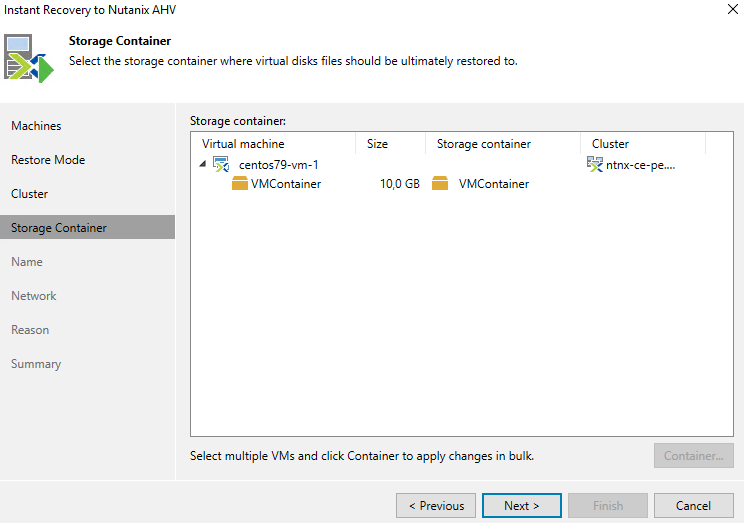
The next step is to select Storage Container:
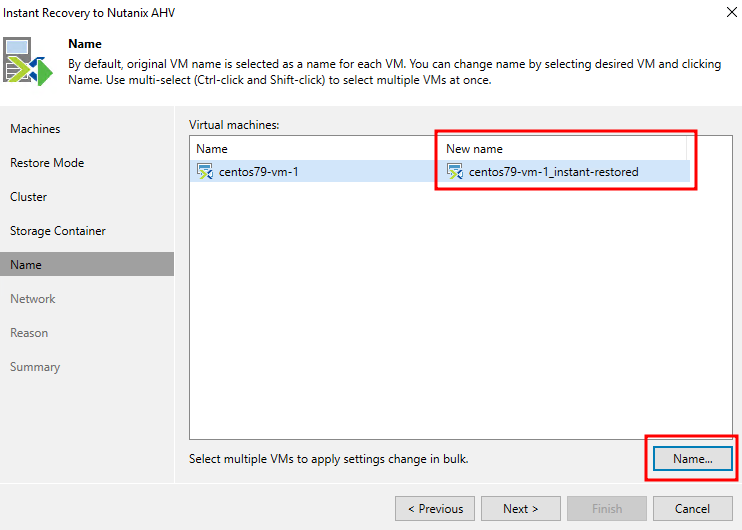
Then we set the name of the virtual machine. It must differ from the names of the machines in the existing cluster:
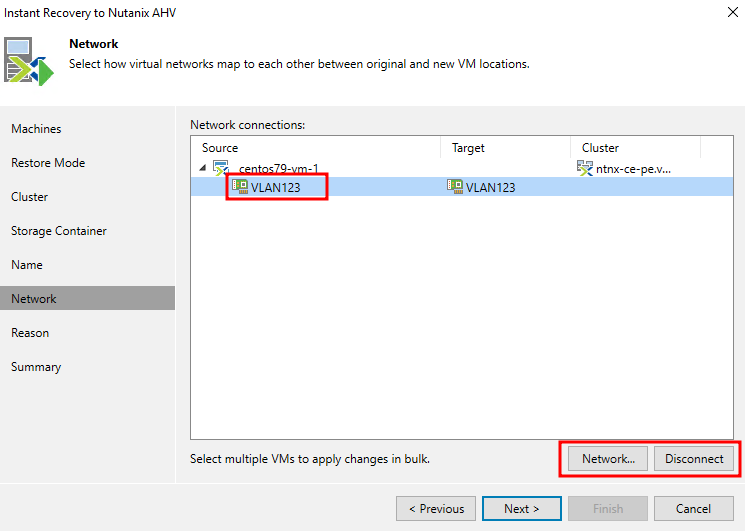
Next, specify the network for the virtual machine, or disable it:
Specify the reason for the restoration and start the procedure by clicking the Finish button.
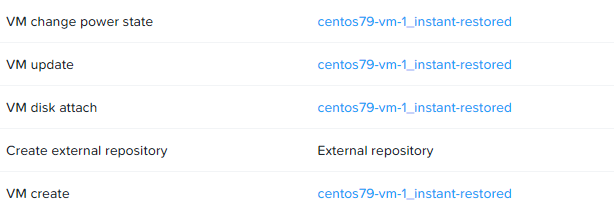
The following operations can be observed in the Nutanix cluster:
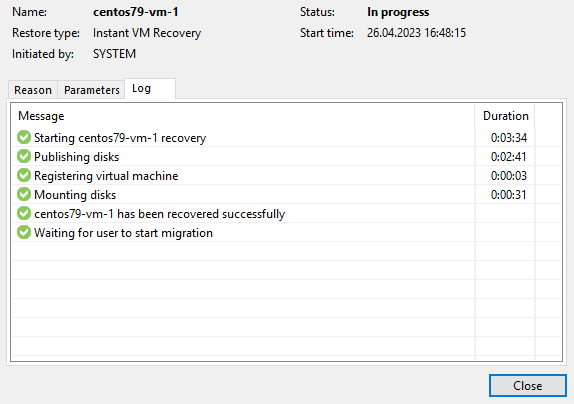
In VBR, everything is standard for Instant Recovery. The virtual machine is deployed and awaiting migration:
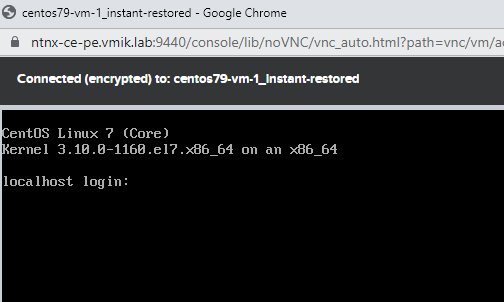
The VM at this moment is working in the Nutanix cluster:
If everything is clear with the Instant Recovery procedure in vSphere – NFS storage from a Mount server is connected to the host, then how does it work in Nutanix AHV?
Let’s connect to CVM and get a list of all external repositories:
nutanix@NTNX-b8d281bb-A-CVM:~$ nuclei external_repository.list
Name                                                   UUID                                  State
Veeam IR session 7b287200-def3-428c-87e1-2d0d2ee27a0c  1f40feaf-2901-4b08-9d18-39fd1cb2ff12  COMPLETE
As you can see, we have one repository, marked as Veeam IR Session. Let’s take its UUID and see the status:
nutanix@NTNX-b8d281bb-A-CVM:~$ nuclei external_repository.get 1f40feaf-2901-4b08-9d18-39fd1cb2ff12
api_version: '3.1'
metadata:
  categories: {}
  categories_mapping: {}
  creation_time: '2023-04-26T10:51:33Z'
  kind: external_repository
  last_update_time: '2023-04-26T10:51:33Z'
  owner_reference:
    kind: user
    name: vbr
    uuid: b3db13fe-4e26-5b23-aa4b-ff09c284323d
  spec_version: 0
  uuid: 1f40feaf-2901-4b08-9d18-39fd1cb2ff12
spec:
  name: Veeam IR session 7b287200-def3-428c-87e1-2d0d2ee27a0c
  resources:
    nfs_configuration:
      access_mode: READ_WRITE
      exported_directory: /VeeamBackup_VBR/centos79-vm-1_42c13d8086d04c5bb5f219d74cb49fbe/
      server_address_list:
      - ip: 192.168.22.206
status:
  execution_context:
    task_uuid:
    - 083bc2e4-baa4-4222-81cc-c855390eb1bd
  name: Veeam IR session 7b287200-def3-428c-87e1-2d0d2ee27a0c
  resources:
    nfs_configuration:
      access_mode: READ_WRITE
      exported_directory: /VeeamBackup_VBR/centos79-vm-1_42c13d8086d04c5bb5f219d74cb49fbe/
      server_address_list:
      - ip: 192.168.22.206
        port: 2049
  state: COMPLETE
What’s interesting here?
Directory exported from Mount server:
exported_directory: /VeeamBackup_VBR/centos79-vm-1_42c13d8086d04c5bb5f219d74cb49fbe/And the IP address of the Mount server:
server_address_list:
      - ip: 192.168.22.206
On the Mount server we can find the corresponding directory with the corresponding UUID:

In my case, this is the default location, but it can be changed during the repository configuration step.
Now let’s return to the VBR console and complete the Instant Recovery procedure by migrating the machine’s disks to productive storage. Let me remind you that now it is launched directly from the backup copy, and all changes are written to IR Cache.
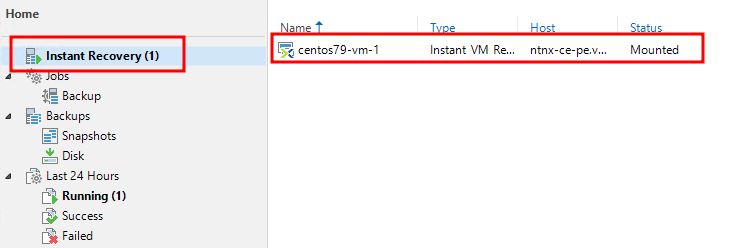
Go to the Home – Instant recovery section and find the session we are interested in:
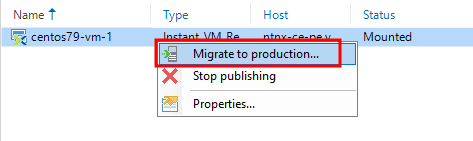
Right-click on the session. We have 3 options – Migrate the machine to production, unpublish, and view statistics.
Select the Migrate to production option:
After that, the procedure for copying VM disks to the productive Nutanix cluster will begin:
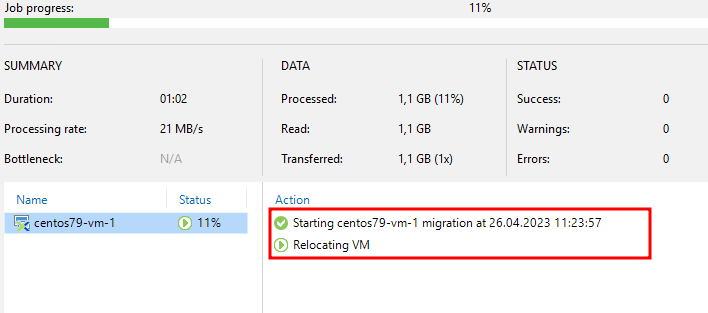
The Nutanix console will also display the migration progress:

Let me remind you that during the migration process, the virtual machine is working and available to users.
We wait until the migration is completed and the recovery procedure using Instant Recovery is completed.
In the example above, we looked at how to recover a Linux-based virtual machine that was previously hosted on a Nutanix AHV cluster.
Now let’s try to restore a Windows virtual machine that was previously located in a VMware vSphere cluster.
I will not show the entire recovery process, only the main points.
And the first point, for the sake of which this was started, is that the machine is restored, but won’t boot:
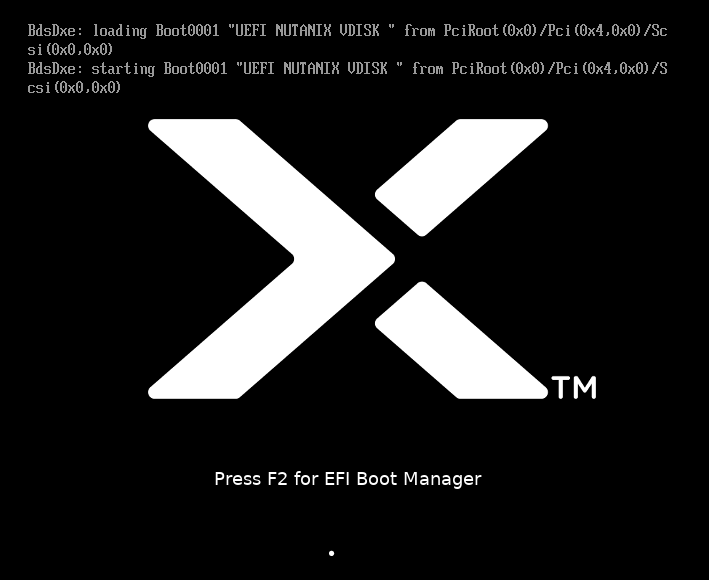
As mentioned earlier, preliminary installation of VirtIO drivers is required.
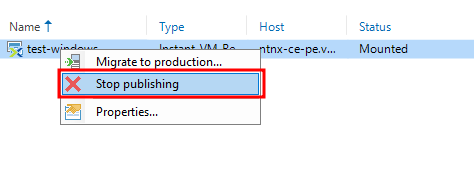
Let’s unpublish the VM:
Next, we will download the latest available version of drivers for Windows from portal.nutanix.com.
Let’s copy the drivers and install them in the OS:

When the drivers are installed, we will perform the backup procedure again to have a backup copy with the already installed drivers.
Next, we restore the virtual machine from the most recent copy. Now there should be no problems starting the OS:
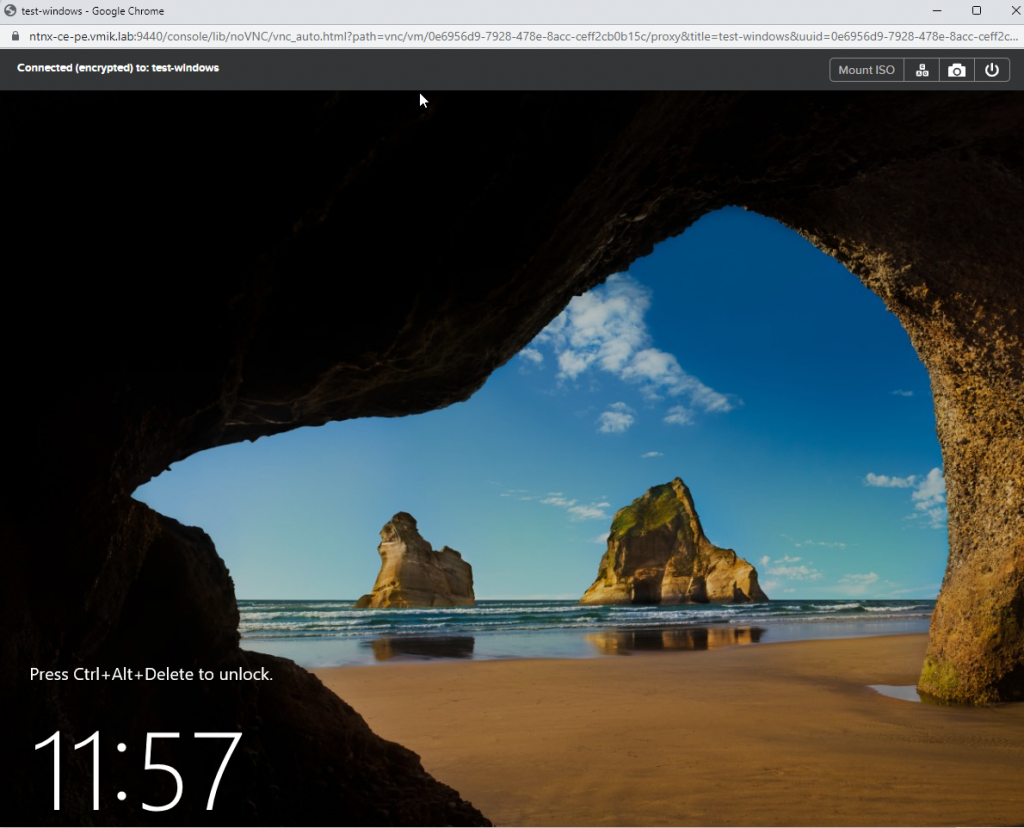
However, you still have to fix the network settings to the new virtual adapter.
In conclusion:
In this article, we looked at the process of restoring virtual machines using Instant Recovery in Nutanix AHV.
Instant Recovery allows you to restore machines in minutes, but you need to understand that with such a recovery, the performance of the VM can be significantly lower, so it is worth moving it to the production site as quickly as possible.
Also, do not forget to install VirtIO drivers on Windows operating systems if you plan to restore to the Nutanix AHV from other platforms.
![]()