Advanced Kubernetes Management is a feature of the NKE that provides extra visibility for Kubernetes clusters in the Prism Central interface. It allows you to get information about deployed resources in clusters in a pretty simple manner.
In this article, we will look at how to enable and use the Advanced Kubernetes Management feature.
Advanced Kubernetes Management consists of two parts:
Management Services – the core of Advanced Kubernetes Management;
Agent Services – agents are installed in the NKE-managed clusters.
Management Services as well as an Agent Service work in a Kubernetes cluster as a set of PODs. Before enabling Management Services, we need to deploy at least one Kubernetes cluster.
The best practice is to deploy a separate small cluster only for Advanced Kubernetes Management purposes.
If you don’t remember how to deploy a cluster using NKE, follow my previous article.
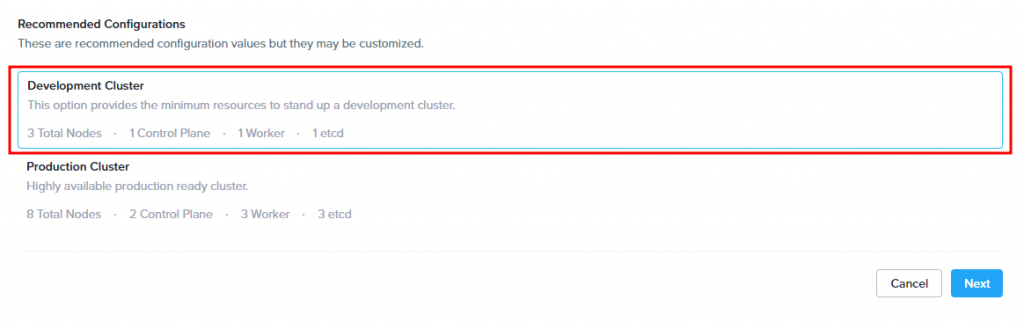
The best option, in my opinion, is a small development cluster, which consists of two worker nodes:
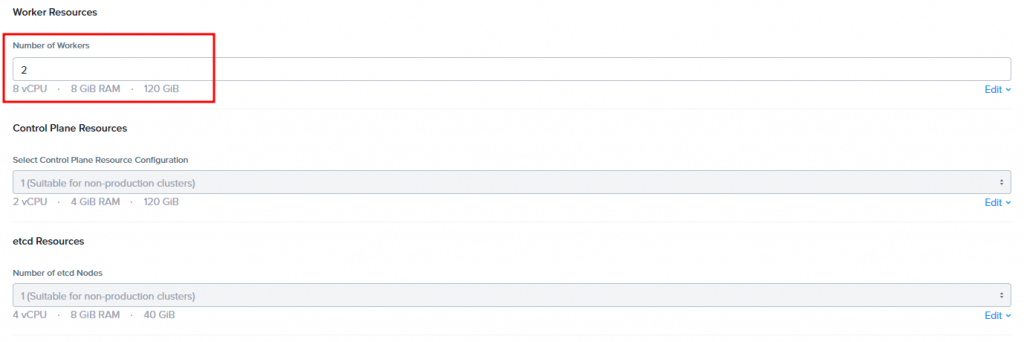
Don’t forget to increase the number of workers:
After deployment, I have two clusters:
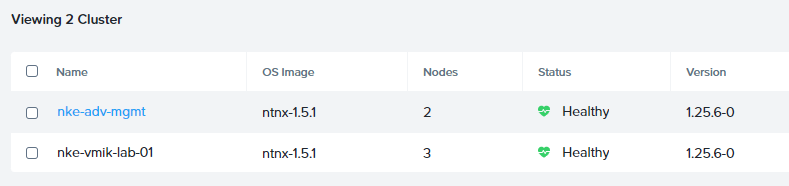
nke-adv-mgmt – dedicated cluster for Advanced Management core services;
nke-vmik-lab-01 – my “production” cluster, where I want to enable Advanced Management and get additional visibility.
To enable Advanced Management we need to use the karbonctl utility located on Prism Central VM.
For those, who don’t know, karbonctl is an NKE management utility that provides additional functionality, not available in the UI.
Connect to the Prism Central VM using SSH:
$ ssh admin@ntnx-ce-pc.vmik.labBy default, karbonctl utility is located in the /hone/nutanix/karbon directory:
admin@PCVM:/$ cd /home/nutanix/karbon/
admin@PCVM:/home/nutanix/karbon$ ls
karbonctl  kps-cloud-deployer-pc.tar.gz
First, we need to login to Prism Central, using karbonctl:
admin@PCVM:/home/nutanix/karbon$ sudo ./karbonctl login --pc-ip ntnx-ce-pc.vmik.lab --pc-username admin
Please enter the password for the PC user: admin
Login successful
Where:
pc-ip: Prism Central IP or DNS name;
pc-username: an account to log in. In this case, with admin permissions.
By the way, running this command without the pc-ip parameter will connect you to the local Prism Central.
Now we can enable Management Service in the previously deployed cluster:
admin@NPCVM:/home/nutanix/karbon$ sudo ./karbonctl karbon-management enable --cluster-name nke-adv-mgmt
…
Successfully enabled karbon management!
…
A new namespace will be created in the nke-adv-mgmt and a set of PODs will be started during the configuration.
[root@k8s-admin ~]# kubectl get namespaces
NAME              STATUS   AGE
karbon-mgmt       Active   3m22s

[root@k8s-admin ~]# kubectl get pods -n karbon-mgmt
NAME                                        READY   STATUS      RESTARTS        AGE
accountserver-deployment-697f575b5f-27q5l   1/1     Running     0               10m
cfsslserver-deployment-6c78fc94b7-6jcfs     1/1     Running     2 (9m31s ago)   10m
cloudmgmt-deployment-979f79d9d-pl77q        1/1     Running     0               10m
graphqlserver-deployment-5dbb794bd9-t6kgh   1/1     Running     3 (8m53s ago)   10m
operator-deployment-74b64c4f99-z6lht        1/1     Running     3 (9m37s ago)   10m
postgres-0                                  1/1     Running     0               10m
postupgradeopsv1-7ddg5                      0/1     Completed   0               10m
redis-deployment-6d5f77896b-q7rnz           1/1     Running     0               10m
traefik-jwjtd                               1/1     Running     0               10m
traefik-nvvtc                               1/1     Running     0               10m
If you investigate a bit further and check /home/docker/karbon_core/karbon_core_config.json file, you may find the IP address of the Management Server:
"KARBON_MGMT_IP=192.168.22.240",
"KARBON_MGMT_PORT=30001",
"KARBON_MGMT_ENDPOINT_PROTOCOL=https"
Sometimes this information could be useful in troubleshooting.
Let’s return to karbonctl and enable Management Agent in a cluster:
admin@PCVM:/home/nutanix/karbon$ sudo ./karbonctl karbon-agent enable --cluster-name nke-vmik-lab-01 --mgmt-name nke-adv-mgmt
…
karbonagent_enable.go:182: [INFO] Successfully deployed karbon agent.
Successfully Enabled the Karbon Agent
…
Where:
cluster-name: name of the cluster where we want to install an agent;
mgmt-name – the name of the management cluster (created before).
After deployment, you should see new namespaces and PODs in the cluster:
[root@k8s-admin ~]# kubectl get namespaces
NAME              STATUS   AGE
karbon-agent      Active   2m46s
project-ingress   Active   2m5s
sherlock-users    Active   2m4s

[root@k8s-admin ~]# kubectl get pods -n karbon-agent
NAME                                    READY   STATUS    RESTARTS   AGE
controller-deployment-788c9df5b-qrnwx   1/1     Running   0          2m55s
edgemgmt-c97765dc7-nvntg                2/2     Running   0          2m55s
nats-c9bd445bb-gmgd4                    1/1     Running   0          2m21s

[root@k8s-admin ~]# kubectl get pods -n project-ingress
NAME                                       READY   STATUS    RESTARTS   AGE
datastream-mqtt-ingress-54b8c67bdd-k9l2r   1/1     Running   0          2m10s
datastream-rtsp-ingress-59c47c8f7c-q2dxk   1/1     Running   0          2m10s
nats-8bc8494cd-9rg2t                       1/1     Running   0          2m25s

[root@k8s-admin ~]# kubectl get pods -n sherlock-users
No resources found in sherlock-users namespace.
Now we can move to Prism Central and select a Kubernetes cluster. First, you can see, is a new “Namespaces” menu:
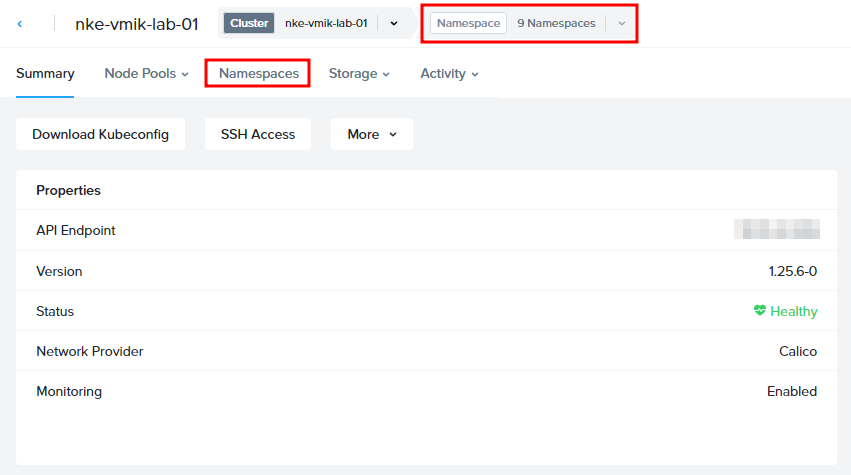
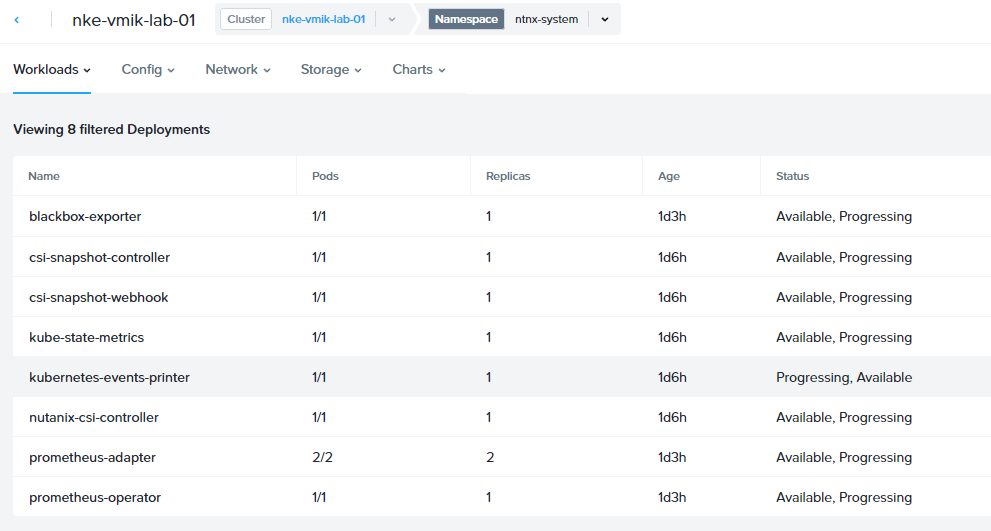
If you select a namespace, you will see a list of workloads:
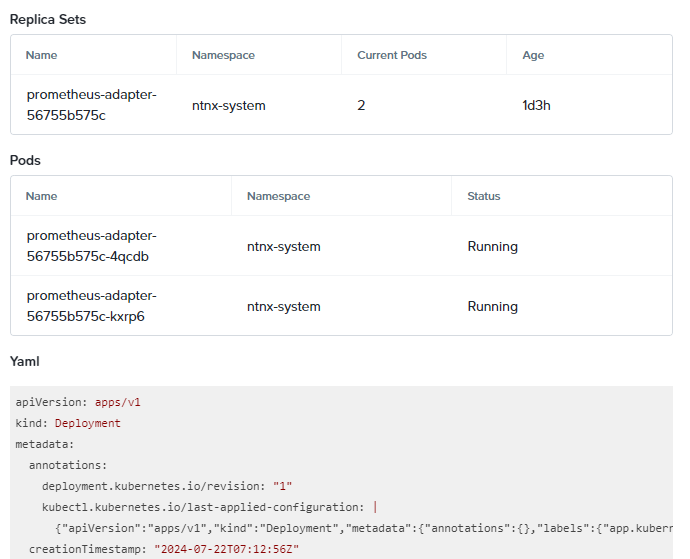
Clicking deployment, we can see a replica set, PODs, and even a Yaml:
Sections we can monitor are:
- Workloads – PODs, Deployments, Jobs, and so on;
- Config – Config maps and Secrets;
- Network – Services, Endpoints, Ingress;
- Storage – PVCs.
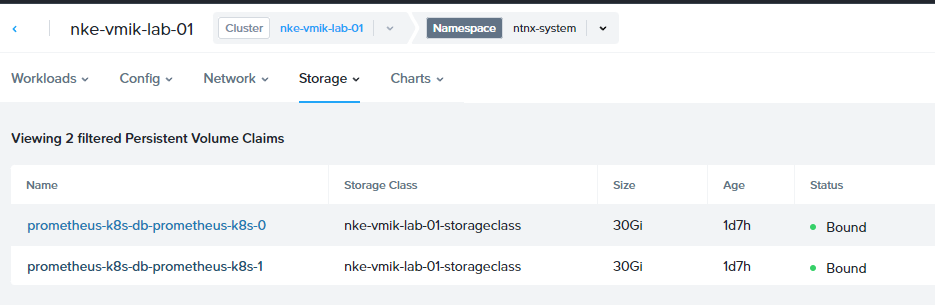
For example, a list of PVCs in the ntnx-system namespace:
In conclusion
This is how to enable Advanced Kubernetes Management. As we can see, this is a pretty easy task, but it requires an additional Kubernetes cluster. Also, we need to install an agent service to monitor a specific cluster.
At the moment of writing, we can’t manage resources (create, delete, or change), but only observe the current status. I believe that this feature will be improved in further NKE releases.
By the way, if we don’t install an agent in a cluster, we will still see a Namespaces menu, but it will display an error:

We can ignore it or install an agent.
![]()