Previously I wrote about the newest Veeam Feature – Veeam Software Appliance – pre-built and pre-hardened image containing all the packages needed to run a fully functional backup server on Linux.
In this article, we will look at the Veeam Infrastructure Appliance – an infrastructure component based on Veeam JeOS as well, which can hold different roles – Proxy, Repository (including Hardened), Mount Server, and so on. Do you remember Veeam Hardened Repository ISO? – This release is a massive evolution.
In addition, please consider this article as a little walk through the basic Veeam Software Appliance Web UI.
The minimal system requirements for the Veeam Infrastructure Appliance are:
2 CPU Cores;
8 GB RAM;
System disk – 120 GB minimum;
Data disk – 120 GB minimum for storing backups.
In addition, carefully read the prerequisites, especially those related to hardened repositories.
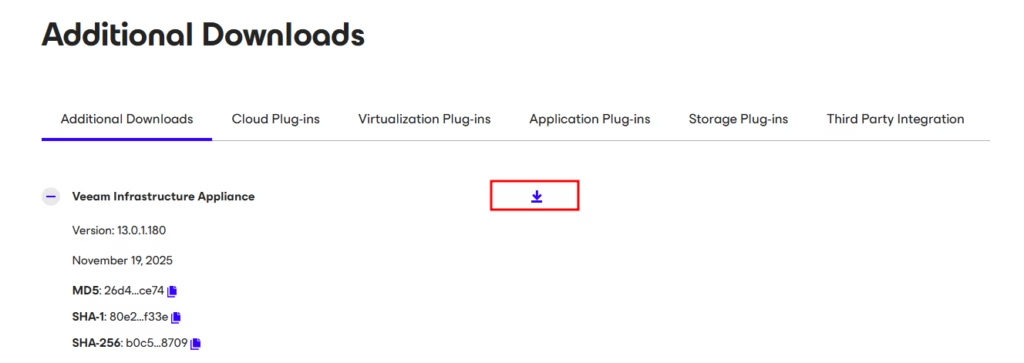
To download Veeam Infrastructure Appliance, select additional downloads in the Veeam Software Appliance download section:
Let us begin with the installation. If you read my previous article about VSA, you will find a lot in common.
After booting from the ISO, first, we need to choose between different VIA modes:
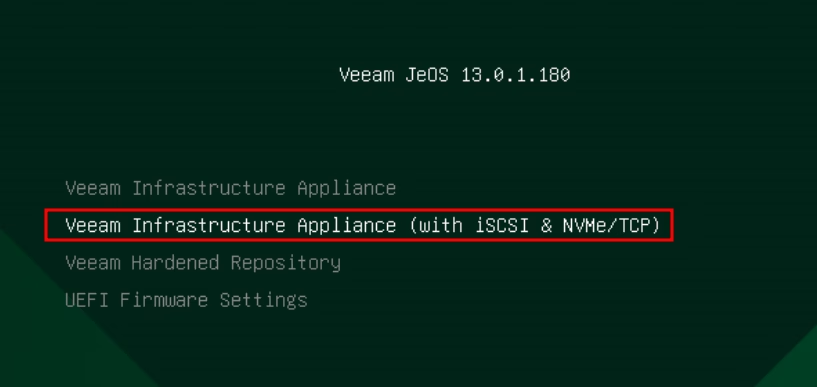
The first option is the infrastructure appliance, which does not include any additional features. Second is the same, but with the iSCSI and NVMe/TCP support. It can be useful when backups from storage snapshots are enabled.
Although both options can hold the repository role, to deploy a hardened repository, we need to choose the third option.
To install Veeam Infrastructure Appliance, select the corresponding option:
The installer will run a set of pre-checks and inform you if something needs to be fixed:
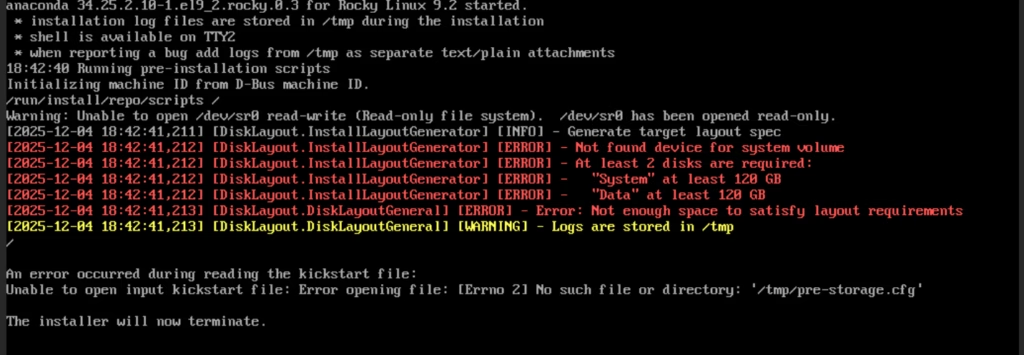
For example, the installer warns that the disk configuration is not suitable for installation.
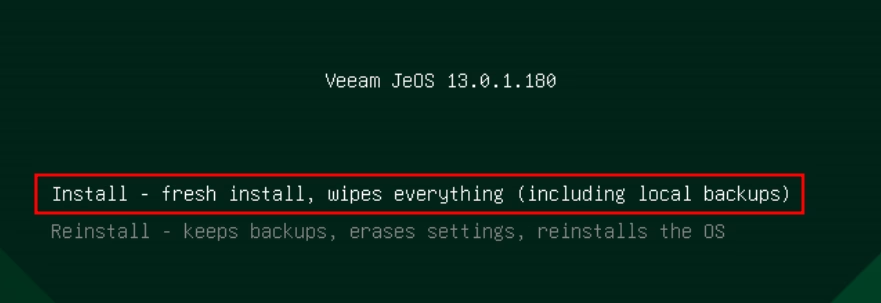
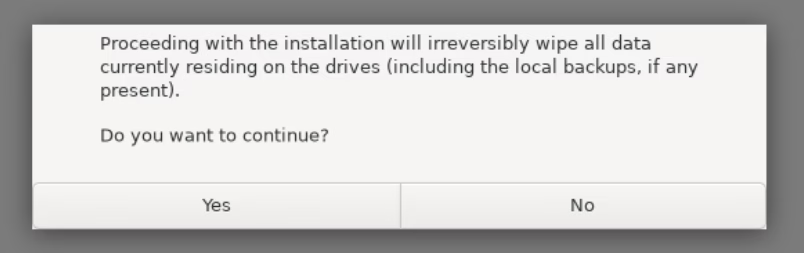
If everything is correct, we need to agree that all data on the server will be wiped during installation:
Next, we will see a familiar RHEL-like installation window:

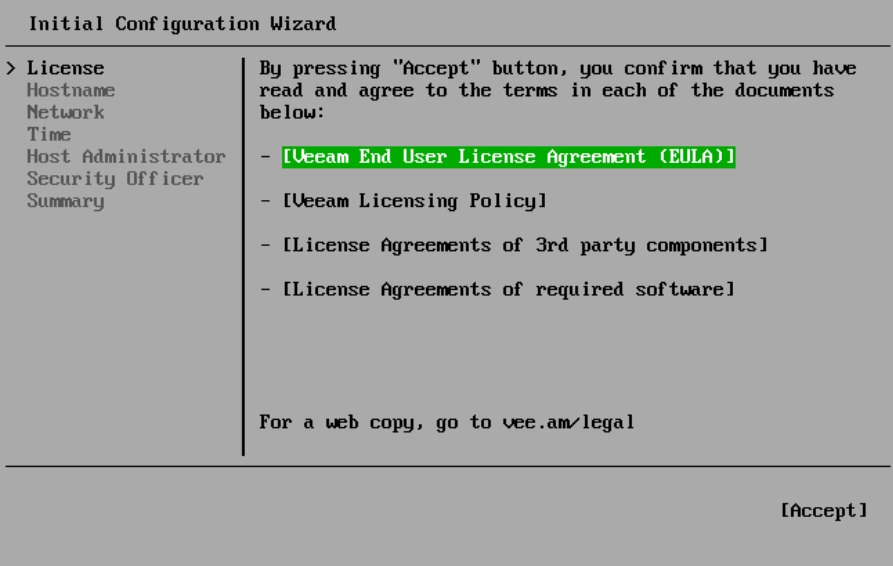
After installation, we need to follow a few configuration steps, and the first is to read and accept the EULA:
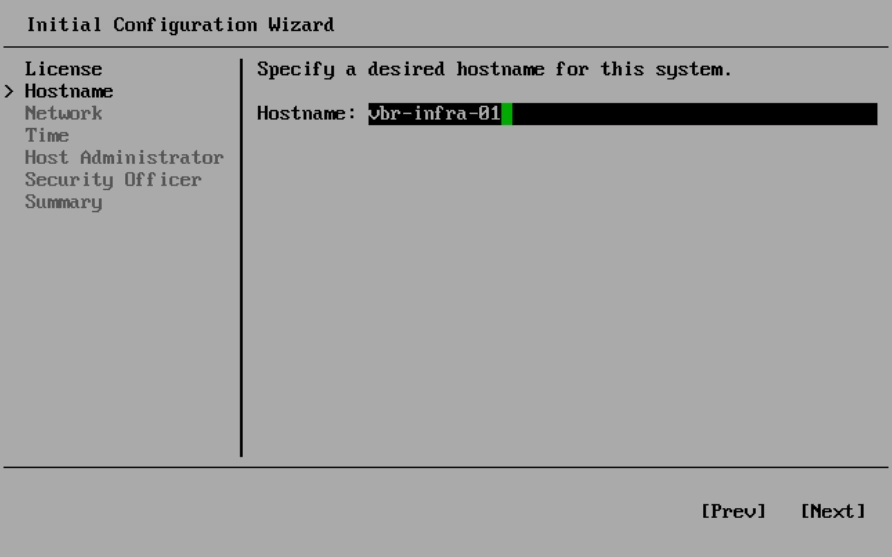
Next, set up the hostname:
The network section allows us to configure the IP address:
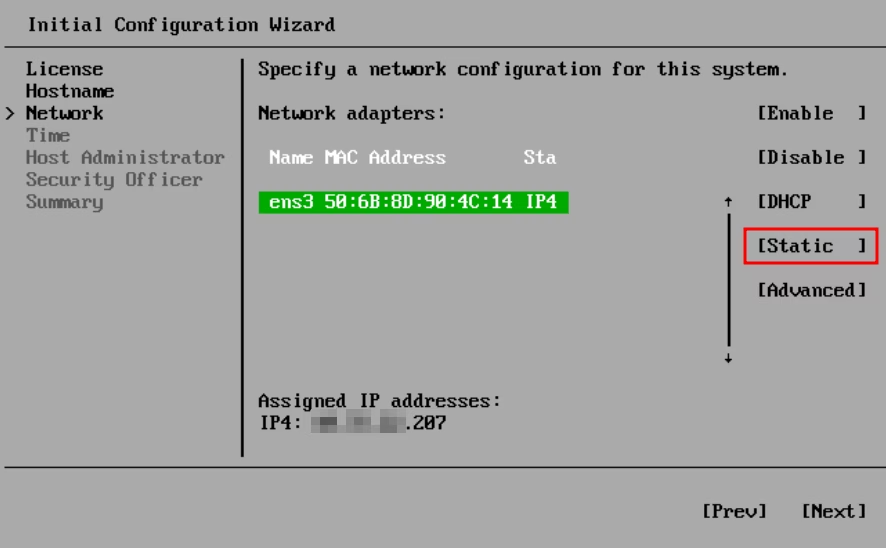
The address can be static or dynamic. For additional configurations, use the advanced menu – it will open the Network Manager Text User Interface (nmtui) to configure the network.
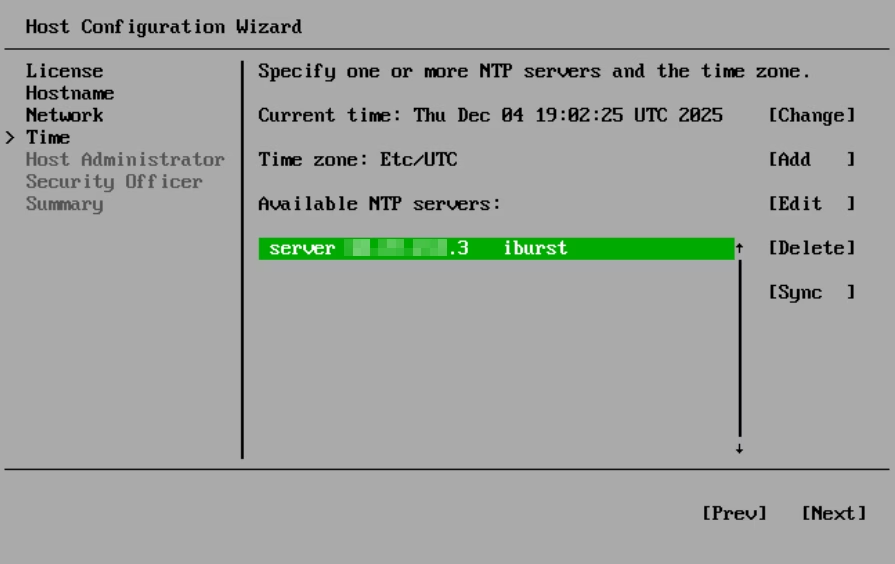
Moving forward, we need to configure NTP servers:
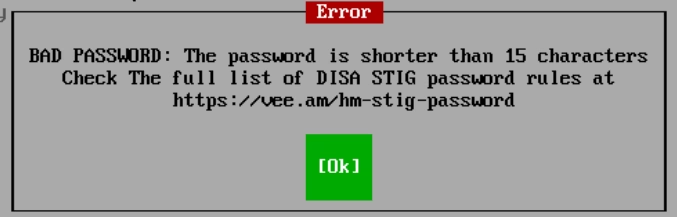
The next step is to set up a password for a default user – veeamadmin:
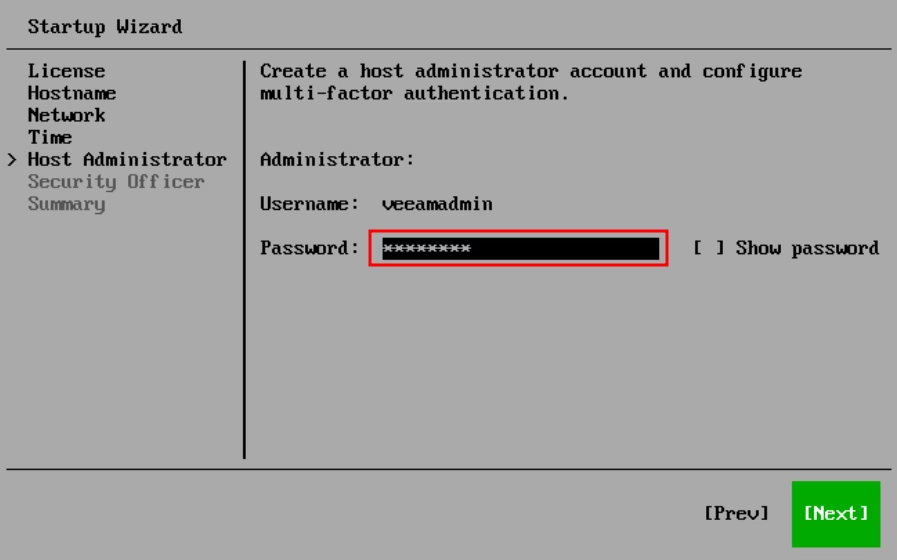
The password should be DISA STIG compliant:
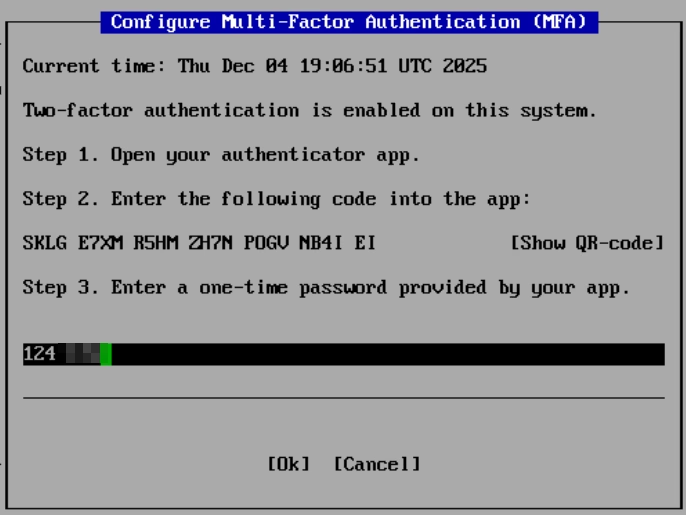
After that, multi-factor authentication configuration is required. To do that, install, for example, Google Authenticator on your mobile phone, scan the provided QR code, and enter the provided one-time password after:
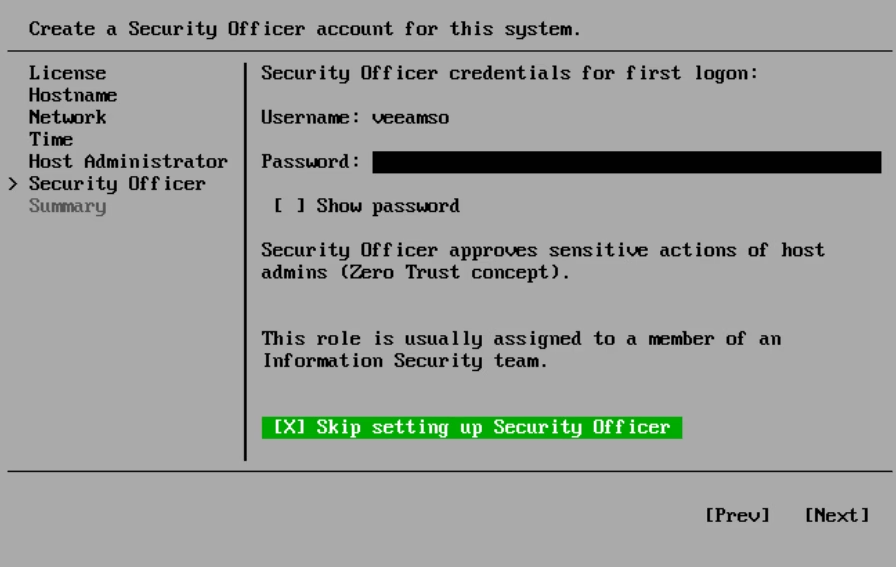
The next step is to configure security officer credentials. I do not have a security officer, so I am skipping this step:
After finishing all steps, review and finish the configuration:

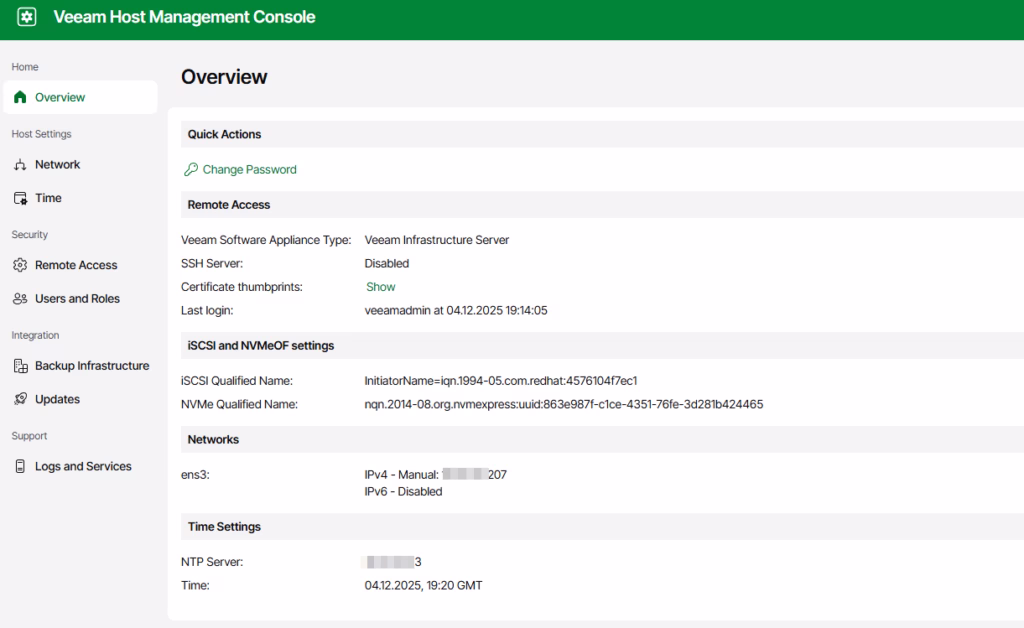
Wait for the appliance to boot; all necessary information will appear on the main screen:

For example, we can use web-browser, to manage the appliance configuration. Just follow the provided address and authenticate:

Through the Web UI, we can perform various configurations, along with updating and managing the appliance:
At this point, we have finished with the installation and configuration. Now, let us move to the Veeam Software Appliance Web UI and add a new infrastructure component.
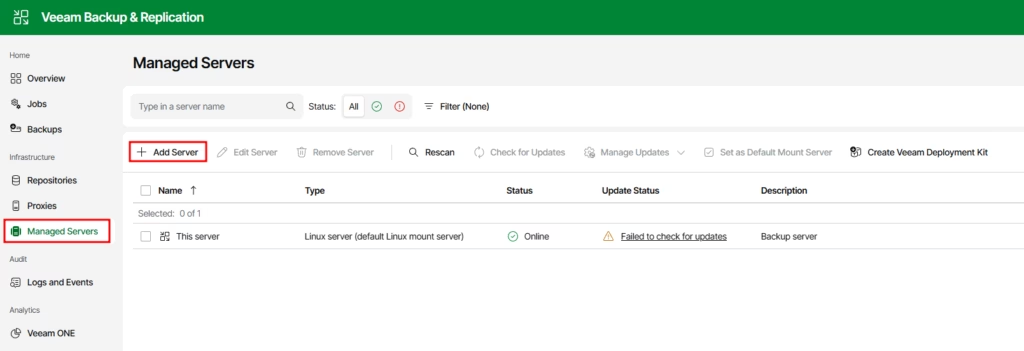
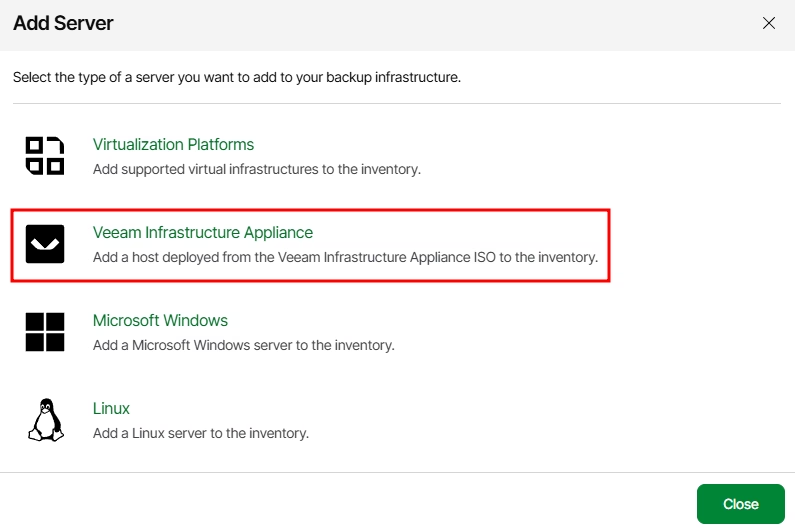
Open the managed servers section, and click “Add Server”:
In the following window, we can see a new V13 option. Select Veeam Infrastructure Appliance:
Next, provide the DNS name or IP address of the newly deployed appliance:
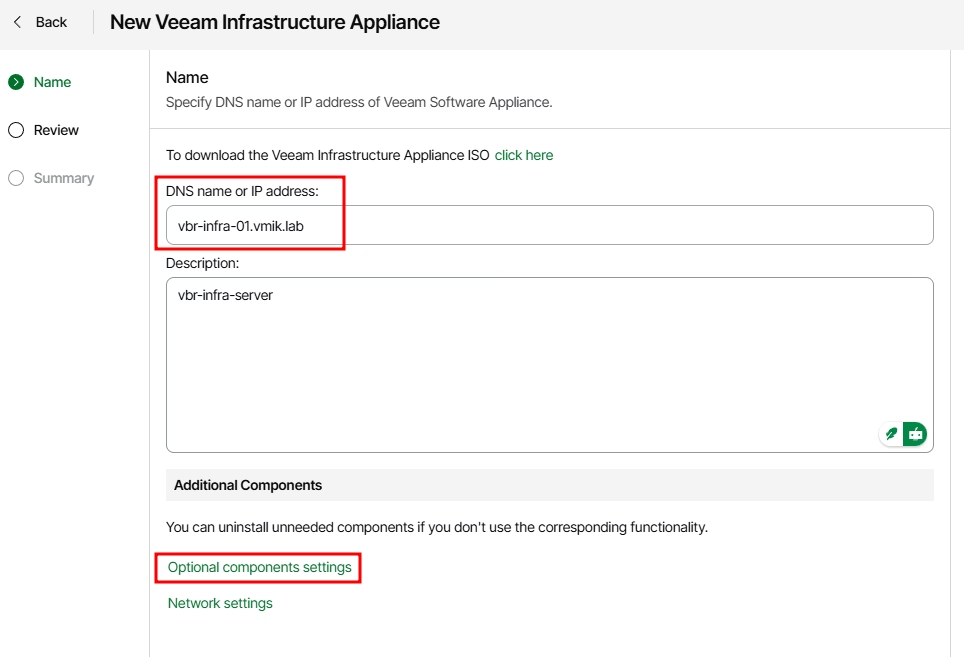
In addition, we can click “Optional Components Settings” to adjust the list of optional components installed on the server.
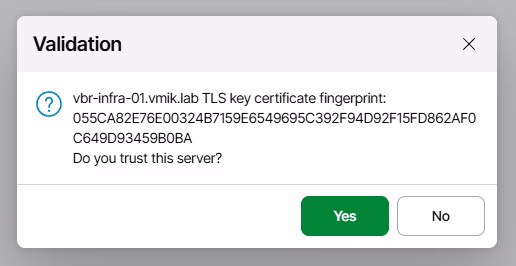
To connect to the Veeam Infrastructure Appliance, we do not need any credentials. It works for the first backup server, connecting to the new appliance. The only thing we need is to verify the certificate fingerprint:
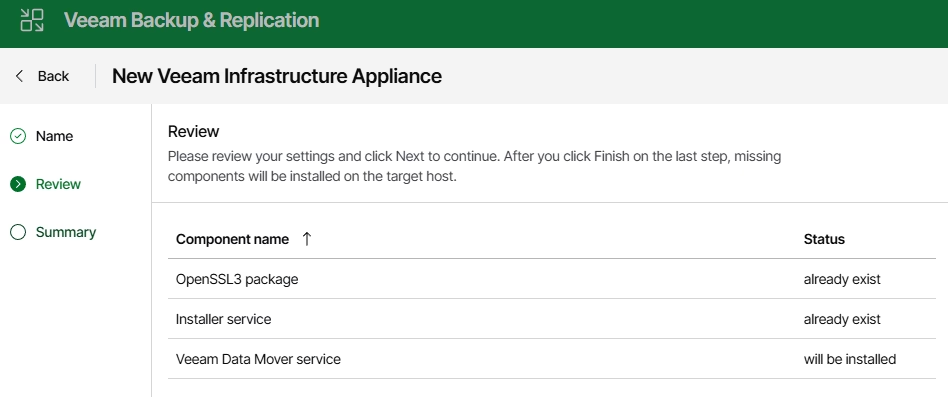
Review the components that will be installed:
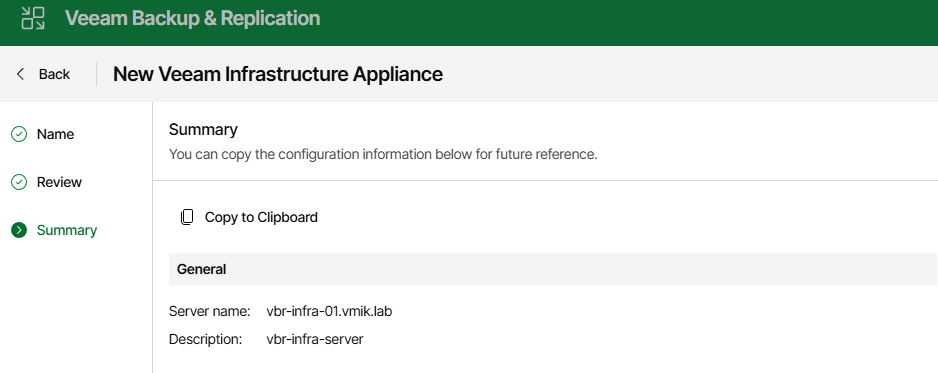
And the summary:
The next window will display the status of preparing and adding the server:
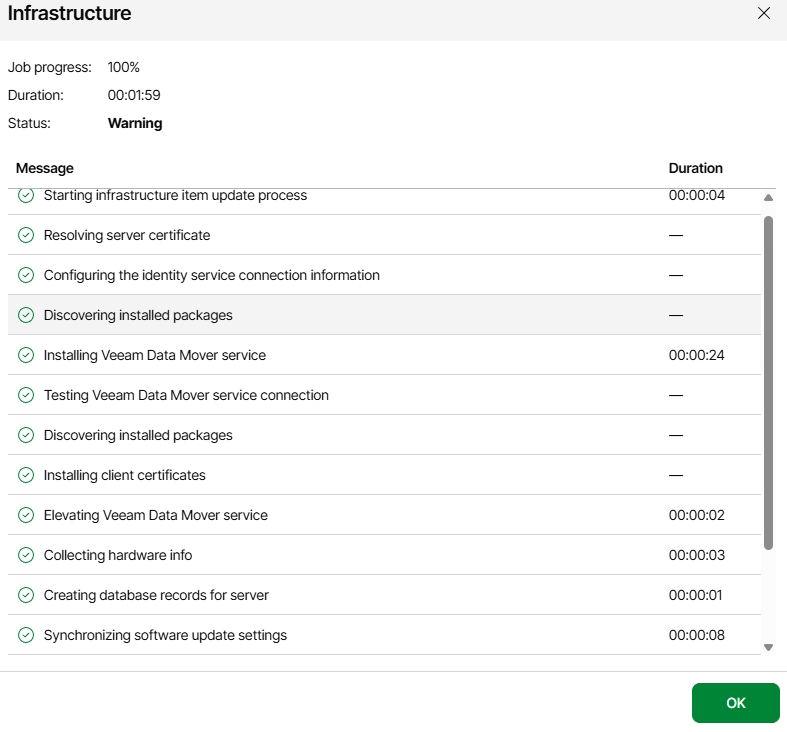
After a short time, the server will be added to the backup infrastructure:
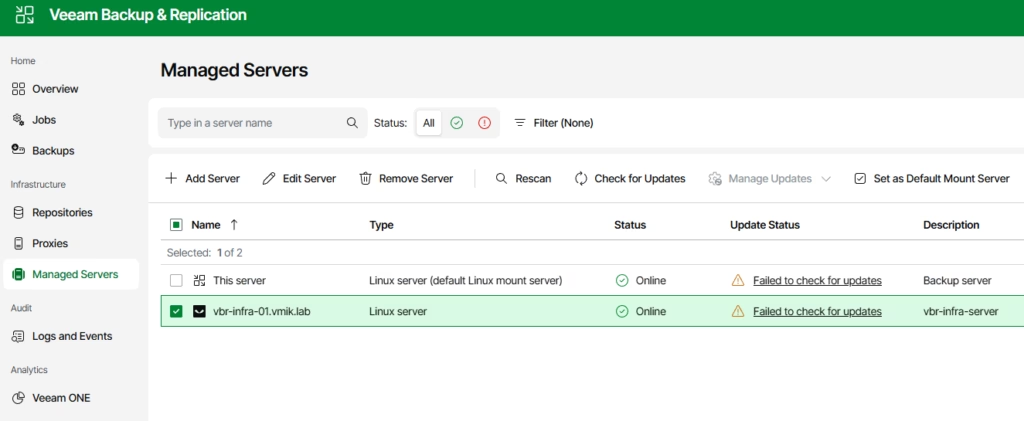
Now the server is ready to deploy additional roles.
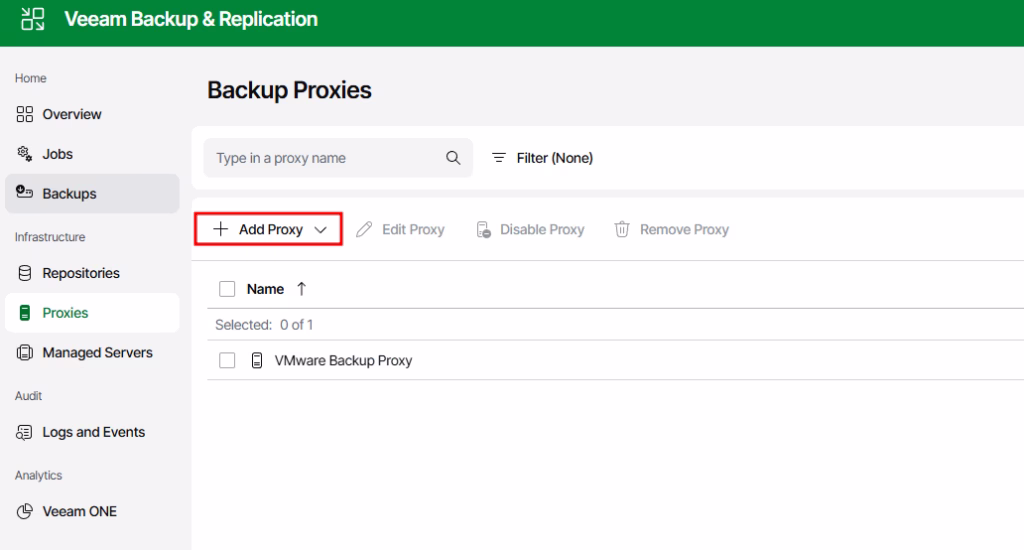
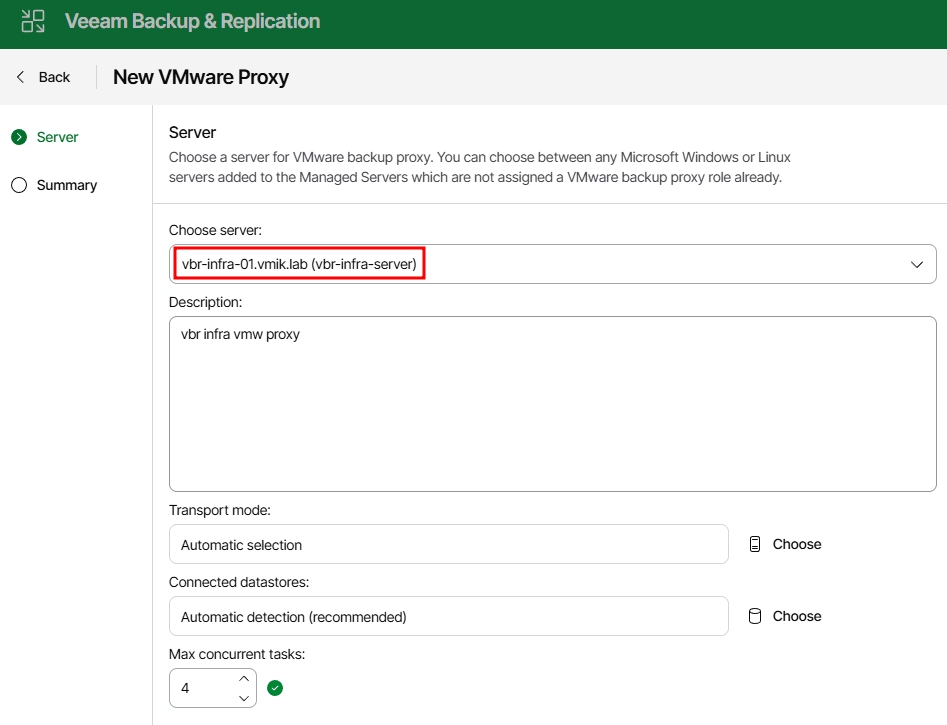
First, we add a VMware Proxy server. To do that, select the Proxies menu, and click “Add Proxy”:
In the following window, we need to choose our VIA server and edit the maximum concurrent tasks if needed (remember: 1 task = 1 CPU core as a best practice):
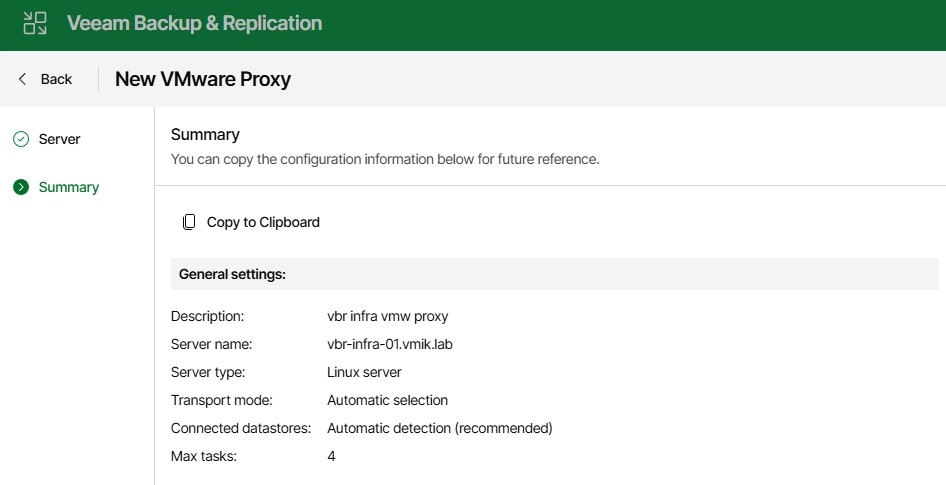
Next, review the summary and start creating the proxy:
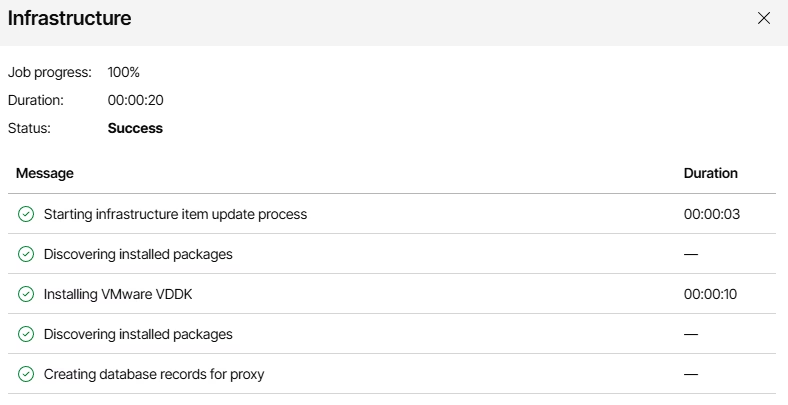
The job log will display all tasks performed on the VIA server:
Now we have a new VMware Backup Proxy in the infrastructure:

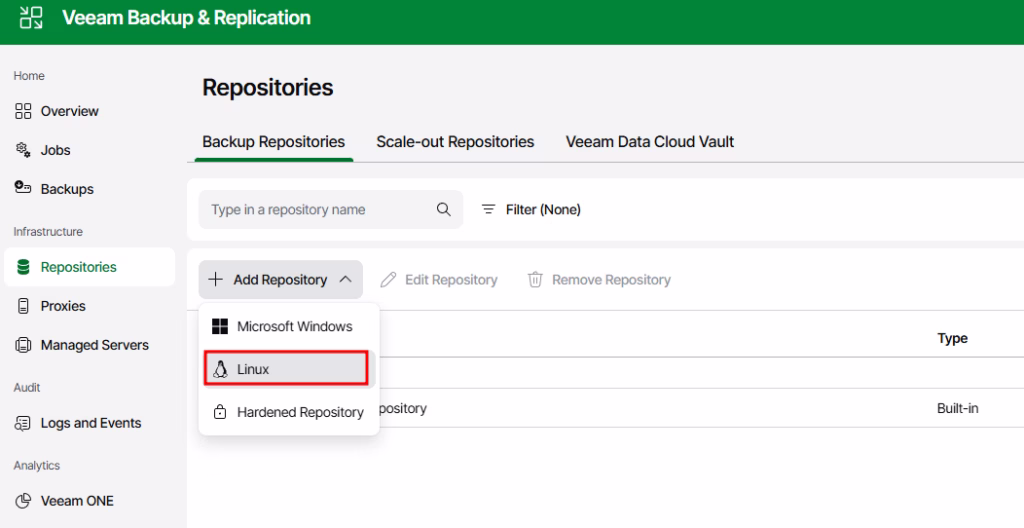
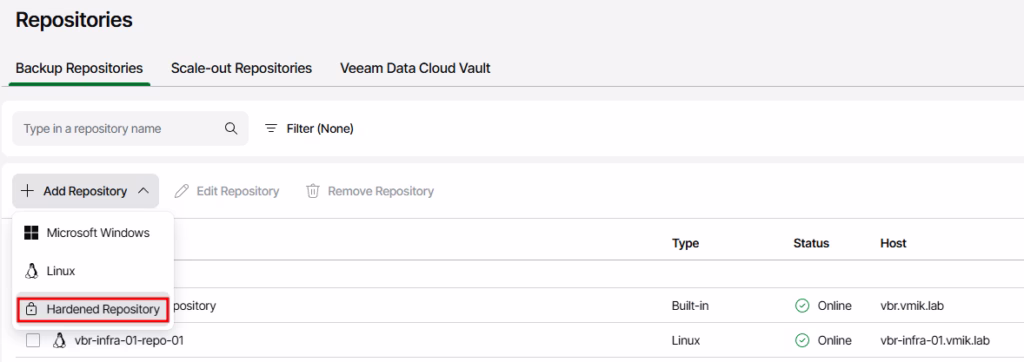
To add a repository, open the corresponding section and click “Add Repository”:
For a hardened repository, we need to use the third option (and please keep in mind that you must install VIA as a hardened repository); in other cases, we will use VIA as a simple Linux repository.
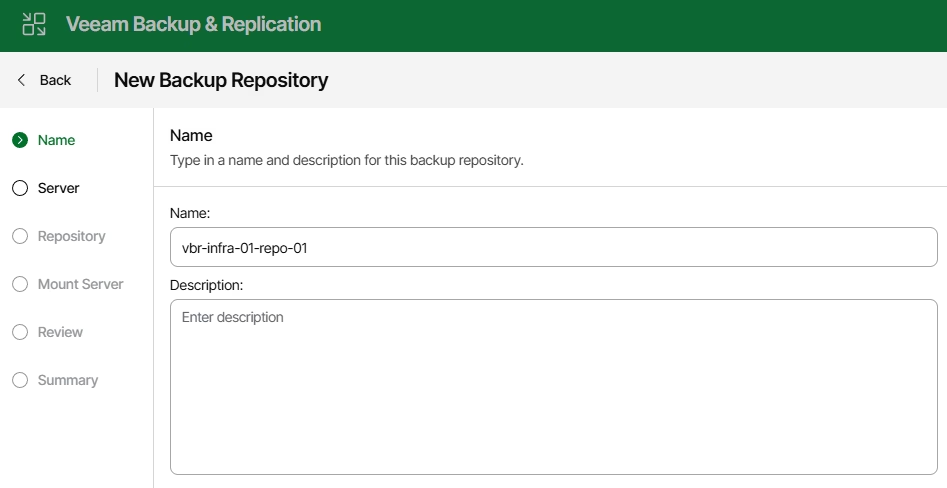
Provide the repository name:
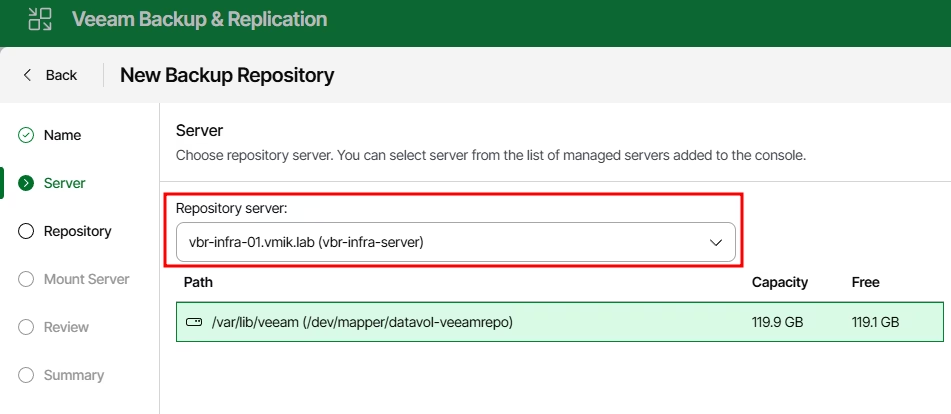
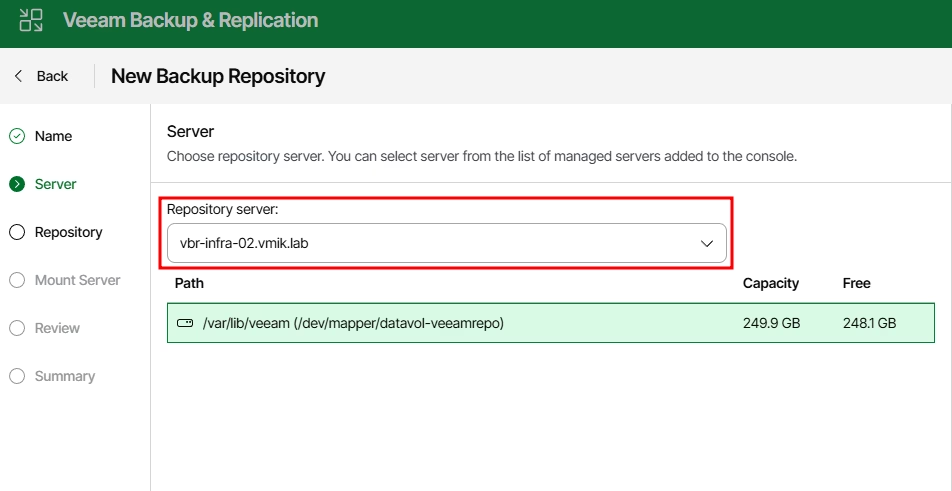
Select the server and a path for storing backups:
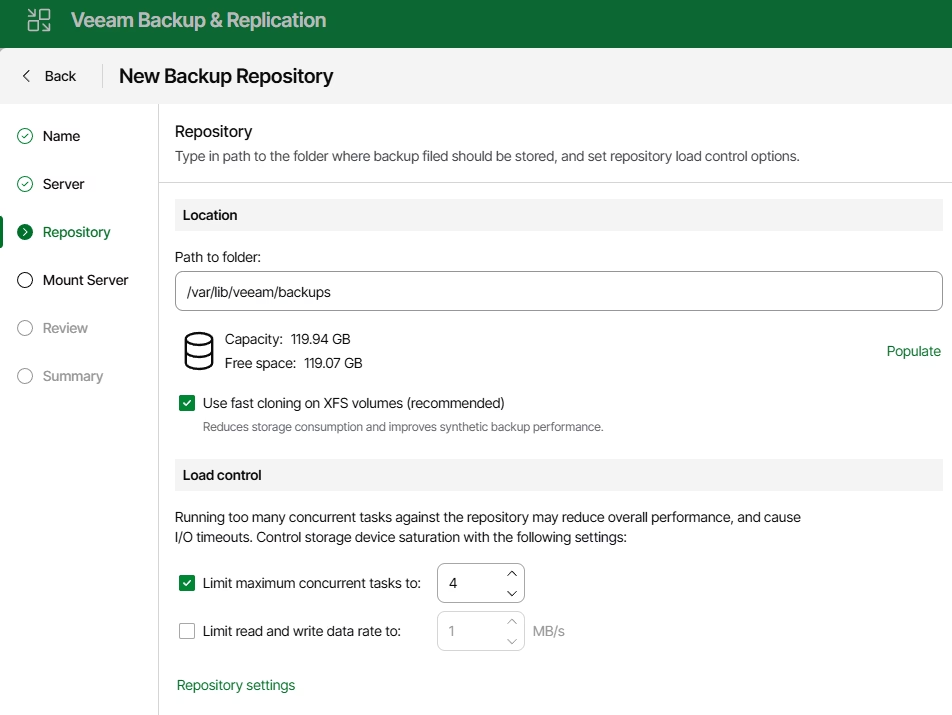
Next, adjust standard repository settings if needed:
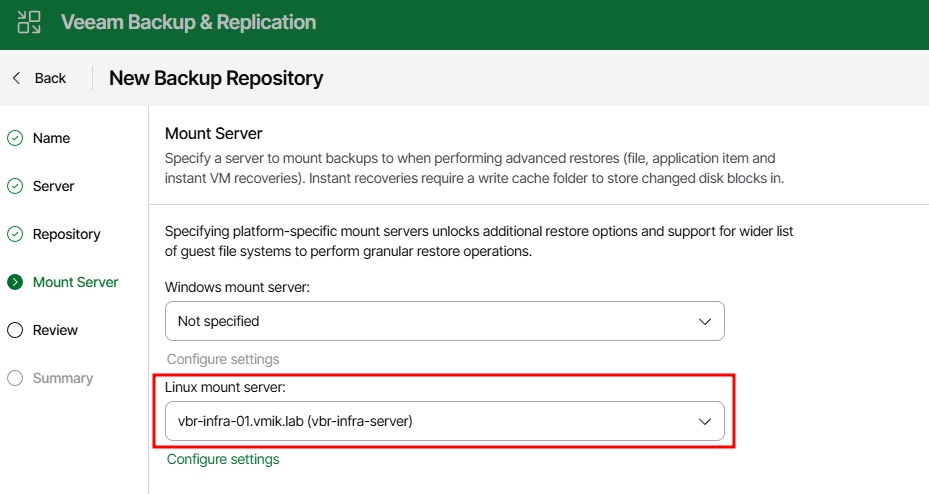
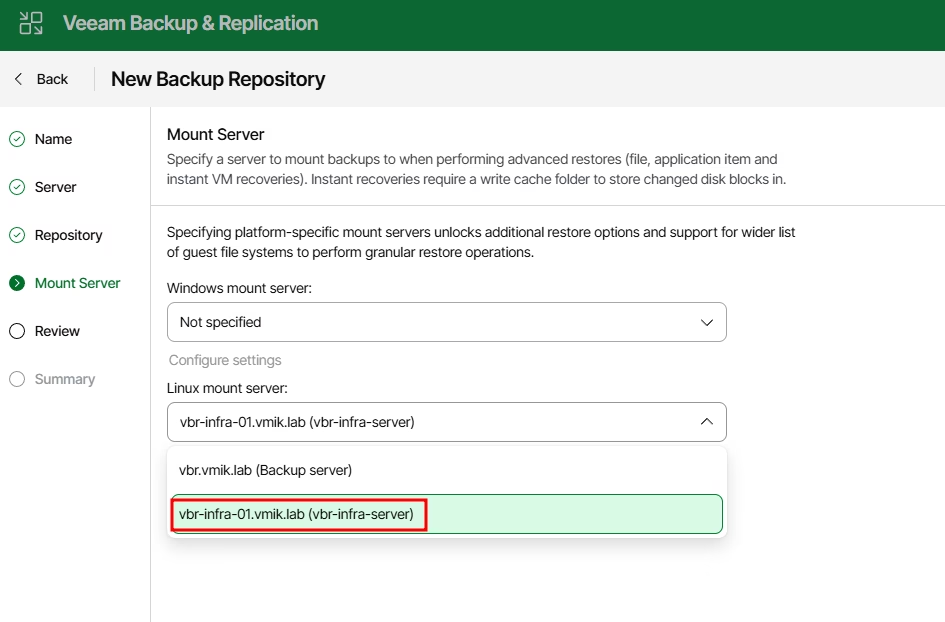
Select a mount server. Yes, you can choose VIA as a mount server. Since V13 the mount server can be hosted on Linux OSes:
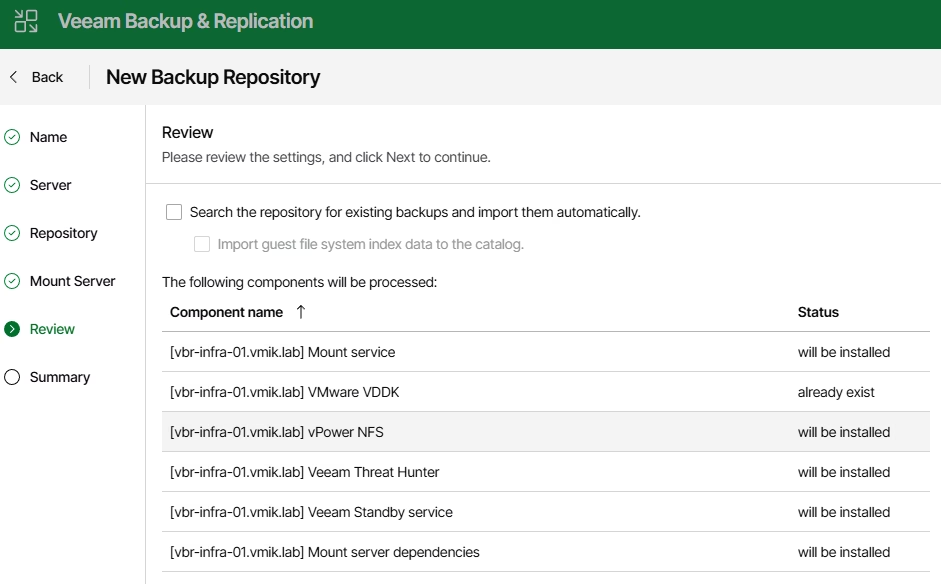
Review the components that will be installed:
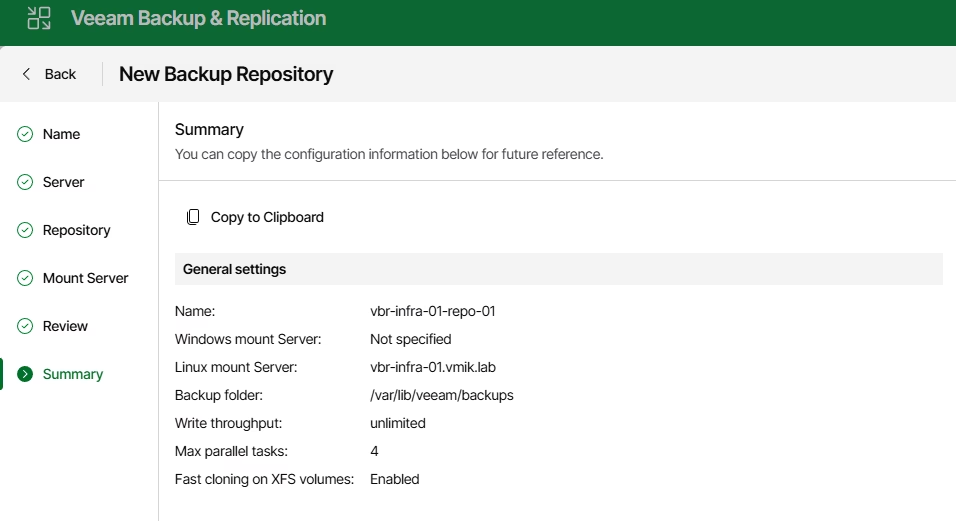
In addition, the summary:
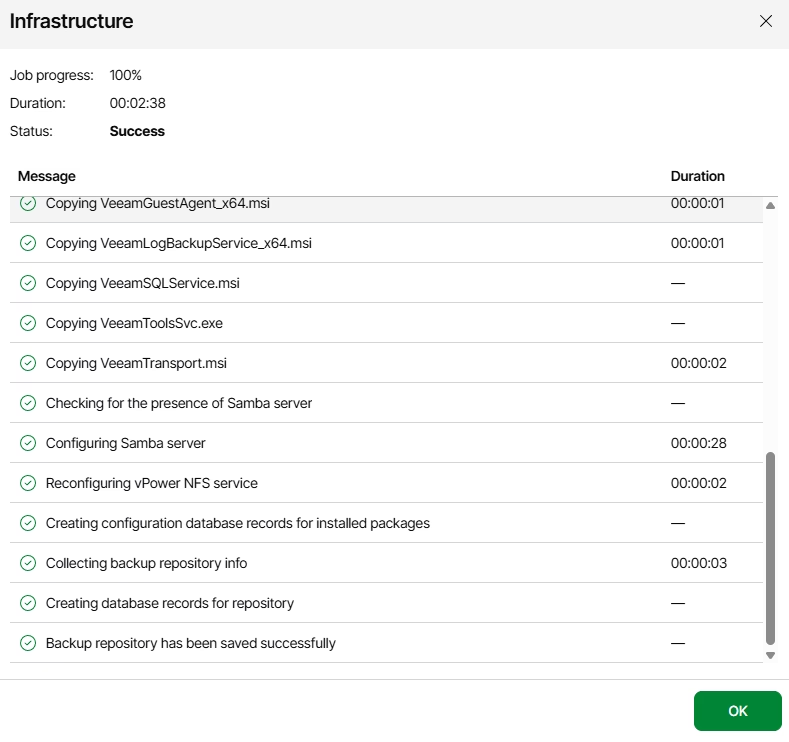
This is how the repository-creating task log looks like:
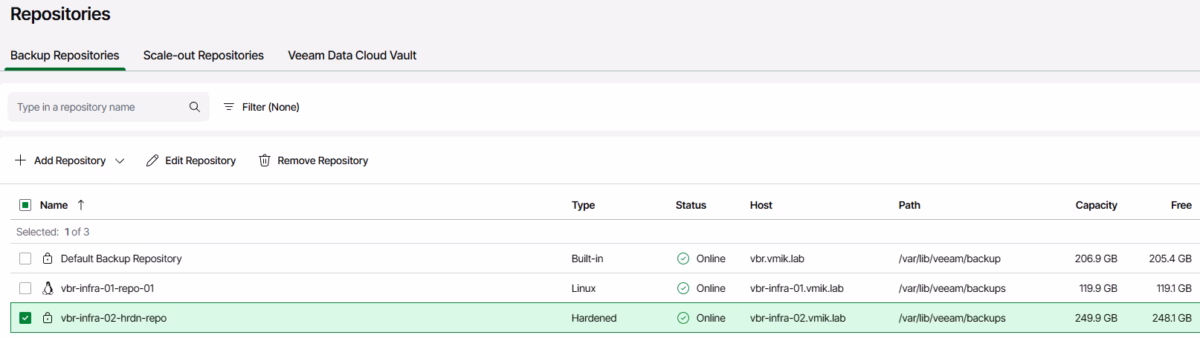
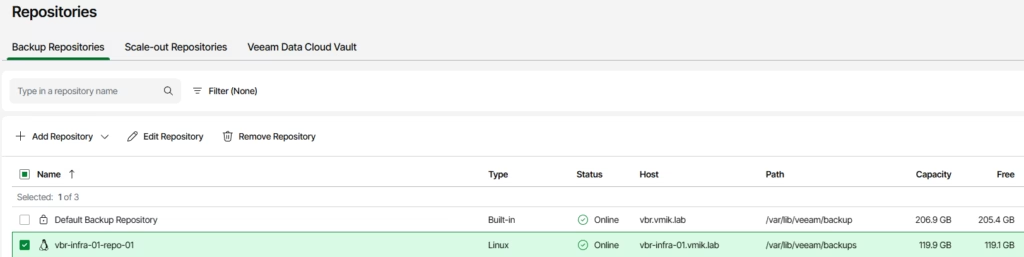
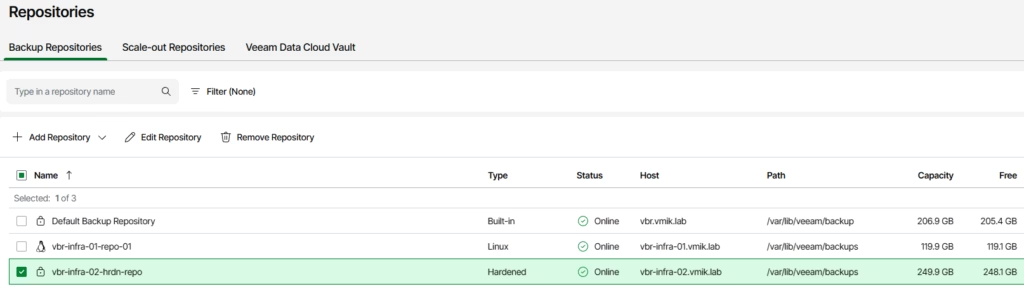
This is it. We have added a new repository, using the newly deployed Veeam Infrastructure Appliance:
Now, let me quickly overview the Hardened Repository.
To add a hardened repository, use the corresponding option:
Select a server, which was installed as a Hardened Repository (you won’t be able to deploy a hardened repository on VIA if you’ve used option 1 or 2 during the installation):
The new option in the Repository settings is Immutability, which means your backups can’t be deleted for a selected number of days (one week is the minimum):
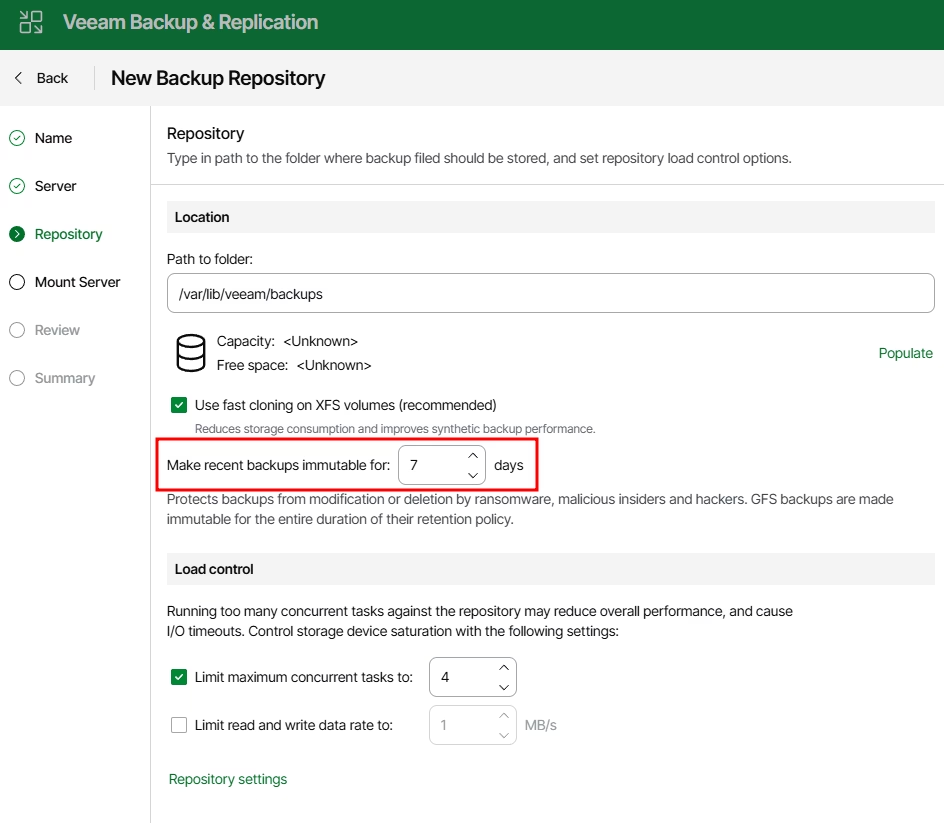
Nowadays, immutability is a must-use feature; it will make your backups safer from viruses, malware, or accidental deletion.
The thing to mention is that you cannot use VIA as a mount server if it is deployed as a hardened repository. So, select another mount server instead:
The other steps are the same, and now we have a new hardened repository in our infrastructure:
In conclusion
I believe that the Veeam Software Appliance and the Veeam Infrastructure Appliance are new standards for each Veeam installation. Both products make your backups as safe as possible and reduce the attack surface.
I think for now VIA is a must-go for:
Proxies;
Repositories on a bare-metal servers without external storage;
Mount servers;
Other infrastructure components.
In short: VIA for everything, except a server with an externally attached storage. However, I hope that it will support external storage in the future; for now, a typical Linux OS is the only option.
![]()