Did you know that you can connect the VBR Server to the existing Nutanix AHV Backup Proxy (Appliance) instead of deploying a new one in case it was removed from the backup infrastructure for some reason, or you just want to connect an appliance previously used by another backup server?
I never thought that I needed this feature until I reinstalled the Prism Central in my lab. After that, I had to remove the old PC instance from the Veeam Inventory, which requires removing the existing proxy from the configuration as well.
Next, I will provide a quick walkthrough on how to connect to the existing proxy.
To connect to the existing proxy, make sure you added a Prism Central or Prism Element instance to the backup infrastructure.
In my particular case, I added a new Prism Central instance to the VBR inventory, and I have a Veeam Proxy VM working in the Nutanix cluster deployed earlier.
Connecting to the existing proxy
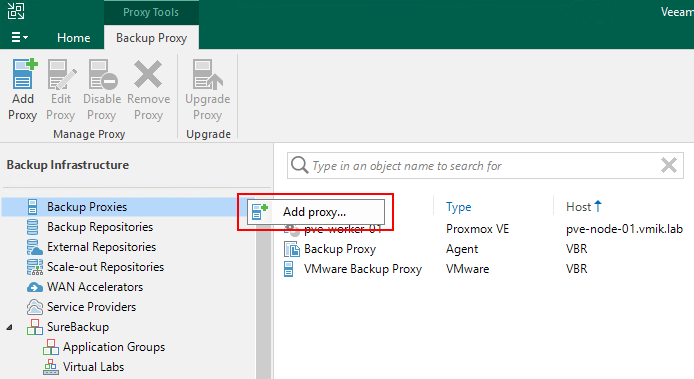
To connect to the existing proxy, first we need to open the backup infrastructure and the proxies section in the VBR console.
Next, add a new proxy:
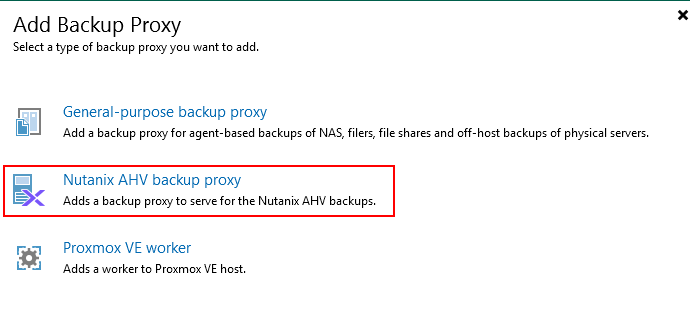
Select the Nutanix AHV backup proxy option:
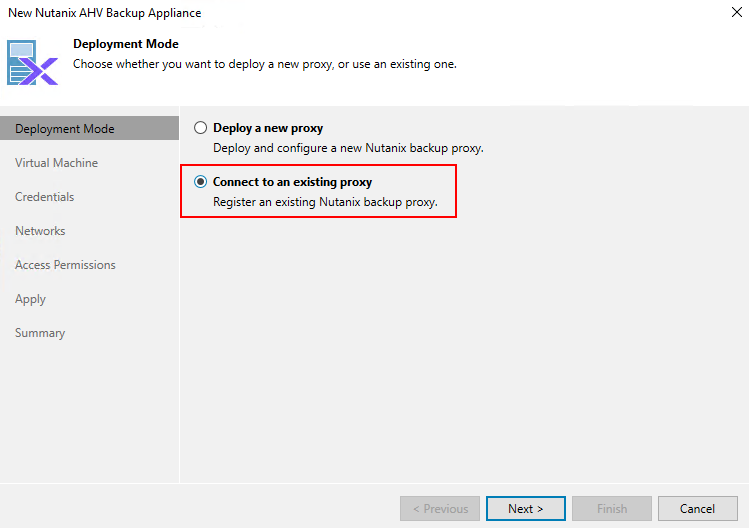
Instead of deploying a new proxy, select “Connect to an existing proxy“:
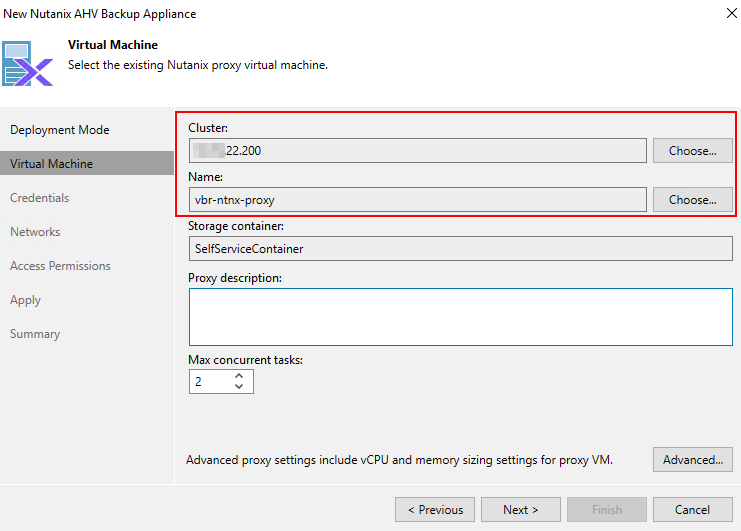
In the next window, we need to select a Nutanix cluster, where the proxy VM is located, by clicking the corresponding “Choose” button:

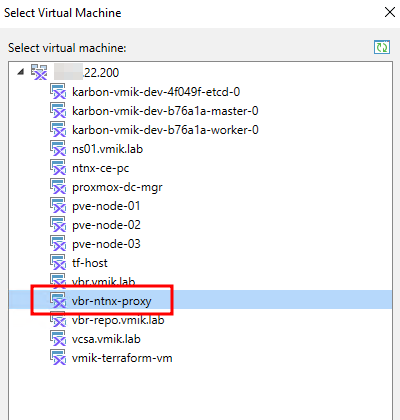
After that, click “Choose”, and select a virtual machine from the list:
After that we can adjust appliance settings – concurrent tasks, CPU, or RAM, if needed, but we cannot change the storage container for an already deployed appliance VM.
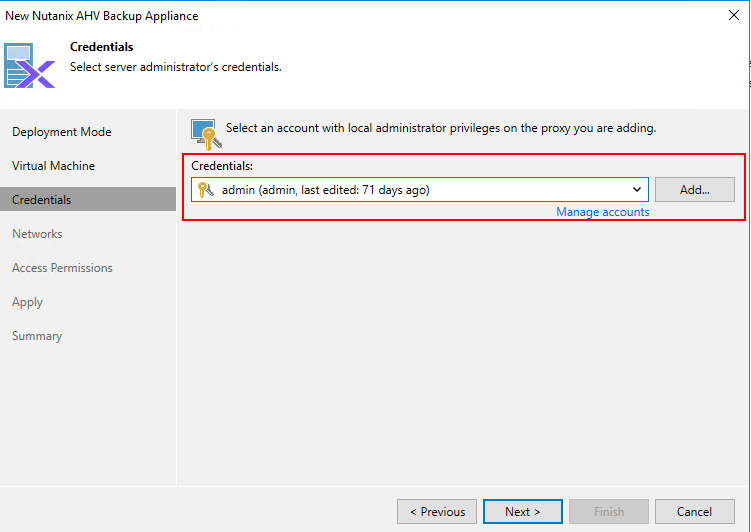
The next step is to provide proxies’ authentication data. If you’re using the same backup server, the data is most likely added already:
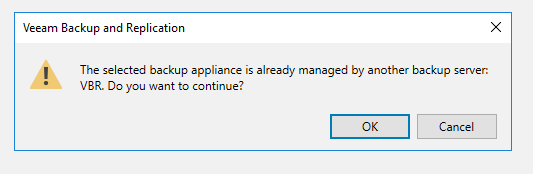
Clicking next, we might be notified that another backup server already manages the appliance. Agree and continue:
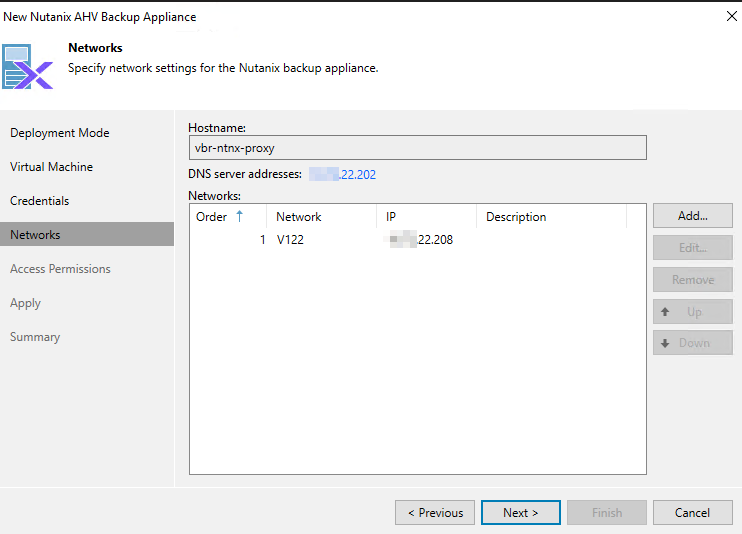
One of the last steps is to verify proxy network settings and edit them if needed:
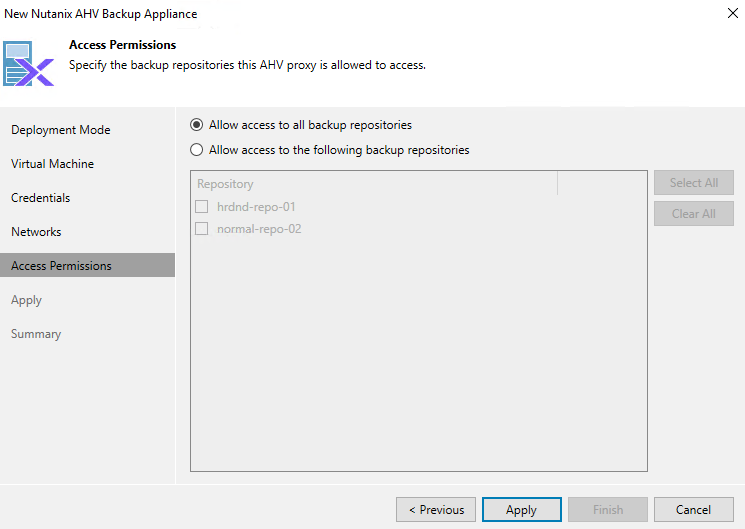
In the last step, we can limit access to the backup repositories:
Click apply and observe the adding procedure:
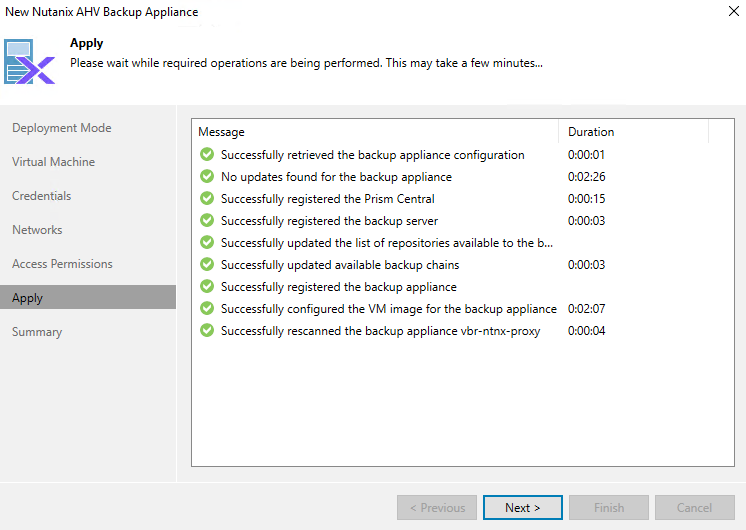
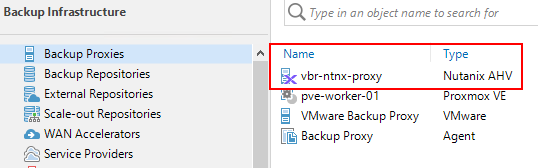
After applying, the proxy will be added to the infrastructure and ready to process backup tasks:
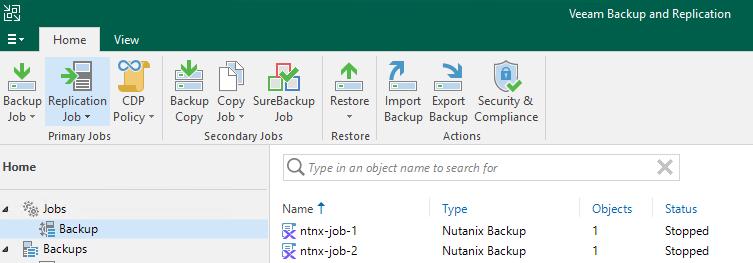
By the way, if, during the removal from the configuration, the backup appliance contained backup jobs, they will be restored too:
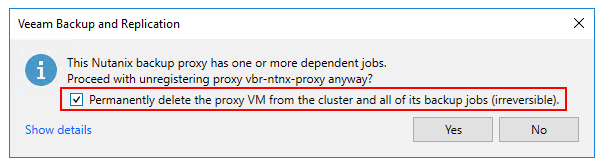
In addition, to delete a Proxy Appliance VM, including all associated jobs, just mark the corresponding checkbox during deletion:
![]()