With the release of Prism Central PC 2024.x, you may see significant improvements and changes in the functionality, features, user interfaces, and menus.
In my opinion, one of the major features added is the marketplace providing us the ability to deploy additional PC components, including NKE.
Although I believe that the Nutanix Kubernetes Platform is the future of Kubernetes management in Nutanix, I am still a big fan of the Nutanix Kubernetes Engine and want to demonstrate how to deploy NKE with pc.2024.x.
Let me remind you that I have a few blog posts on NKE, and all of them can be found using the NKE tag.
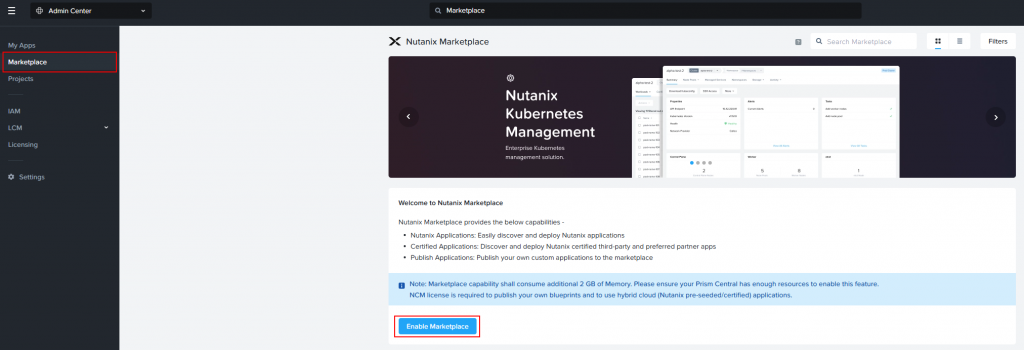
To start using NKE, first we need to open the Marketplace, which can be found in the Admin Center; you can select it on the top left.
By default, the Marketplace is inactive and requires activation. Keep in mind that it requires additional resources.
One thing to mention: Marketplace cannot be enabled on X-Small Prism Central, and you can’t use NKE with X-Small PC.
To enable the Marketplace, just click on the corresponding button:
We need to wait a bit until it is enabled:

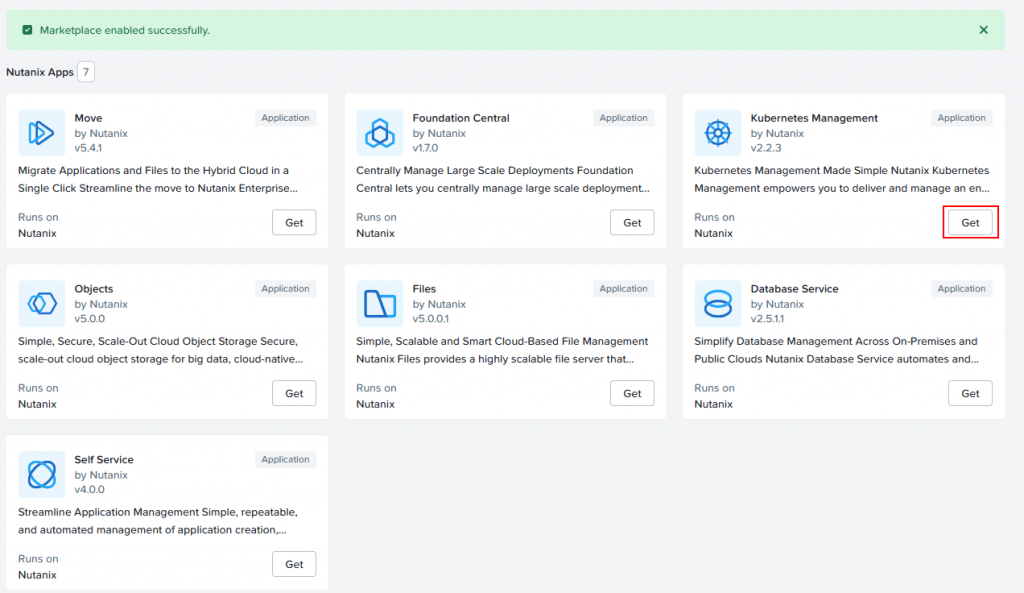
And, after that, we can start to use apps provided by the marketplace. Let’s enable Kubernetes Management by clicking “Get”:
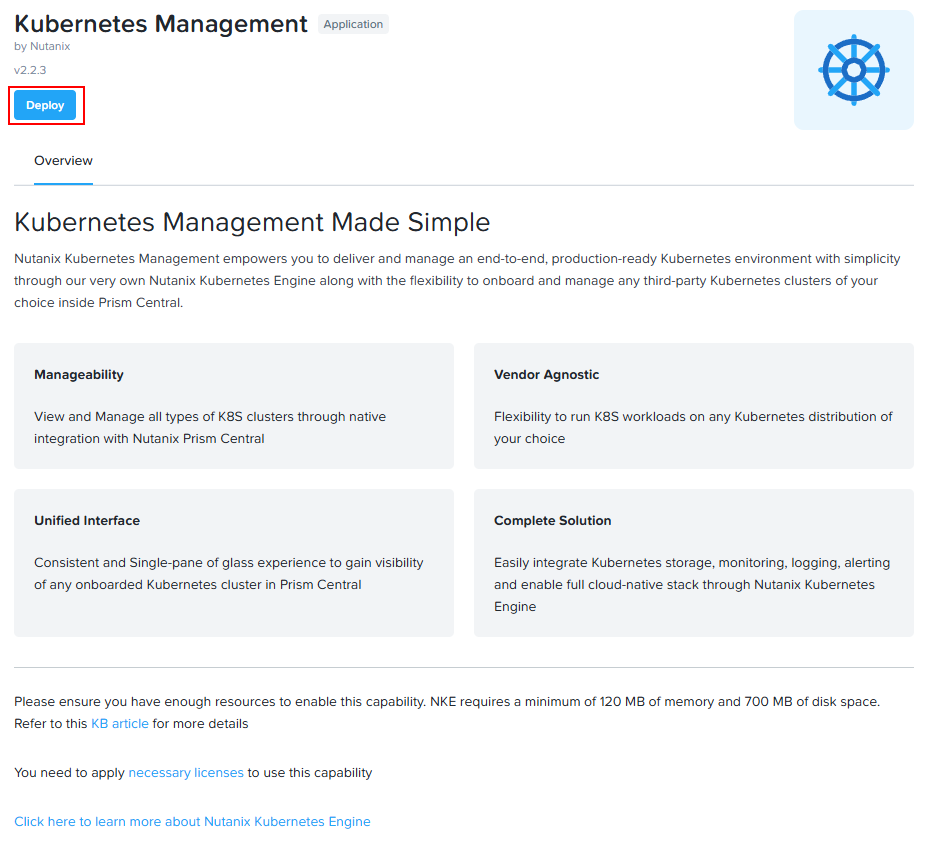
In the opened window, we can get information about the application and deploy it:
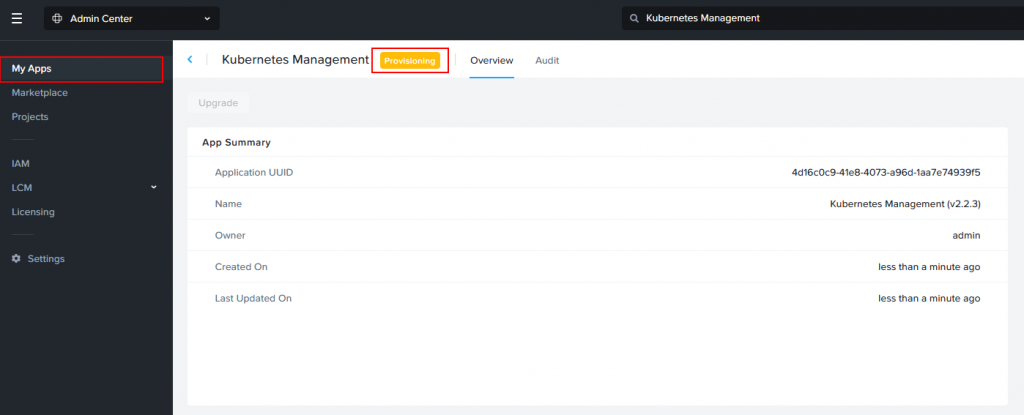
After that, we can find a new application in the My Apps menu, and the initial status should be “Provisioning”, meaning that the application is now deploying:
When the deployment is finished, the status should be changed to green “Running”, meaning that the application is ready to use.
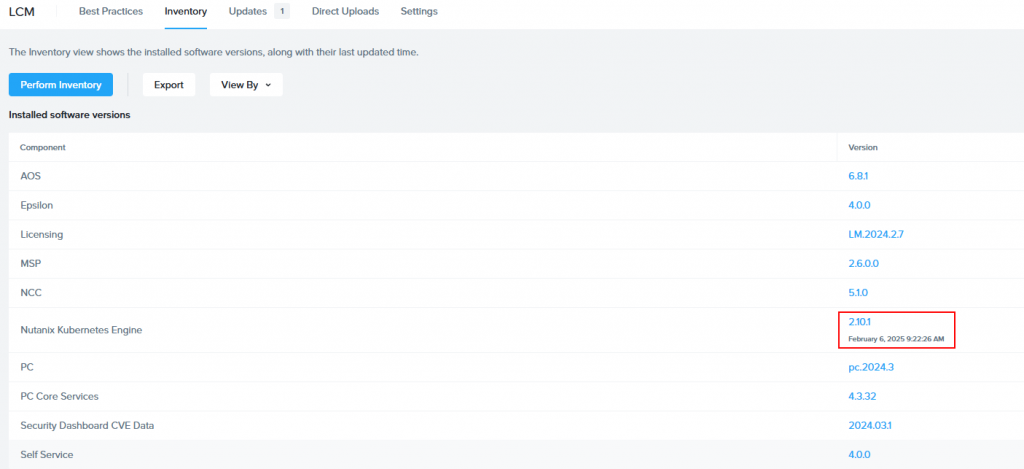
The deployed version of the NKE application (2.2.3) is outdated, and we can update it using the familiar Prism Central LCM interface.
In the Admin Center, open the LCM menu, select Prism Central Cluster, and perform the inventory task. We will see that a new version is available. Click View Upgrade Plan to begin the upgrade:

When the update is finished, we can observe that the new version is installed:
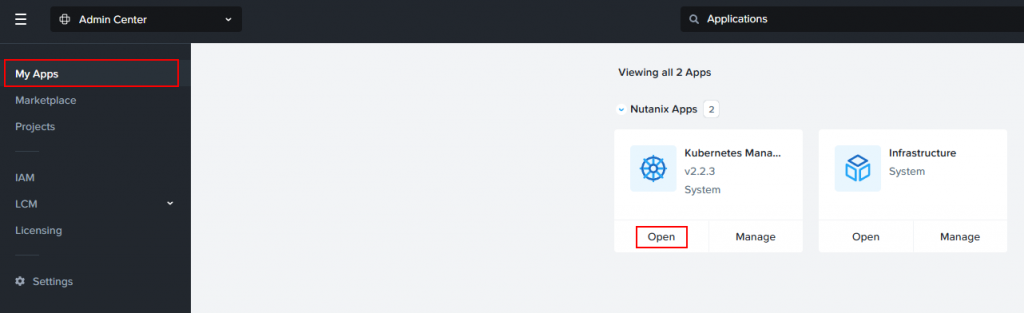
Now we can start to use the NKE. Open My Apps menu, find the Kubernetes Management, and click Open:
We will move to the familiar NKE interface. The first thing we need to do is to download the OS image:

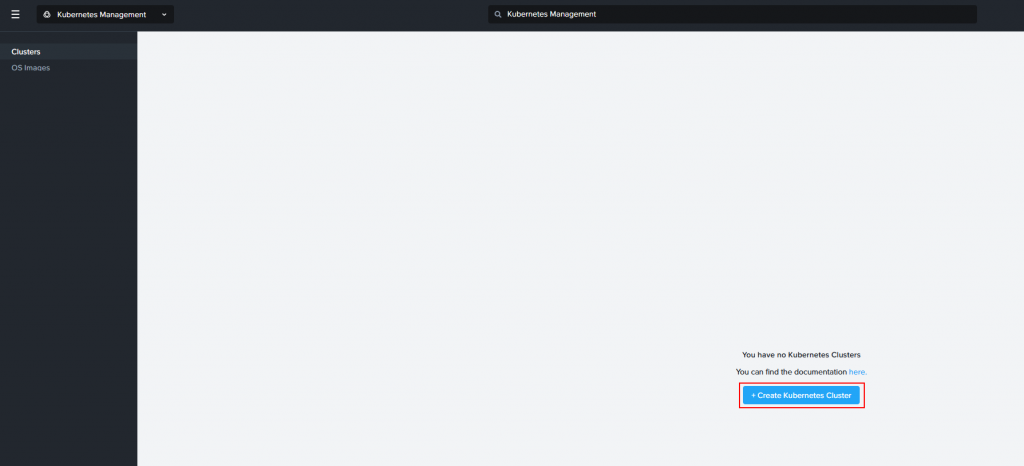
After that, we can create our first Kubernetes cluster:
One thing we have to do before we start to create the cluster is to configure the IPAM-enabled network.
In this article, I will not describe how to do that, but if you’re interested in how to create an IPAM-enabled network, you can read my first NKE-related article where this topic is mentioned.
Two things you should keep in mind: the IP address pool should be large enough to deploy all required Kubernetes VMs (including the master virtual IP address in some configurations), and do not forget to set the DNS address; otherwise, you could get an error during deployment:
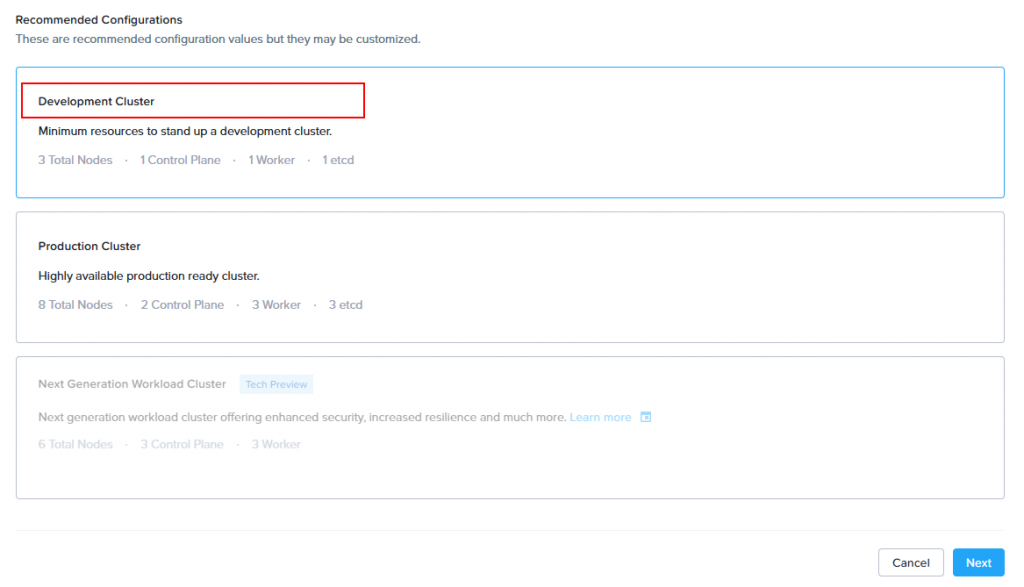
Cluster Create: Failed to pass all prechecks before NKE cluster deployment: VM network used is a managed network with no DNS configuredWhen the network is ready, click “Create Kubernetes Cluster.”. First we need to decide on the cluster configuration: production or development.
In the lab environment, I will choose a dev cluster, but in the production environment, you should use a high-availability configuration:
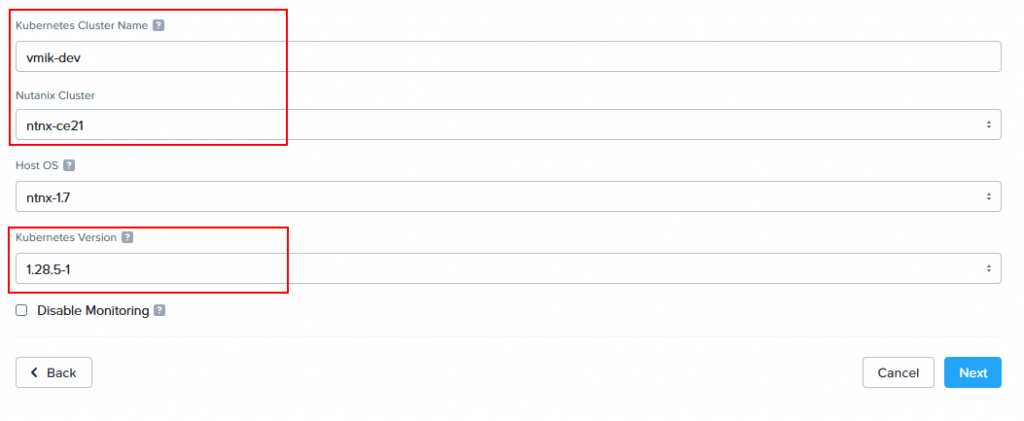
In the next window, we need to provide the cluster name and select a Nutanix cluster where we want to deploy Kubernetes VMs. In addition, we can change the Kubernetes version:
Next, we need to select the previously created IPAM-enabled network. We can also change the number of workers or adjust the worker’s settings by clicking edit:
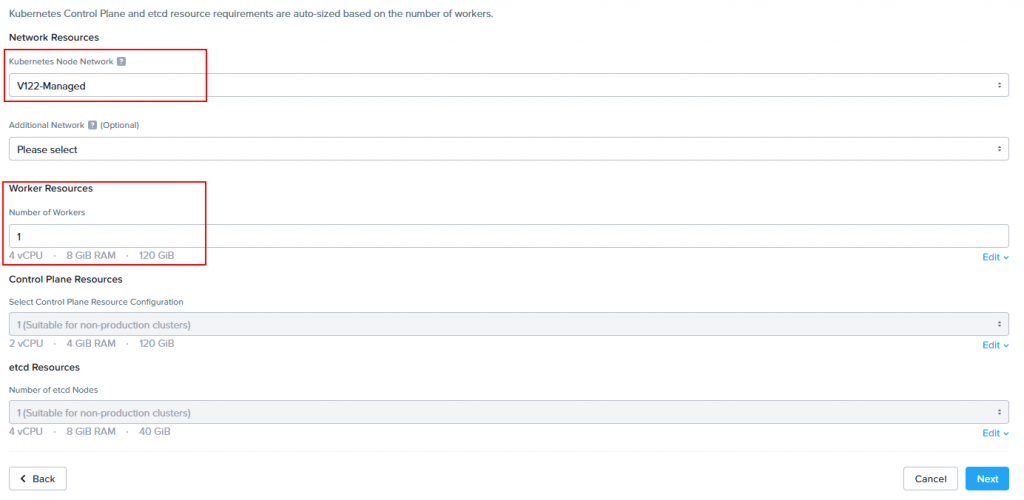
If we decided to deploy a production-ready cluster, we could adjust the control plane and etcd, resources. In addition, depending on a number of control-plane machines, setting a VRRP address or load balancer address will be required.
Moving forward, we can select a network provider, which can be Calico or Flannel, and change POD or Service CIRD Ranges:
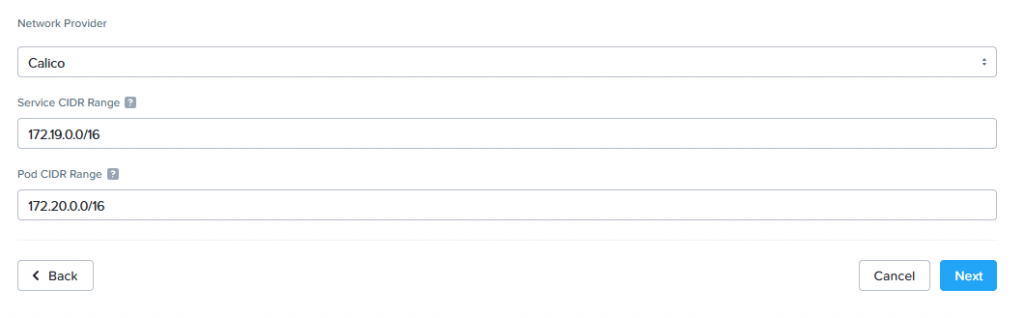
By the way, Next Generation Workload Cluster allows you to use Cilium CNI as well.
The last step is to configure the storage class. Few options are available, but the most useful are name, cluster, and storage container used to store PVs:
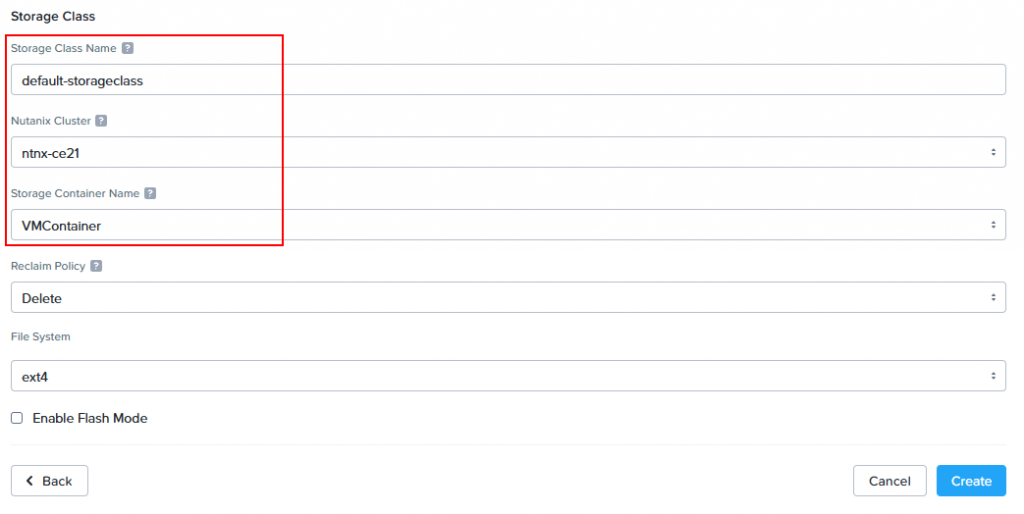
Once you have set all the settings, click “Create” to launch a new Kubernetes cluster.
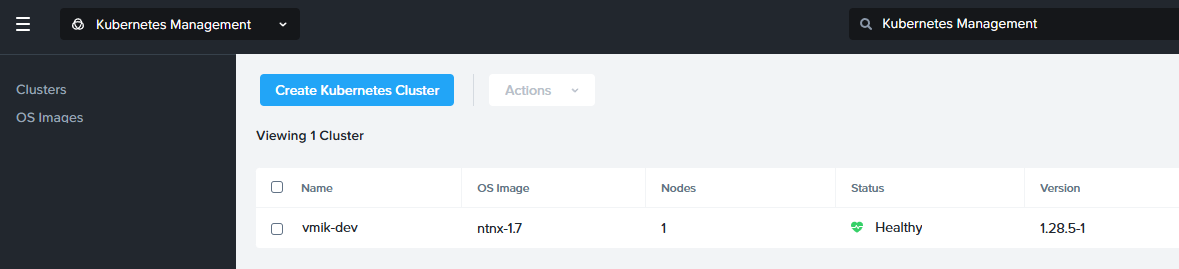
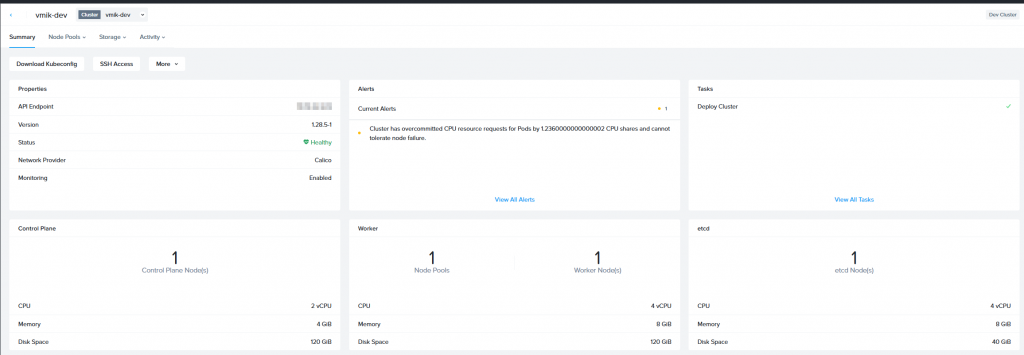
And here it is:

The new Kubernetes cluster is ready to use:
In conclusion:
The purpose of this article is to provide guidance on how to use PC 2024 Marketplace applications and how to deploy an NKE cluster.
If you’re interested in NKE, consider checking out my other articles on this topic.
![]()