In the previous articles, we updated VMware Cloud Foundation Operations and vCenter Server to version 9.0.1, and just to complete the series, I will add one more post about updating vSphere hosts using a single-cluster image.
Although the overall procedure for updating is the same and simple, you may have heard of or even faced a new token-based authentication to download updates from the Broadcom repositories, and in this article, I will cover this moment too.
In the new installation, the first error you may see is that your Lifecycle Manager (LCM) cannot connect to the Broadcom repositories to synchronize updates:

A general system error occurred: The vCSA is configured with invalid depot URLs. Please refer KB 390098.The first thing you need to do is to obtain a download token from the Broadcom Support portal. I covered this topic in the previous vCenter Update post, but if you are new here, let me repeat the steps.
The overall procedure is described in the following KB.
However, in short. To generate a download token, first log in to the Broadcom support portal.
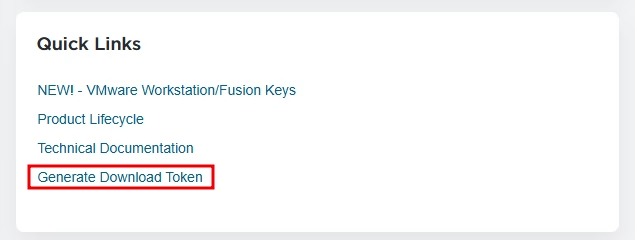
On the right pane, you can see a quick links section; select “Generate download token”:
In the opened form, select your organization’s ID, and click “Generate Token”:

Provide a brief description:
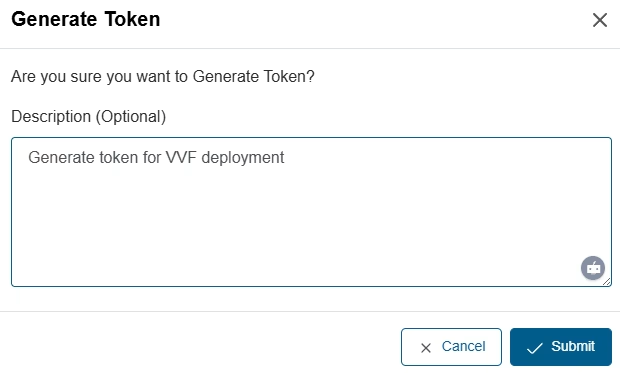
Thereafter, the token will be generated. Copy it:

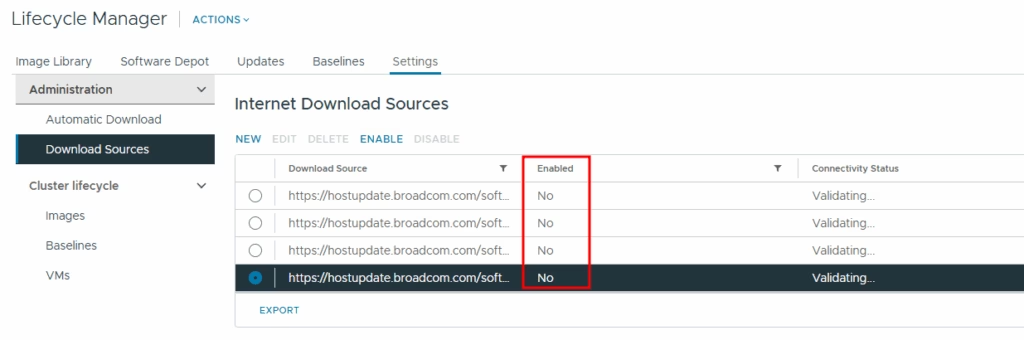
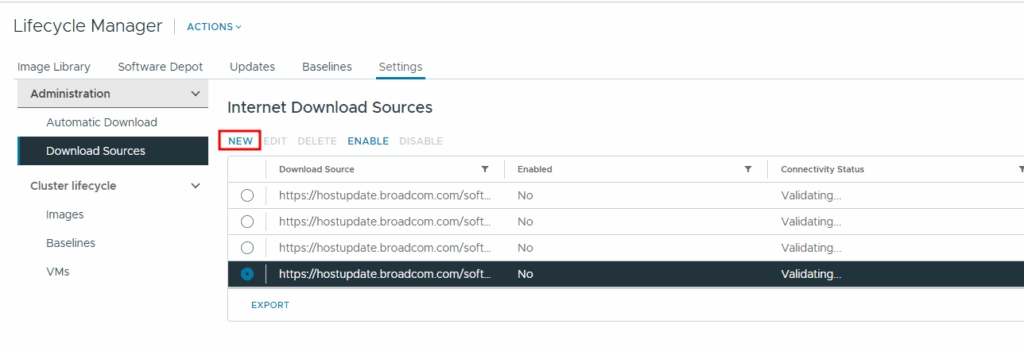
After getting a token, move to the Lifecycle Manager “Settings” section. We can see four existing depots. Select each of them and disable:
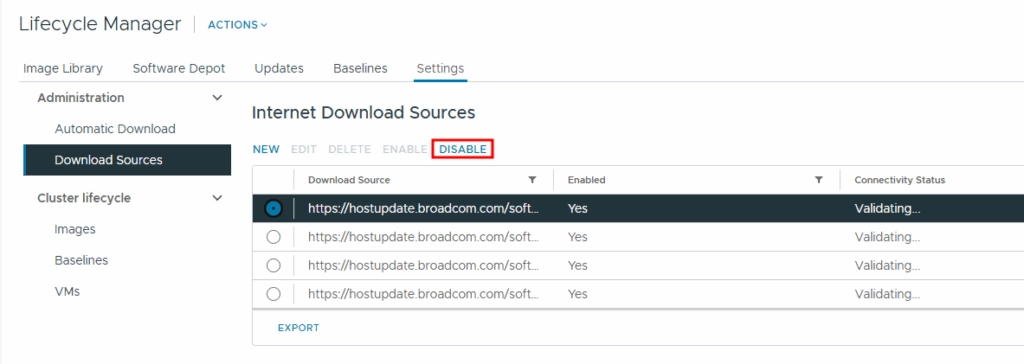
All depots should be disabled:
Now let’s create four new depots, as described in the KB.
Click new, and add four depots using the links below, one by one:
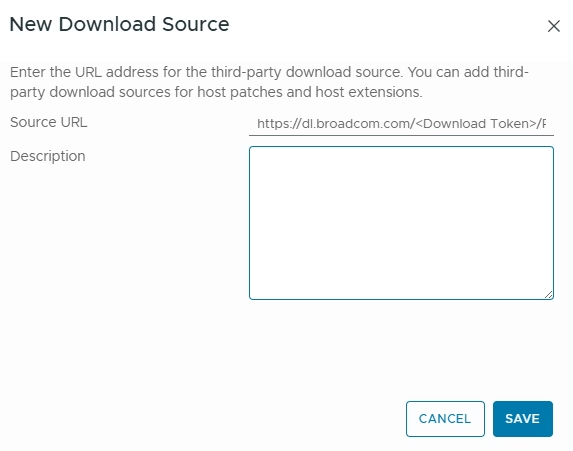
https://dl.broadcom.com/<Download Token>/PROD/COMP/ESX_HOST/main/vmw-depot-index.xml

https://dl.broadcom.com/<Download Token>/PROD/COMP/ESX_HOST/addon-main/vmw-depot-index.xml

https://dl.broadcom.com/<Download Token>/PROD/COMP/ESX_HOST/iovp-main/vmw-depot-index.xml

https://dl.broadcom.com/<Download Token>/PROD/COMP/ESX_HOST/vmtools-main/vmw-depot-index.xml
Do not forget to use your download token in the link:
After adding new repositories and syncing updates, you will see that now the operation is running instead of getting an instant error message:

You may also notice that the connection status displays as connected.
When updates are synchronized, we can set up a cluster image. To achieve that, move to the cluster’s updates section.
We can review the current image and alter it, clicking “edit”:
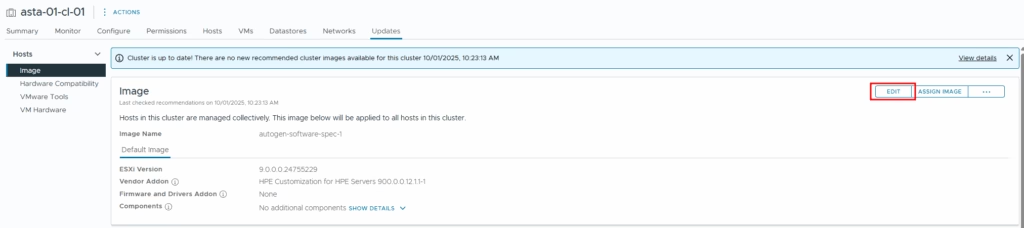
The cluster image consists of four elements:
- ESXi image – mandatory. Consider it a “vanilla” ESXi;
- Vendor Addon – not necessary, but may contain drivers and software, provided by your hardware vendor;
- Firmwares and drivers;
- Components – additional packages you want to install. It could be manually uploaded VIBs, other versions of VMware tools, and so on.
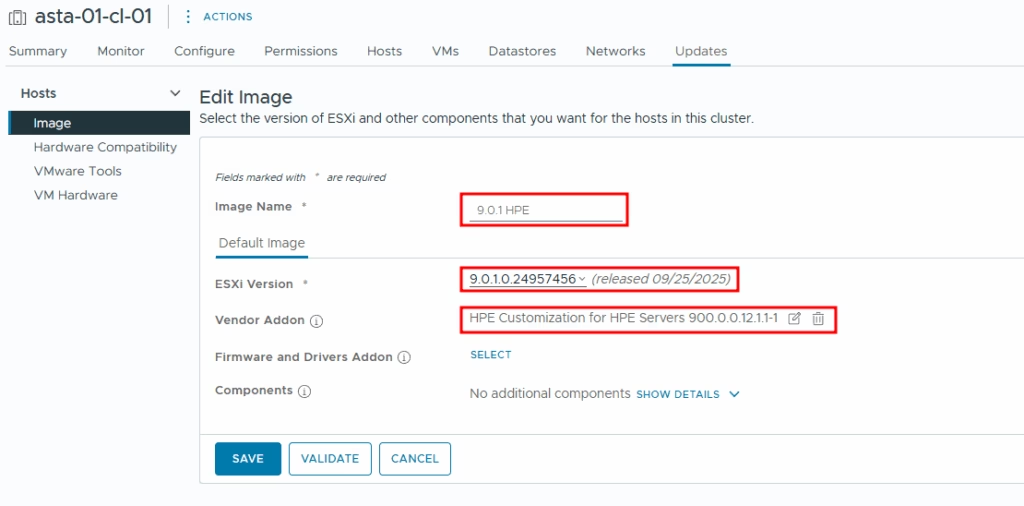
In my example, I select the latest ESXi version and HPE addon for my servers:
After saving the image, the system will verify the hosts’ compliance. As you can see, it warns that my hosts are not compliant with the new cluster image:
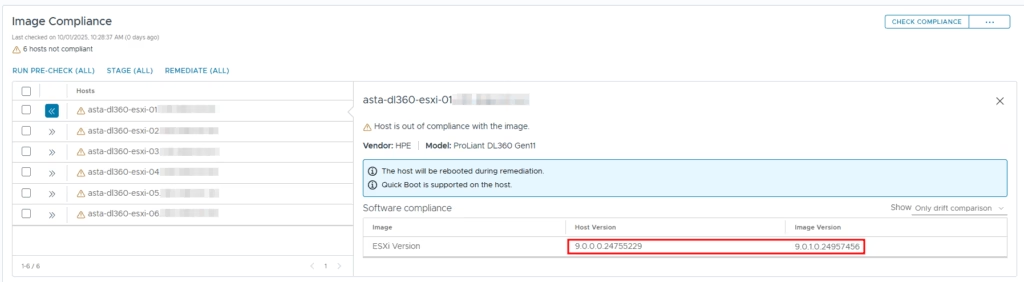
Below, you may see what is not compliant. In my case, the vendor addon is the same version, but the ESXi version in the cluster image differs from the version on the hosts.
To update our cluster, we can click “Remediate”, but first, let’s click on the “three dots” near “Check Compliance”, which provides us a menu of additional remediation settings:

Cluster remediation settings provide us some options during remediation:
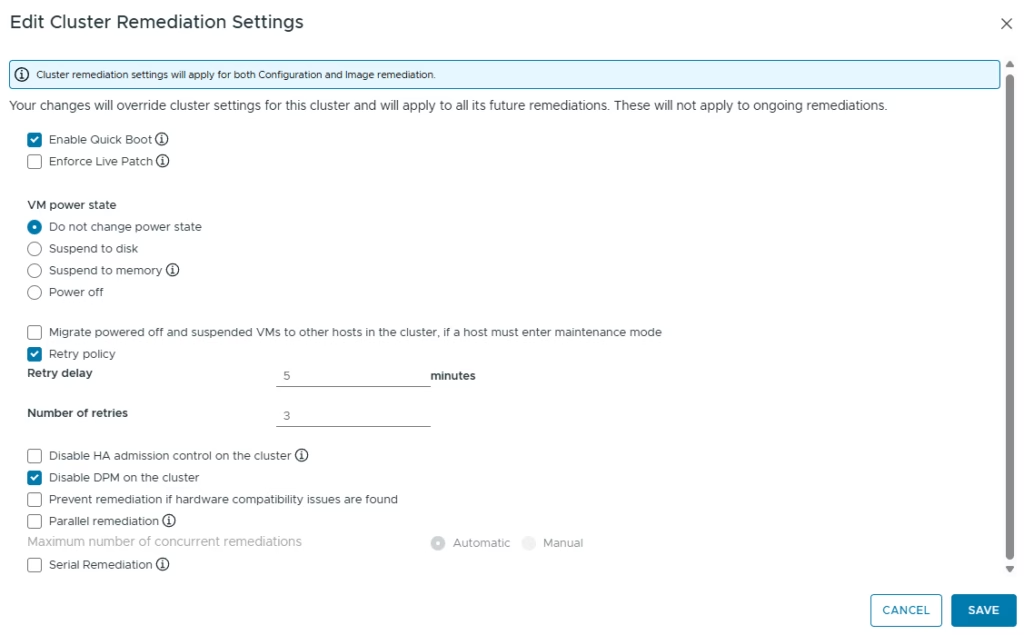
For example, in small clusters, we can temporarily disable HA admission control so we have enough resources to move VMs between hosts.
You may ask, what is the live patch? During image creation, you might notice a version marked as “Live Patch”:
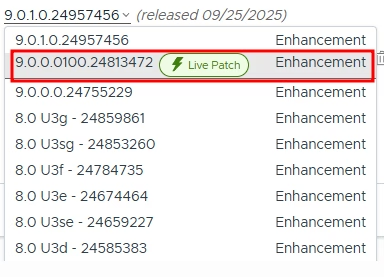
You can read more in the provided article.
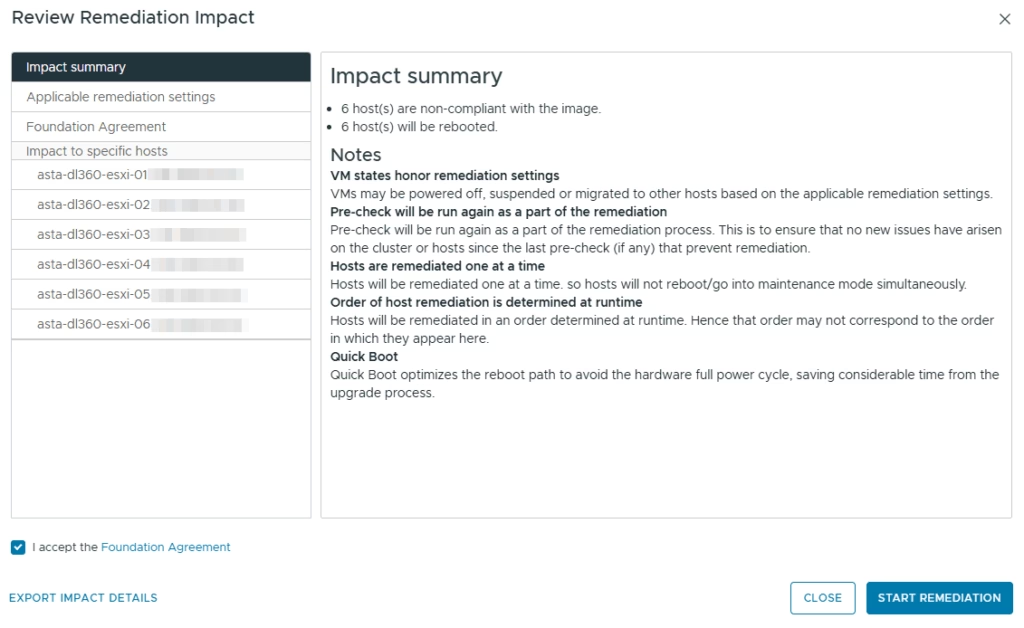
After adjusting the remediation settings, we can click the “REMEDIATE (ALL)” button. We will receive a summary before the update.
In the following window, start remediation:
Your hosts will update sequentially unless you select “parallel remediation” in the settings beforehand.

After the procedure is finished, compliance will be checked again, and we can see that all hosts are compliant with the generated image:

And this is it. We have updated our ESXi cluster to the latest available versions using a single-cluster image.
![]()